
LEGO is – without a doubt – the best toy in the world. The problem is: sitting on the floor the whole day hurts, big time! Luckily, with all the modern 3D tools and thanks to ldraw and mecabricks I’m still able to play with it digitally. Up to now, I’ve made two brickfilms already. A stop motion one and a CG one. At the time of making those movies, I was pretty proud. From today’s perspective, of course, they both look visually and technically not thaaat great anymore. This is why I decided it’s time to take it to the next level. The major problem with today’s LEGO CG imagery is the shading. Most of the time the bricks look like perfect geometry with a simple reflective shader applied to it.
The problem is: a real LEGO brick material is fairly complex and the geometry has lots of tiny imperfections. This is why I decided to study LEGO bricks and the main goal of this blog post is, trying to really understand the LEGO material. With this newly gained knowledge, I’m hopefully able to create great looking shaders, matching the real life thing as close as possible.
Fresnel
Let’s get started with simple bricks. Looking at it from different angles makes pretty clear, that it has – just as every dielectric – a fresnel reflection. When looking directly at it, it’s almost looking like a simple lambert, but when looking at a side that’s facing away or at the studs, it’s quite obvious, that we have some kind of fresnel. In fact, reflections are always view-dependent. For example at 0 deg. – that is, looking directly at it – we have a relatively low reflection intensity. At 90 deg. (Obviously we are not able to see what happens at 90 deg. viewing angle) but in theory, there is always a full intensity reflection. In some shaders we can only control the 0 deg. reflectance value, because 90 deg. is fixed anyway, in others we have n (IOR) and sometimes additionally k (Absorption).
It’s hard to tell the specific IOR, just from looking at it, but luckily there’s this thing called world wide web and we are able to find out almost everything what we need.

So, sorry for getting more scientific here but, what I found out was quite interesting. Polystyrene (PS) seems to be a pretty common “plastic”. It’s a Homopolymer, which means that it’s made from one monomer: Styrene. Polystyrene seems to be rather brittle, which is why there are Copolymer or other modifications (multiple monomers) to improve certain characteristics. For example Acrylonitrile butadiene styrene (ABS) is a terpolymer, which means that it’s synthesized from three different monomers. Styrene, the monomer used for PS is the main component (40-60%). ABS is less brittle and generally stronger than pure Polystyrene. And to get back on track: ABS is used for LEGO bricks! At least the opaque ones, since ABS apparently can’t be transparent.
Sadly I was asleep whenever we had chemistry at school, so if I’m talking nonsense please write a comment or a mail and correct me. Or add any interesting side fact! I would really appreciate that!
However , there isn’t any data at refractiveindex.info for ABS, but for Polystyrene (PS). Since they share the monomer styrene, maybe that’s good enough to get an idea. (If anybody has measured data for ABS I would be interested of course!) On refractiveindex.info we can get the exact IOR for a specific wavelength. So let’s assume we have 650nm, 550nm, 450nm for RGB respectively. That’s
- 1.6136 for Red
- 1.5959 for Green
- 1.5862 for Blue
Roughness
The other important thing, with reflections, is its sharpness. Looking at our bricks again, it reveals a specular, mirror-like reflection. The reflection is almost perfectly sharp. There are also lots of small and sharp highlights, which are relatively hot. Those are typical for glossy (not so rough) reflections.
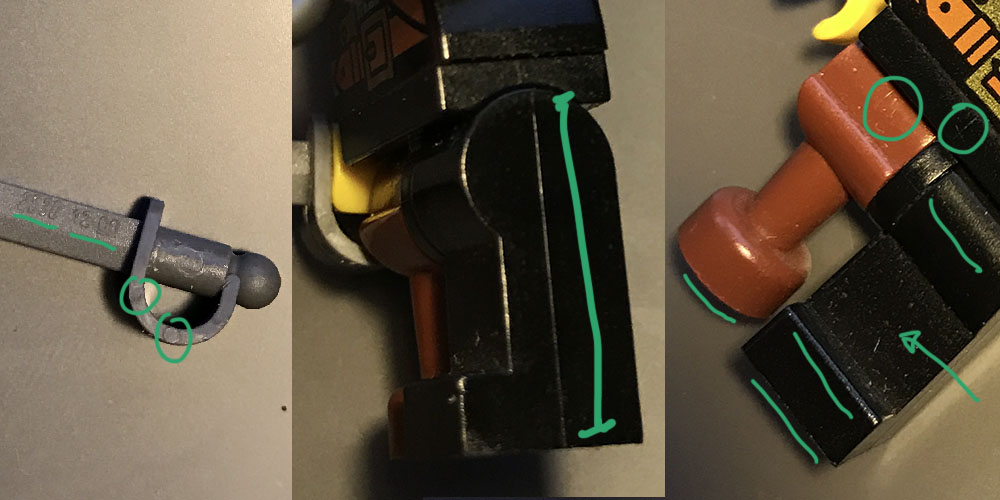
But this is not the case for every LEGO Brick. For example, the saber has a fairly rough surface and therefore rougher – unsharp – reflections. The highlights appear dimmer and broader. This is exactly what the glossiness – or roughness as it is called in more modern shaders – is for. This parameter emulates tiny imperfections (too small to be visible to the eye) that causes the light rays to bounce in different directions and making the reflection appear more unsharp.
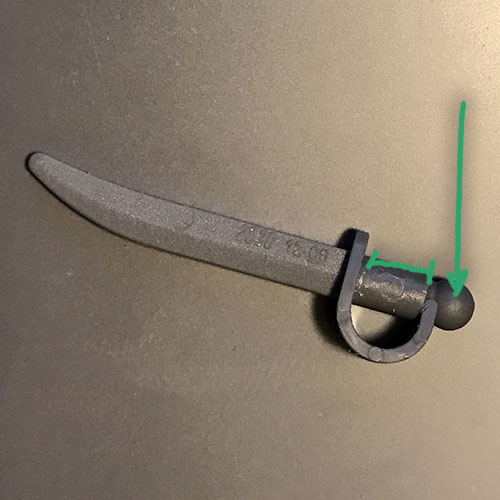
However, the bumpy surface is visible to the eye. In those cases, in addition to our roughness map, we need a bump map to simulate the surface correctly.
It’s important to remember that, in real life there is no such thing as a roughness value. Reflections are always sharp. It’s just that it may not look so because the surface is uneven. For example, there is The Wikihuman Project and Emily looks quite believable with a simple phong specular shader, because she has incredibly detailed displacement maps.
Since computing power is still very limited, and we are not able to subdivide and displace every object multiple times we still rely on “shortcuts” like roughness maps.
Subsurface Scattering
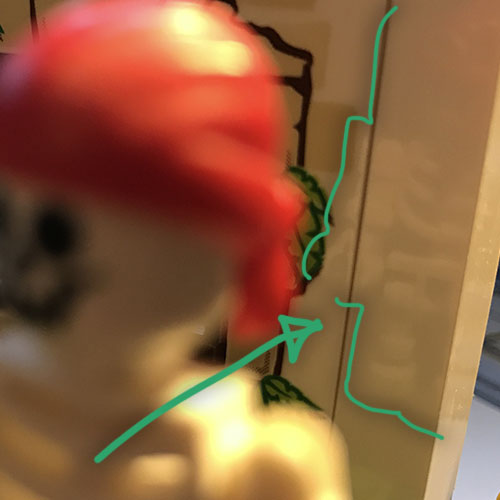
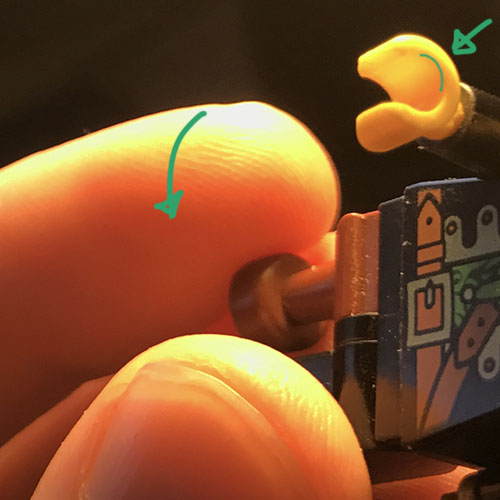
Every LEGO brick (or plastic in general) has some sort of subsurface scattering. That is, when a ray penetrates the surface, is scattered multiple times and exits it. This isn’t that obvious at first, but whenever there is strong backlighting one can clearly see the diffuse color shift. Everybody has seen this effect on his own hands, but it’s also happening with lego hands. smile
Imperfections
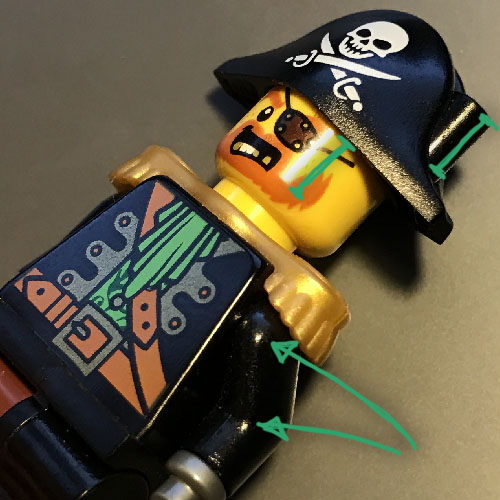
These are all the ingredients we need to render perfect LEGO bricks. But one problem remains. No LEGO brick is perfect. Not even if it’s brand new. In fact, imperfections are pretty important if one wants to match the real world. Looking at LEGO bricks, we have mold lines, these bumped discs (don’t know how to call them), part numbers, and of course scratches, marks, fingerprints and whatnot.
Round Corners
All of the stuff we talked about as of now, can be done with shading. Some would probably argue that we should consider to actually displace the imperfections, but as long as we are not trying to render extreme close ups, good bump and normal maps will probably do the trick. Concerning the rounded corners, this is a case by case scenario. Looking at different LEGO bricks, there are some with actually relatively sharp edges, so a round corner shading trick will probably work, but there are some bricks with such a strong bevel, that we – no doubt – need to model it if we want to render high-quality LEGO.
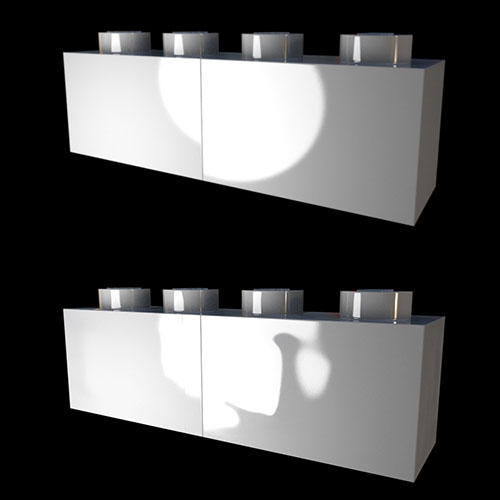
Coplanar
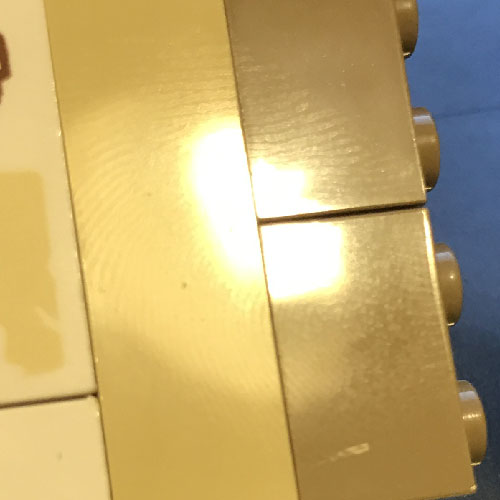
When modeling a simple brick, of course, we would start off with a simple cube with a cylinder on top. This might be sufficient most of the time, but whenever we have a strong light pointing at a side of our brick it is easily revealed, that it’s just a computer generated brick that is mathematically perfect. Pointing a light at a brick shows that a side is not a simple coplanar face. Especially towards the edges, it’s quite obvious that every brick looks slightly “squashed”. Of course modeling such things really isn’t an option, but painting normal maps works pretty great, actually. The rendering on the bottom right shows how a normal map can simulate uneven surfaces without the need to model it.

Sooo… lot’s of theory. But since you are still reading, hopefully it wasn’t that exhausting. In the next part of this blog post series, we will try to implement everything into an actual shader, light and render it, and match it as close as possible to a backplate.
Leave a Reply