In this blog post, I would like to take a closer look at how to actually render LEGO. If you missed Part 1, you can still read it if you like smile Because I grew up in the 90s and I love the old LEGO pirates sets, I decided to do the lookdev for the infamous Captian Redbeard.
Modeling
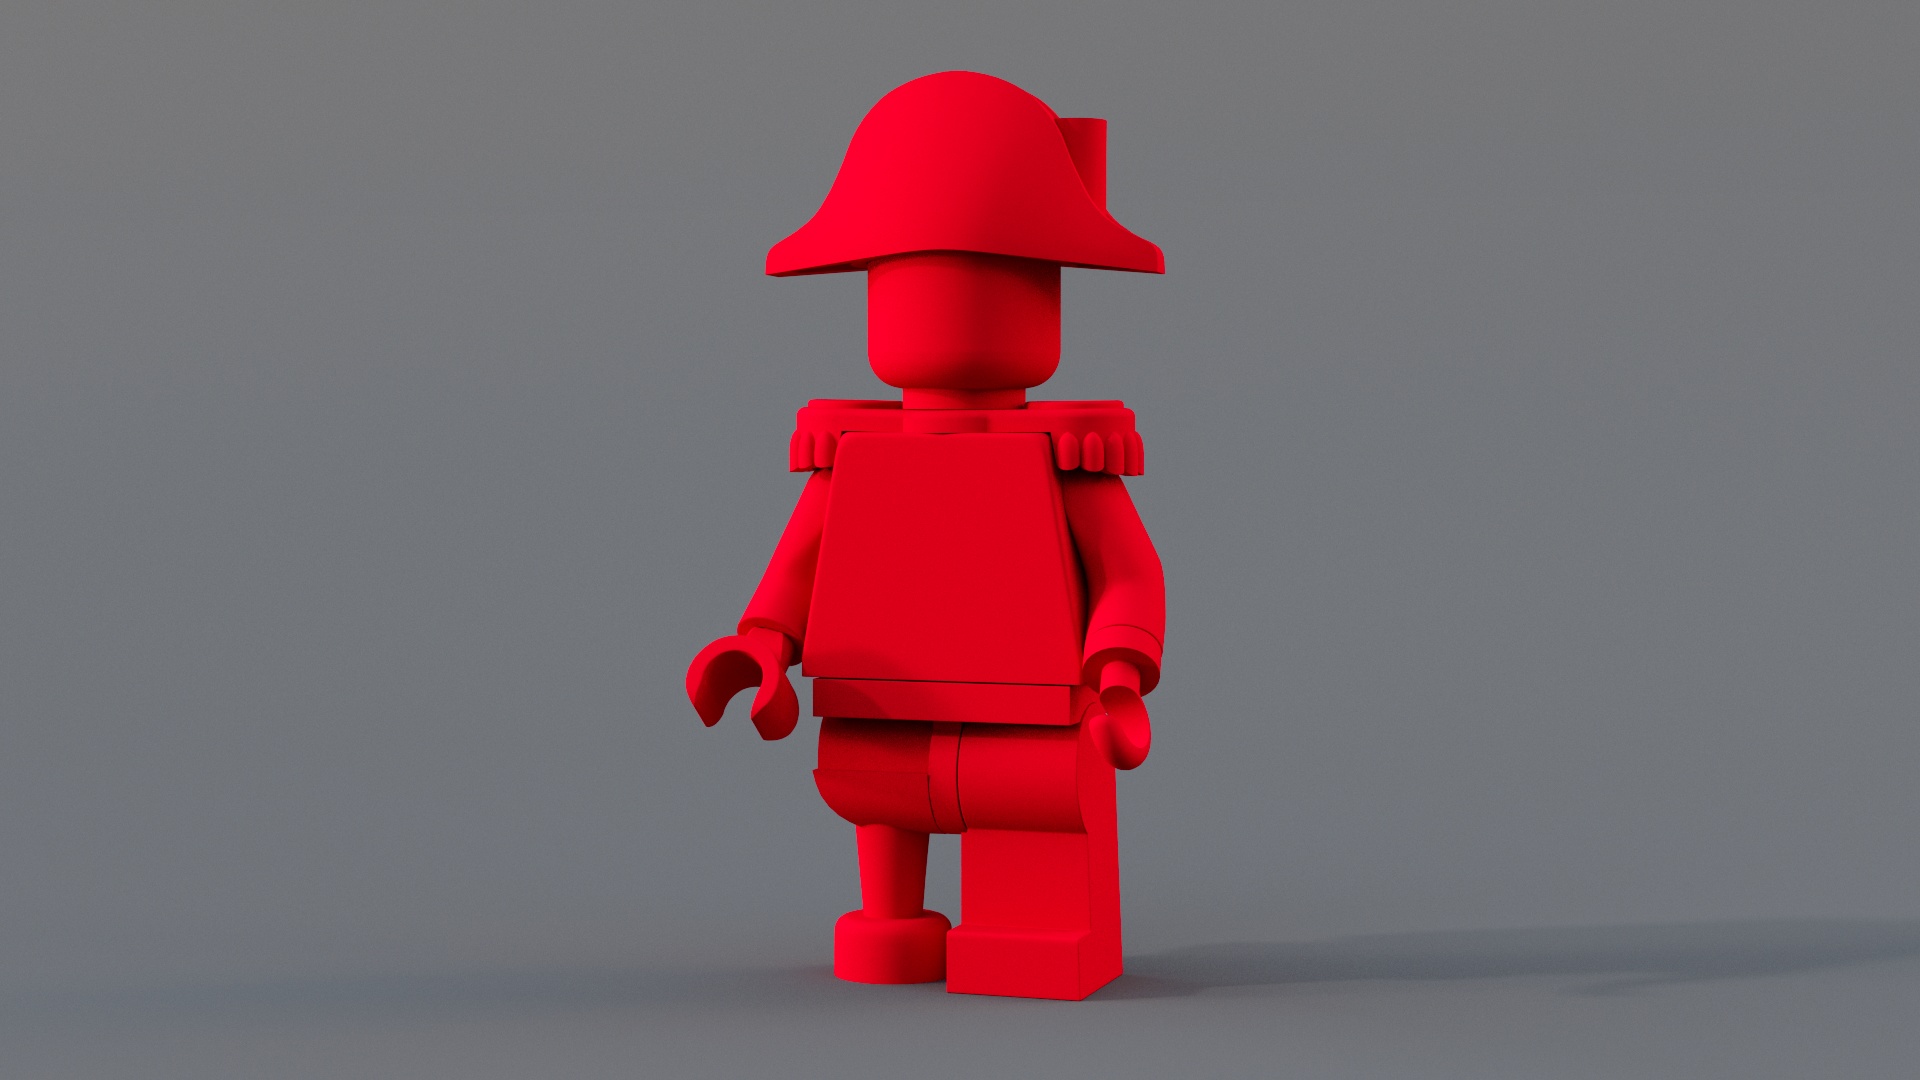
This is a blog post about shading, but obviously, a model is kinda mandatory to do that. So first things first: Let’s get a minifig model! Of course, I could have modeled one, but then I found one on Mecabricks, and I decided to just buy it since I was interested in doing shading, not modeling. The model looks gorgeous when it’s subdivided and the model feels pretty accurate.

Choosing a renderer
Nowadays it feels like there is a new raytracer out there every other week, so the possibilities are almost endless. Blender with its cycle renderer seems to be quite popular in the LEGO community, but my personal favorite is Redshift. It’s incredibly fast, image quality is great and most importantly: The Redshift material is one of the best shaders in the industry. It’s heavily inspired by the alSurface shader for Arnold, but it can do even more. Additionally, Redshift got a lot of useful shading nodes over the last year.
But of course one can render great LEGO imagery with any of the other modern rendering packages as well. That’s why I’ll try to avoid specific parameter values or Redshift specific workflows. Instead, this blog post will cover the general concepts and everything I discovered on my (long) journey of LEGO lookdev and how one can achieve a certain effect.
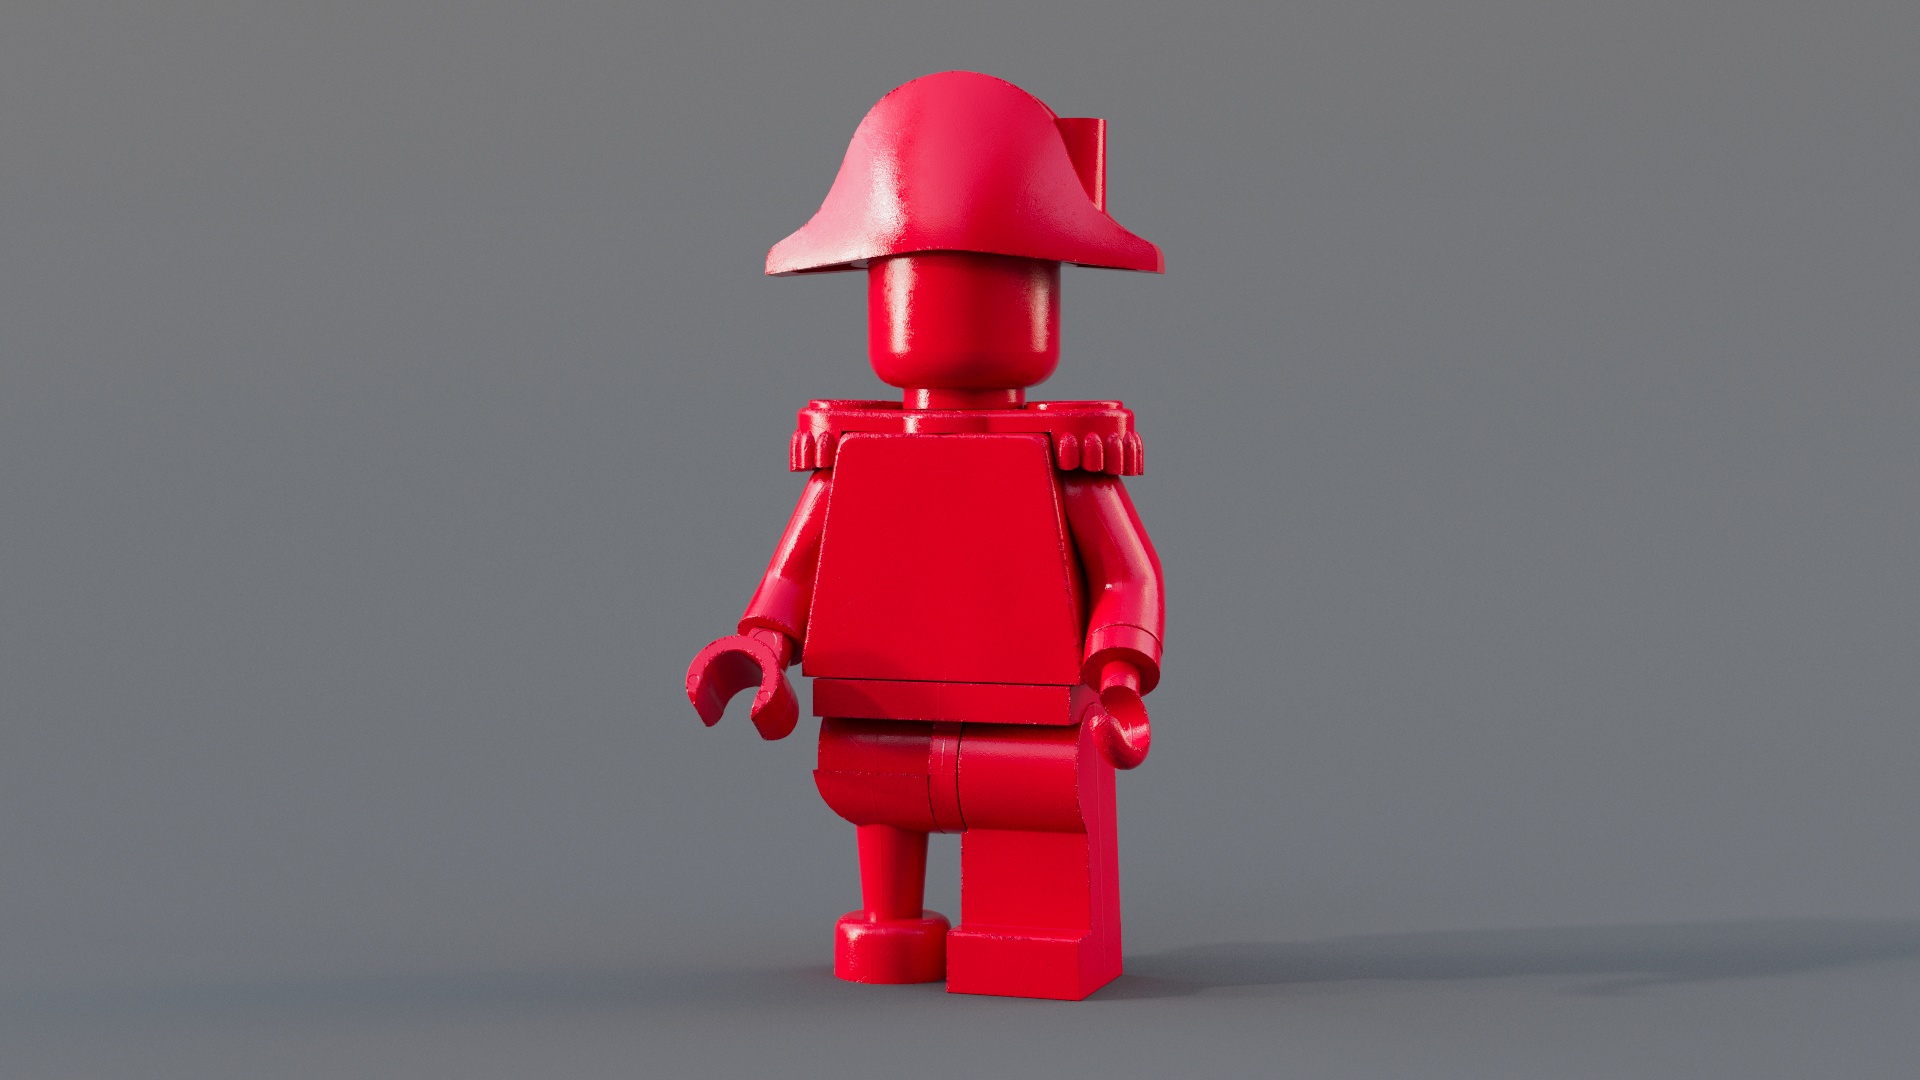
Diffuse
Luckily, there are texture maps for Redbeard on the Mecabricks workshop as well. In case you were wondering if there is anything that I did by myself. Yeah, we will get there wink But before we apply the diffuse textures, let’s start with a solid color.
Reflections
Now this is the fun part. In part 1 we found out, that for lego plastic we would probably have these IOR values:
- 1.6136 for Red
- 1.5959 for Green
- 1.5862 for Blue
Let’s feed our shader with these values. Sadly, there isn’t any noticeable difference, between those and a simple averaged 1.6 IOR. bigsmile To be honest, my hopes weren’t that high that there would be a big difference – the values are just too close. The IOR split is more useful, or actually quite important, for metals but not really for dielectrics. Actually, an IOR of 1.5 felt better than 1.6.
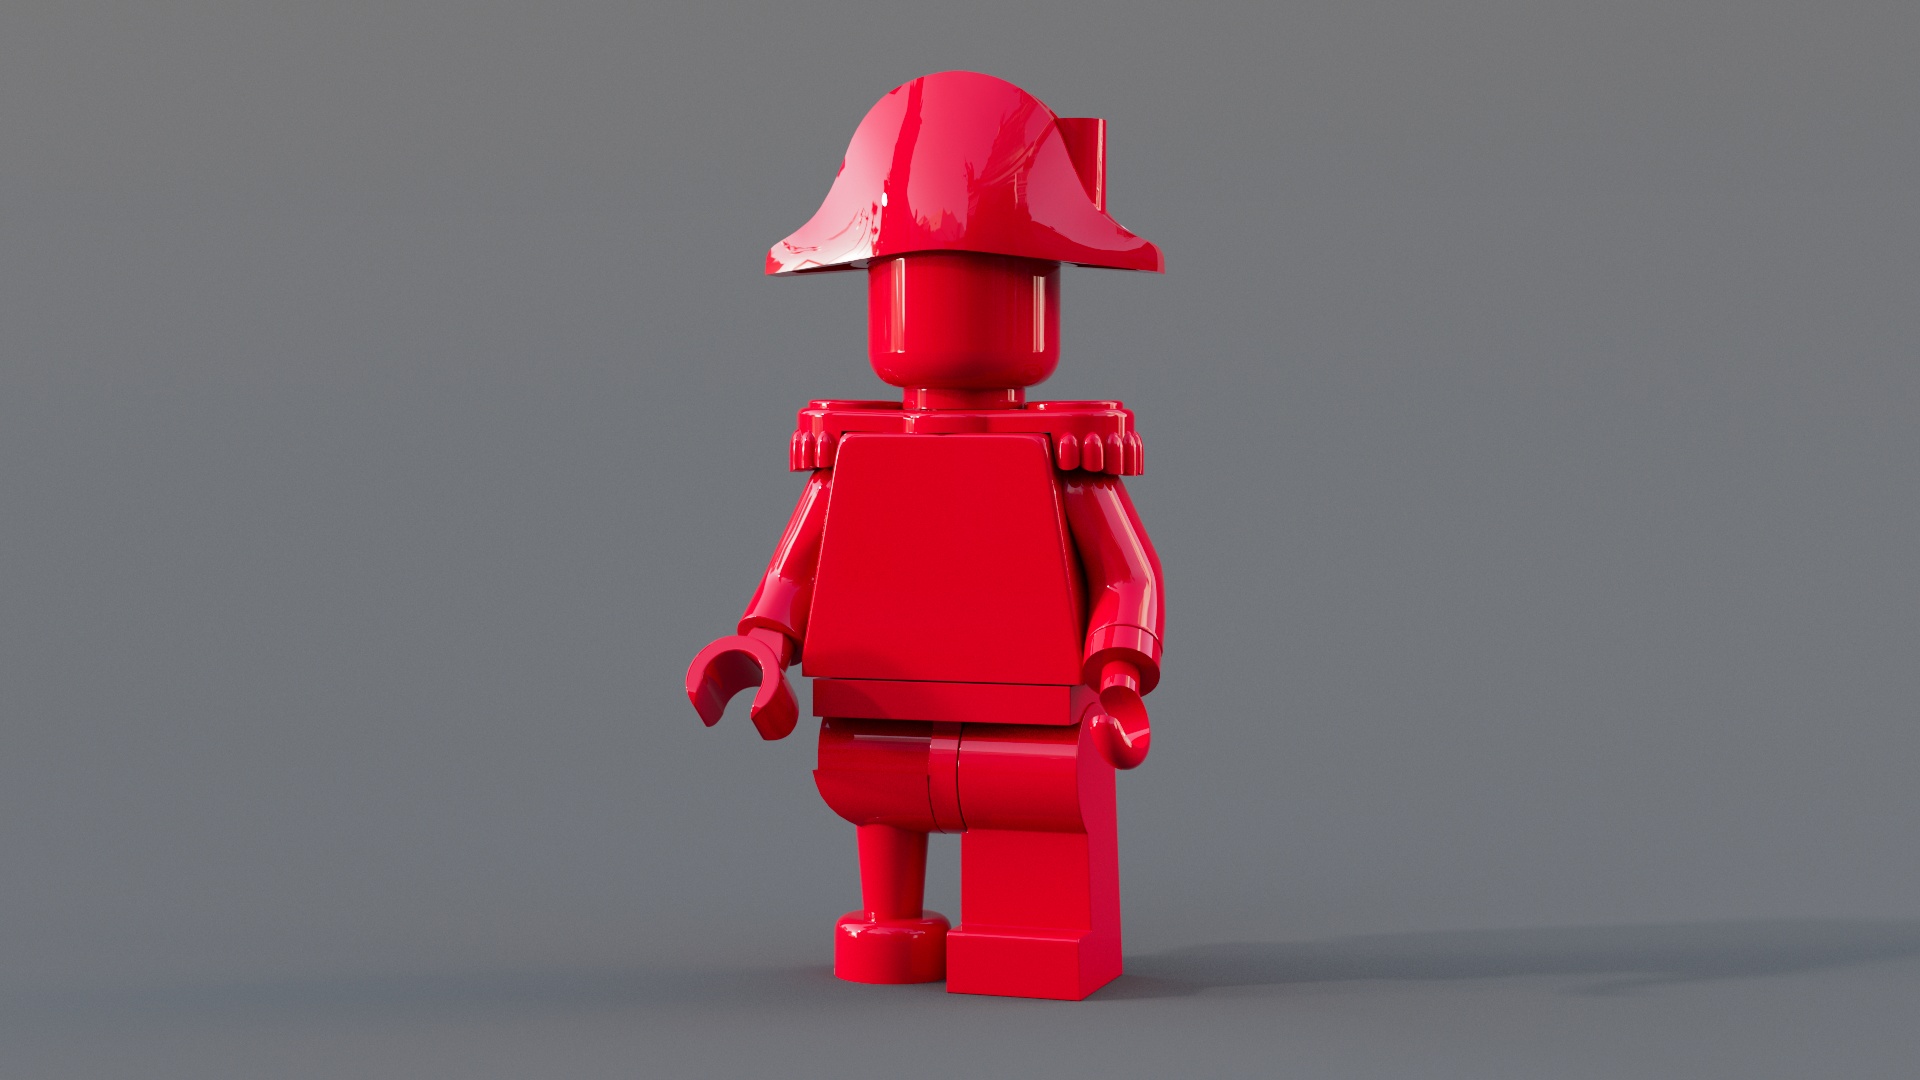
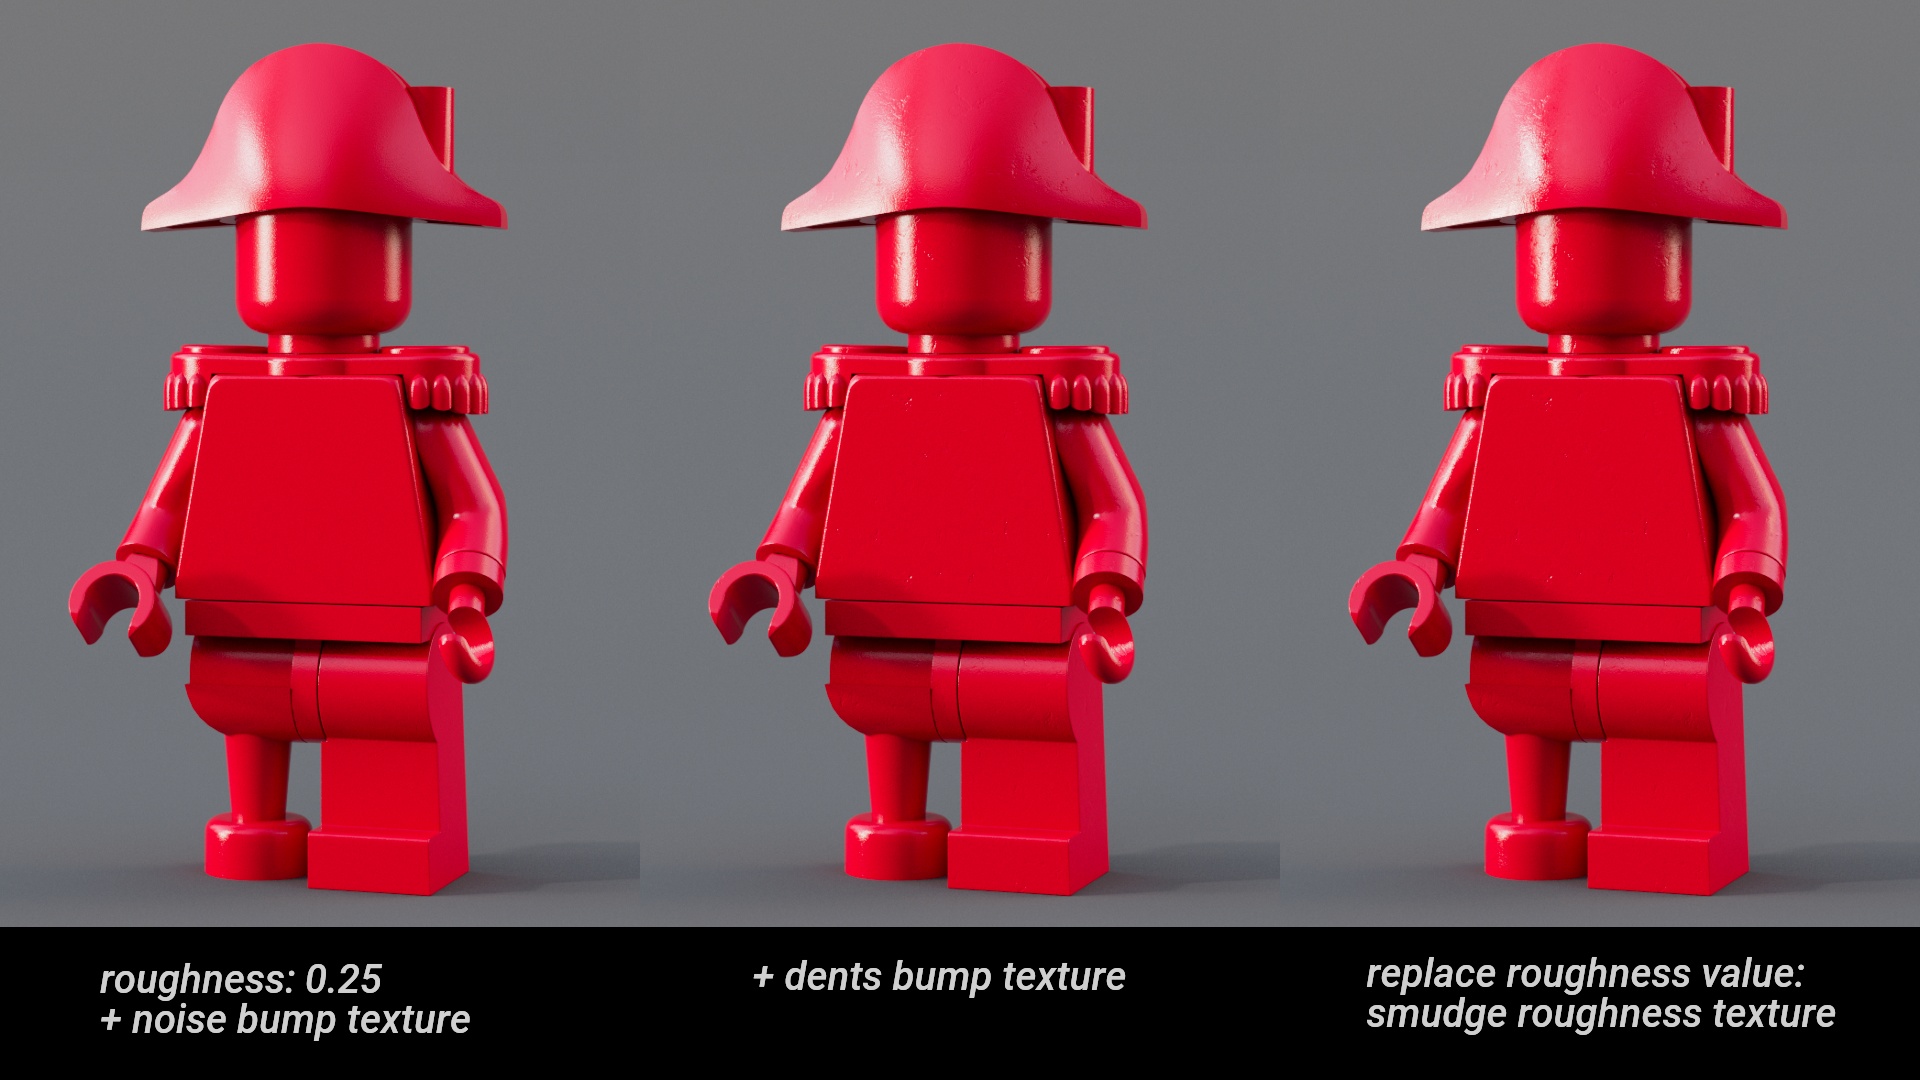
Nailing the roughness
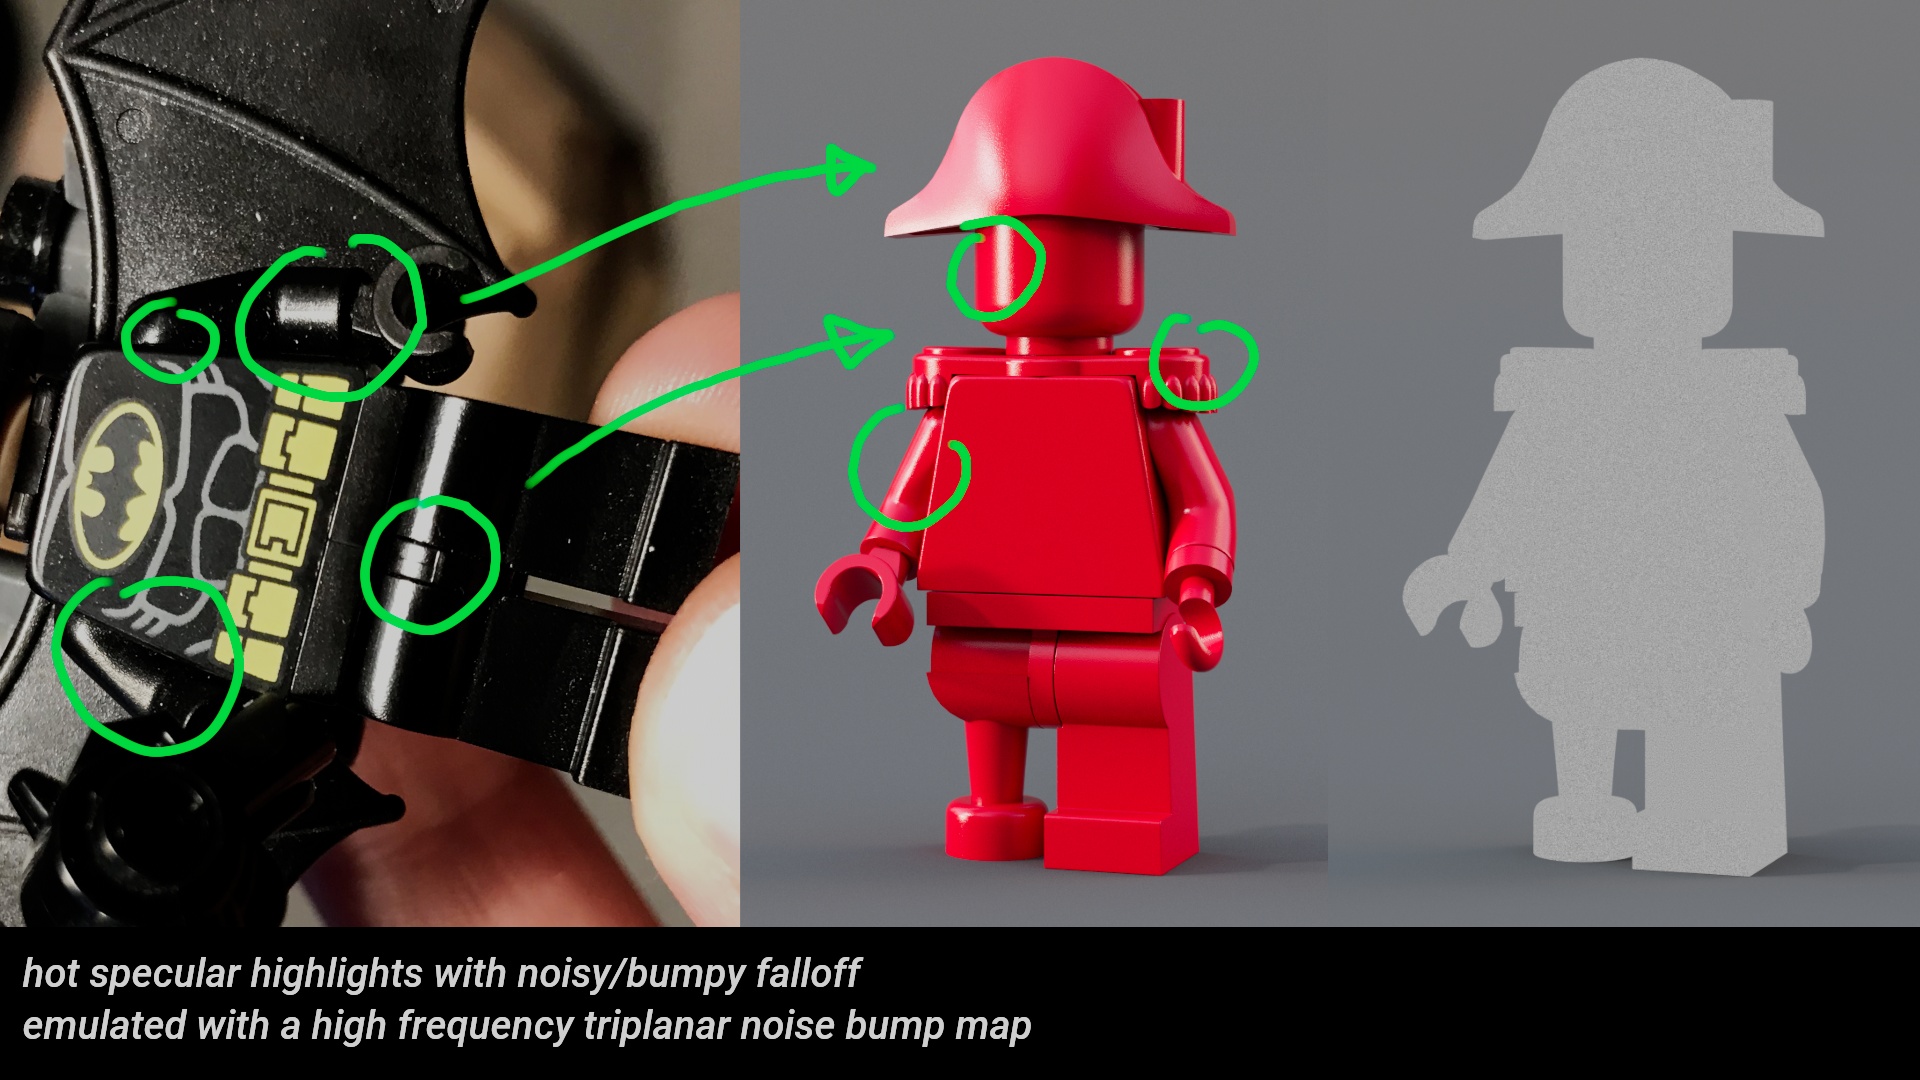
This is a tricky one. Let’s do a wedge test and see what happens. The roughness 0.4 comes the closest to the minifigure in the photo. The problem here is, that in real life there is no such thing as a roughness value. It only emulates an imperfect surface. The specular highlight in our rendering is way too smooth compared to the real thing. So what we do instead is, we use a high-frequency noise triplanar as a bump map to mimic the microsurface imperfections and therefore we can use a much lower roughness value like 0.25.

Imperfections
While noise maps are always nice to get something done quickly, it still looks too clean and especially the specular highlight on his head screams CG. Let’s add a bump texture with lot’s of tiny dents to break up the surface. This helps, but we can still see this straight “line” on his face. Let’s replace our roughness value with a smudgy texture map. With the help of a color correct node, we can bring it into a similar range as our previous value but with additional variation. Again, this helps, but there is even more we can do.
Unevenness
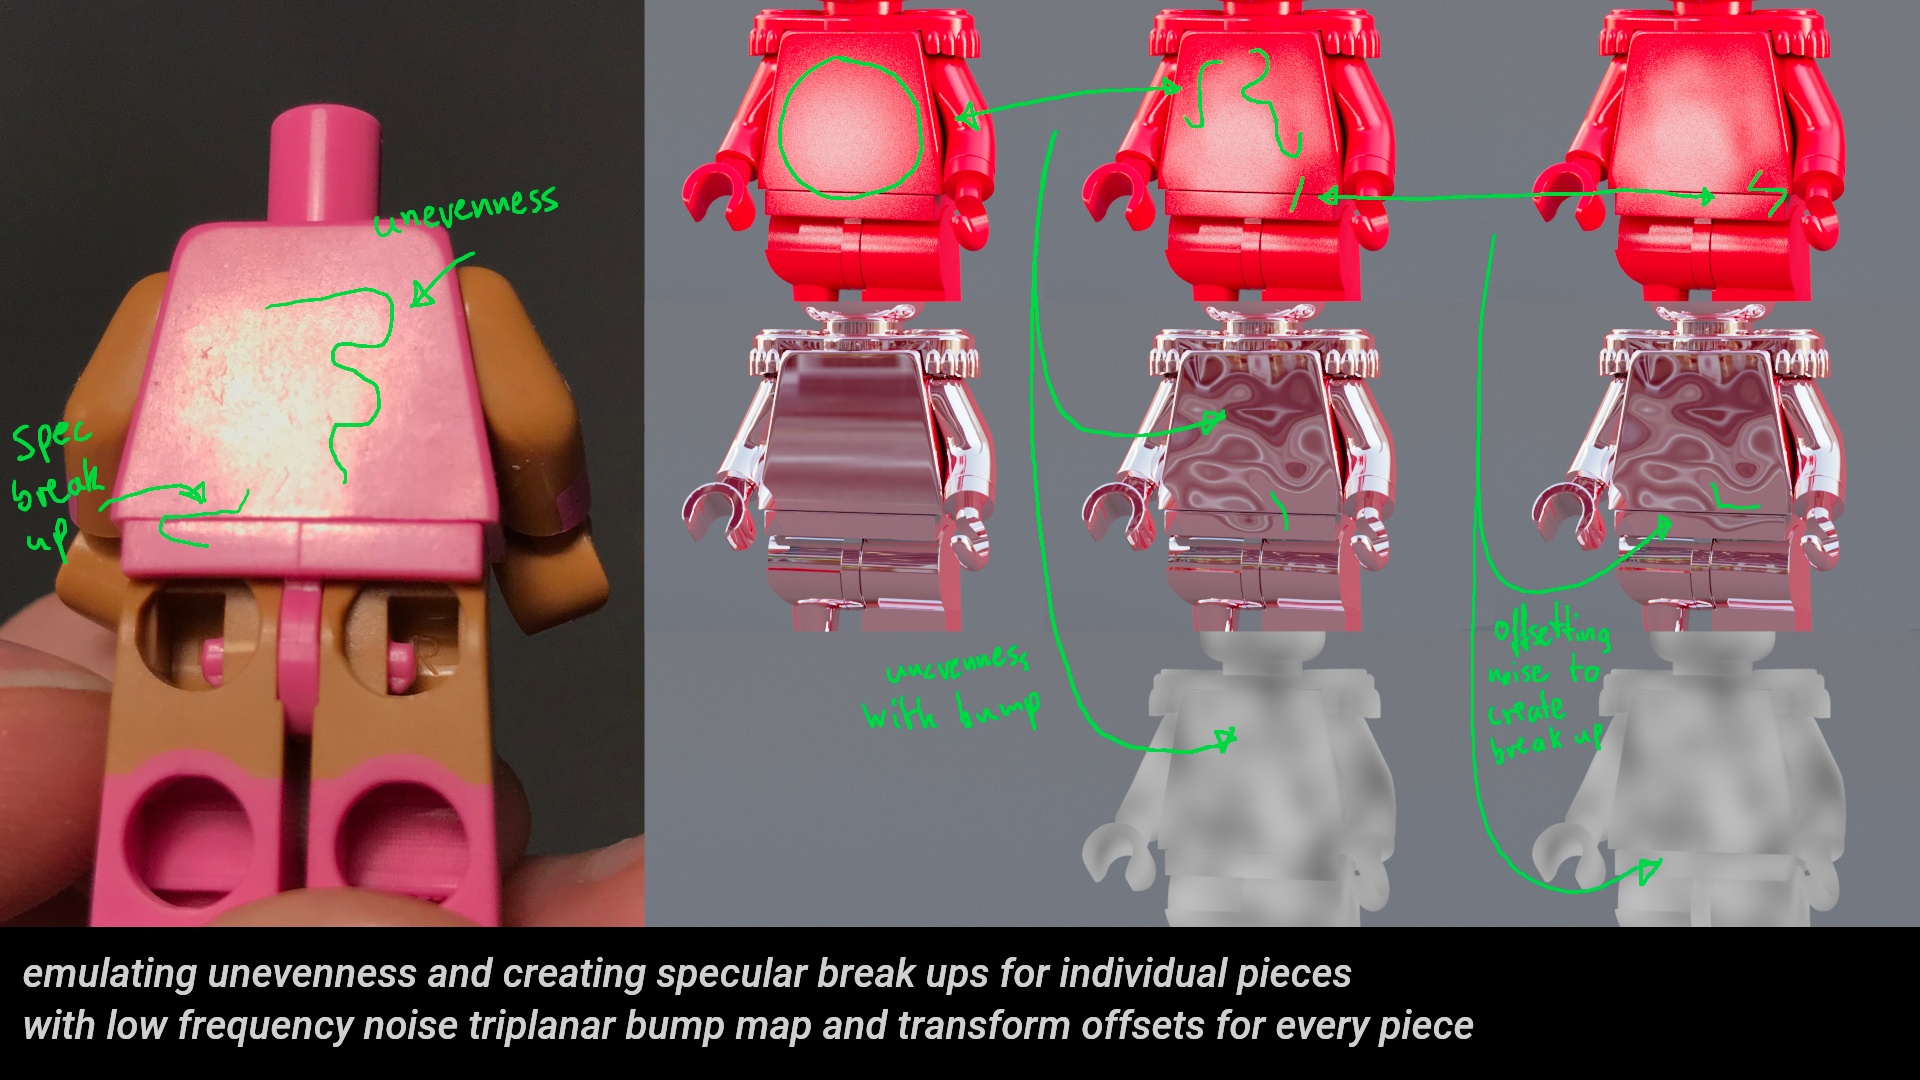
What really differentiates a truly well-executed shading from something that was thrown together in 3 minutes is, when it holds up in many different lighting conditions. Let’s step back a second to a simpler shading to better illustrate this. Let’s see what happens when we point a light source directly at our model. This immediately reveals a big flaw. We get this big white ugly circular reflection. If we look at the reference, we see that our light source gets distorted on the torso. That is because the mold process makes it a bit uneven. Our model, on the other hand, is mathematically perfect. We could do some modeling now, but because we are not crazy, we just use a second bump map. This time, a noise triplanar with a very low frequency.
Let’s turn our shader into a chrome like thing and turn off the roughness and the other bump so that we can really see what is going on. If we apply our low-frequency noise as a bump map now, we can see how the reflection gets nicely distorted. If we test this with our dielectric shader, we get this nice distorted reflection now, that looks a lot more like what we see in our reference. But we can push it even further.
If we look closely, where the torso and the hip meet, we can clearly see a break in the reflection. The torso was of course molded independently from the hip and has a completely different unevenness. Our noise pattern makes it look like the torso and the hip belong together. So what we need to do, is to offset the noise pattern on the hip to break up the distortion. We can do this with a user data vector node. This way we can still keep our single shader for all our pieces and we don’t need to create multiple ones.
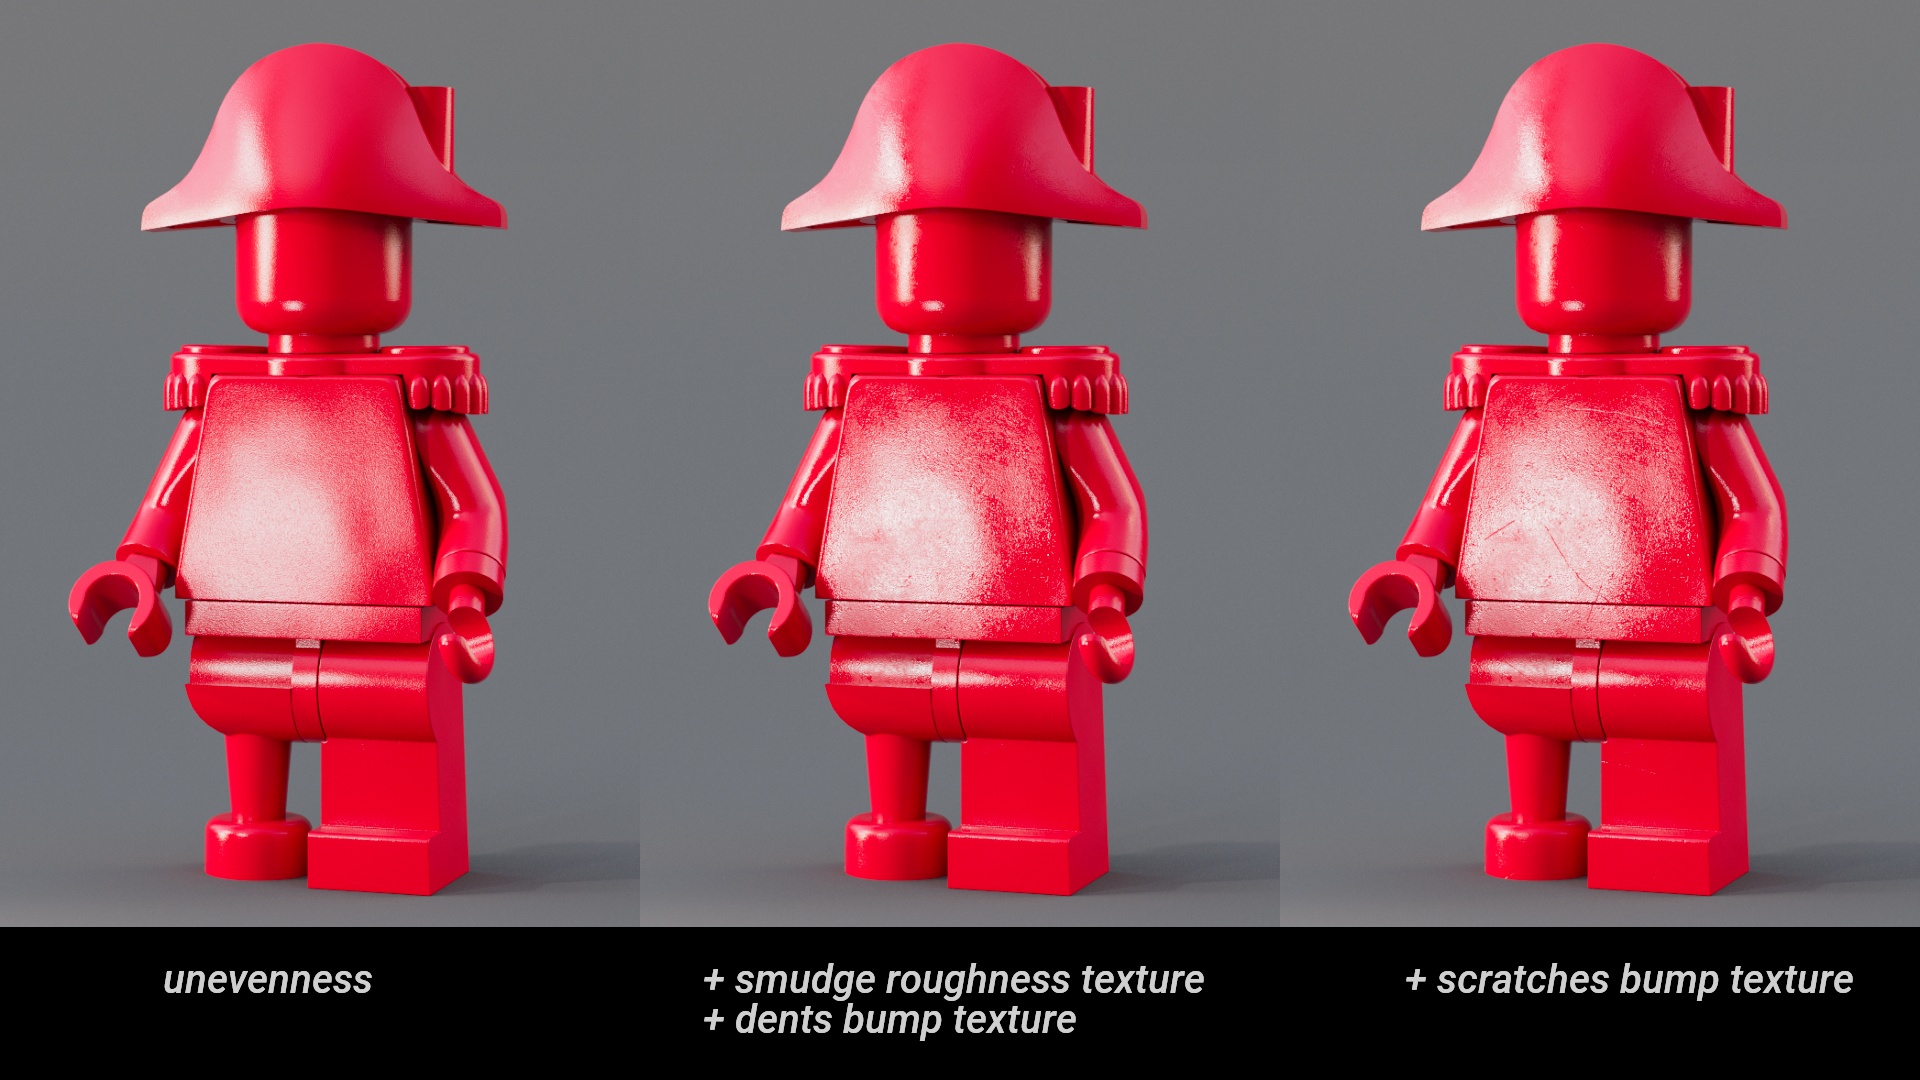
Variation is key
Now, with our unevenness in place, it’s time to add our textures from our previous step back to our shading network. Another important concept is variation. We can find it everywhere in the real world, and surfacing is no exception. While we added large and small noise maps, smudges and dents, it would be great to add another element that looks completely different. How about long thin scratches scattered randomly onto our model? This texture is – again – from the Mecabricks model.
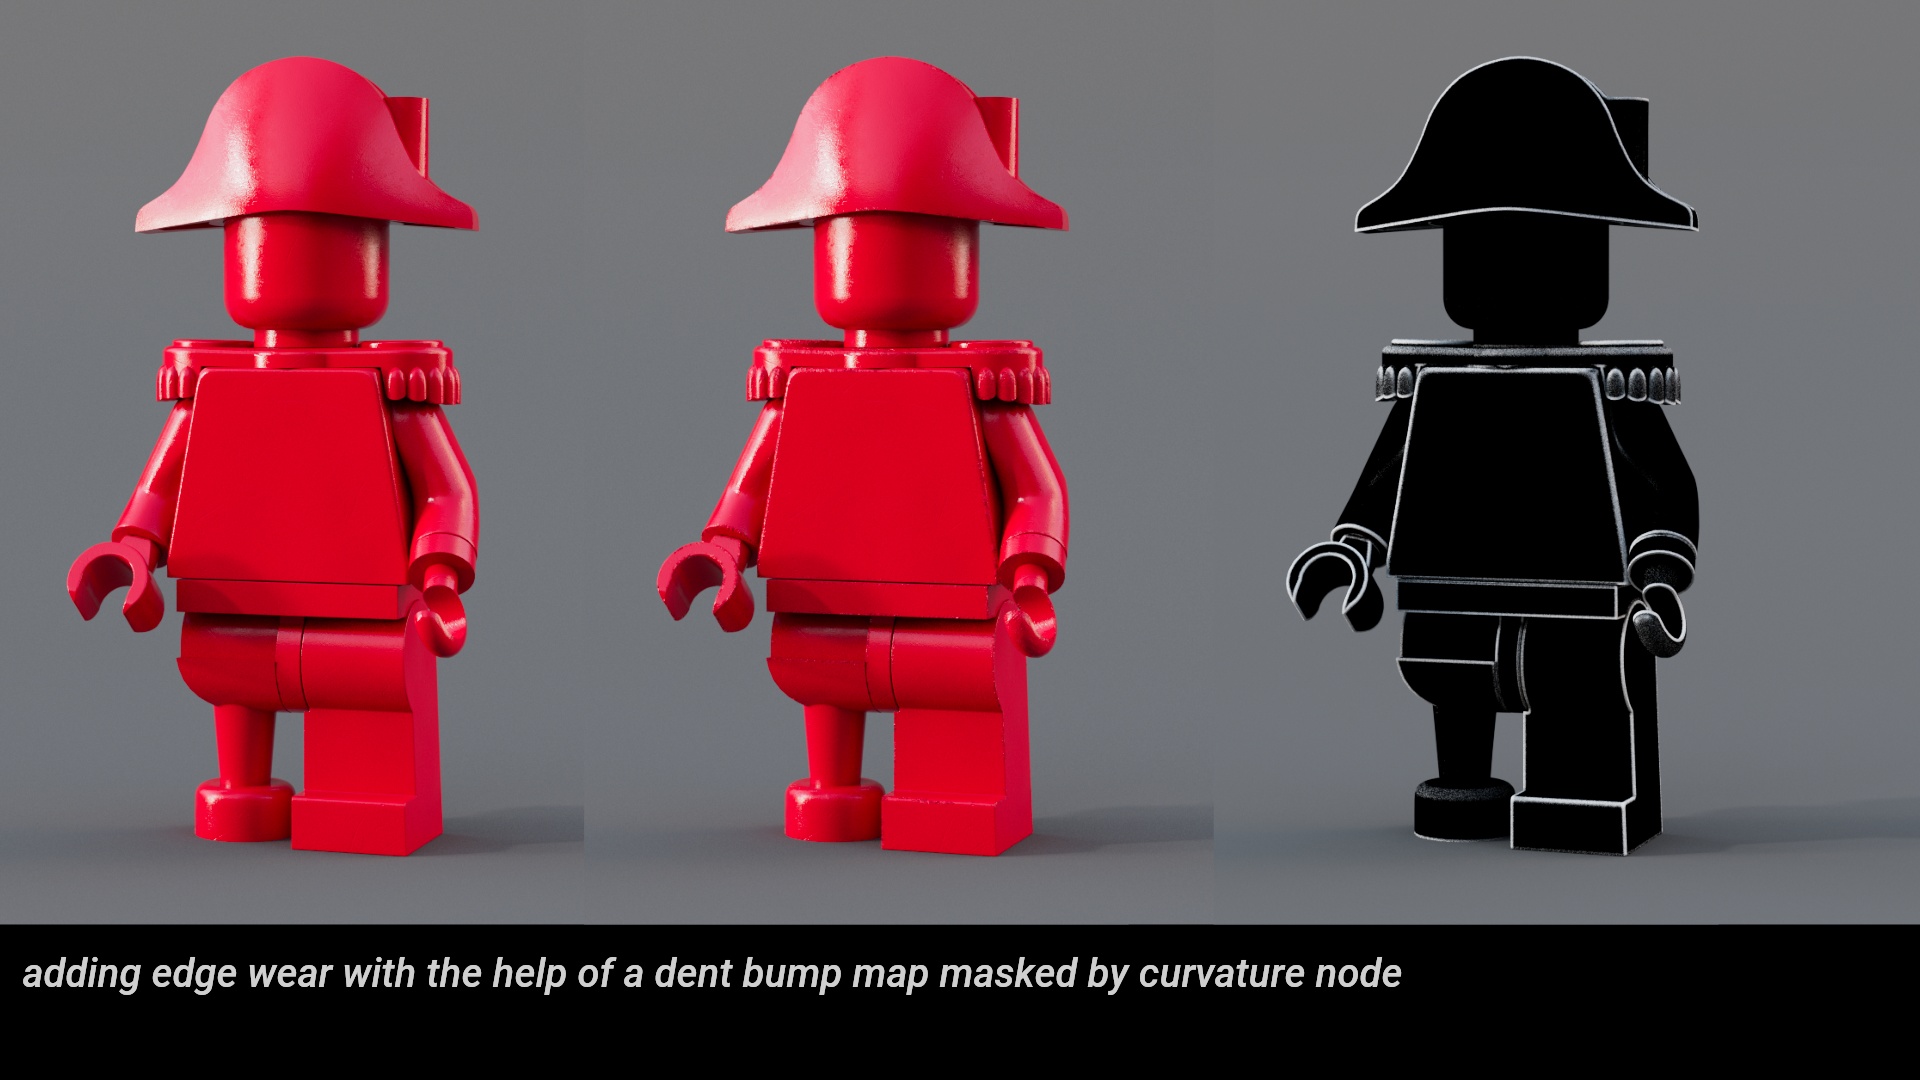
Edge wear
This is a great one. Edge wear is usually a relatively subtle effect. You usually don’t find this on brand new bricks, but it’s pretty noticeable on older ones. Over time lot’s and lot’s of dents appear on the edges of the bricks because we put them together so many times. This can be easily achieved with a curvature map. This way we can just apply another dent bump map to the whole shader and mask it with our curvature map.
Mold lines
Another piece to the puzzle are those mold lines we see on a lot of LEGO bricks. Since we still want to keep our single shader for the whole minifigure, I use a shader switch here and assign unique integer values to a custom attribute for every piece. If you use arnold or renderman you could use filename tokens, which is a bit more convenient. This way we can assign individual mold line maps to every piece. Those maps ship with the Mecabricks model as well. (Have I told you how awesome this thing is???)
Okay, enough bump map layering madness for now, we’ll come back later…
Fingerprints
In most modern shaders we have a secondary reflection lobe we can layer on top. We will use this one for fingerprints. We put the fingerprints texture (you know where I got it from…) in the weight channel so that we can use the IOR to control its visibility. I have no idea what the correct IOR for greasy fingerprints is, but if we look at a real brick, fingerprints are really hard to see and mostly appear on sides which are facing away from us, which suggests a low IOR value. Additionally, they are way more apparent if a light source points directly at it. We can mimic this behavior with a relatively low roughness value. If we look at the turntable (at the end of this post), we will see that the fingerprints only pop up at certain angles.
Diffuse – again
Now, this is the moment we have all been waiting for. Let’s assign our diffuse textures. I use the same shader switch trick here as for the mold lines.
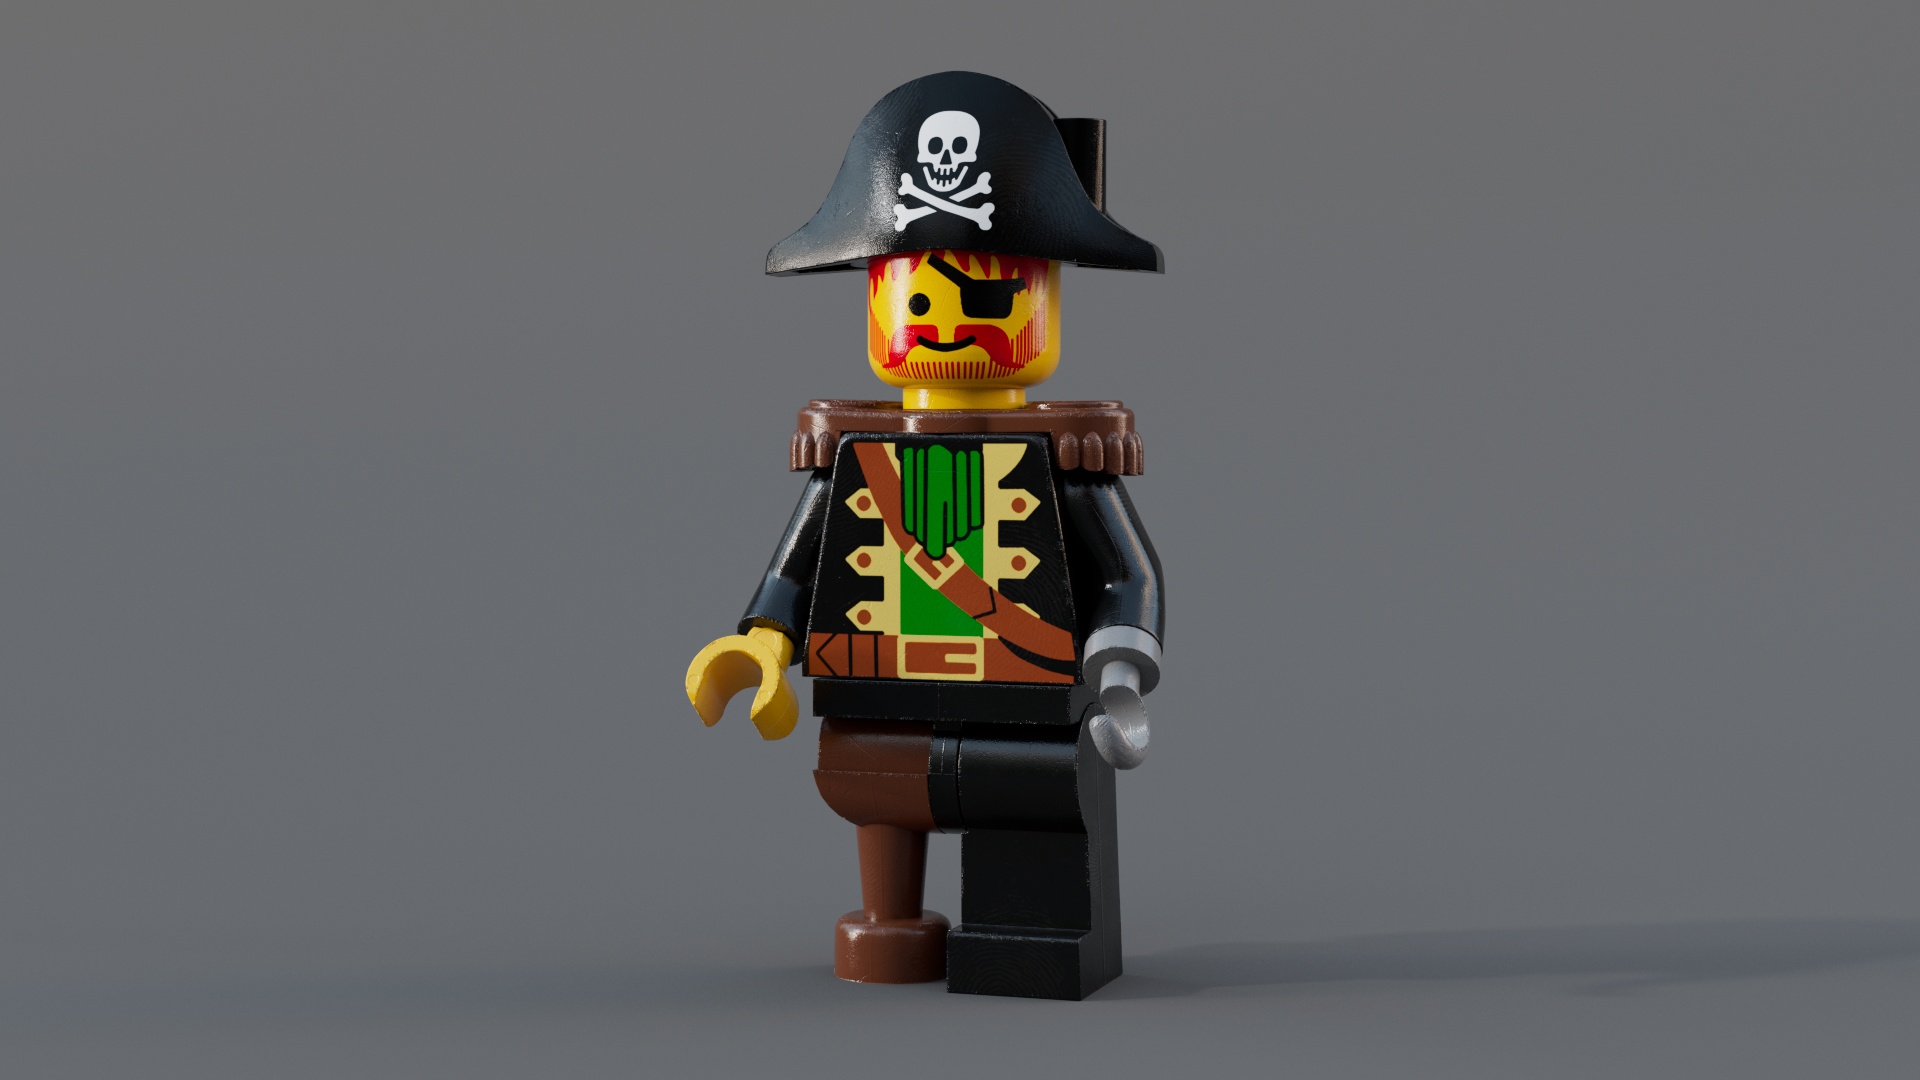
Bump maps – again
I promised it, we need even more bump maps tongue The prints are printed (surprise) on top of the geometry, which means they are slightly elevated. If we convert our color maps to black and white we can simulate this effect.
Subsurface Scattering
Last but not least plastics have some SSS going on. It is relatively subtle and it’s not a deal breaker, but still very nice to have. One needs to be careful with this, though. The general rule of thumb is, if we can see the SSS effect it’s probably too much. All we need is some bleeding to soften the edges a bit. The radius is the most important slider here to get the scaling right.

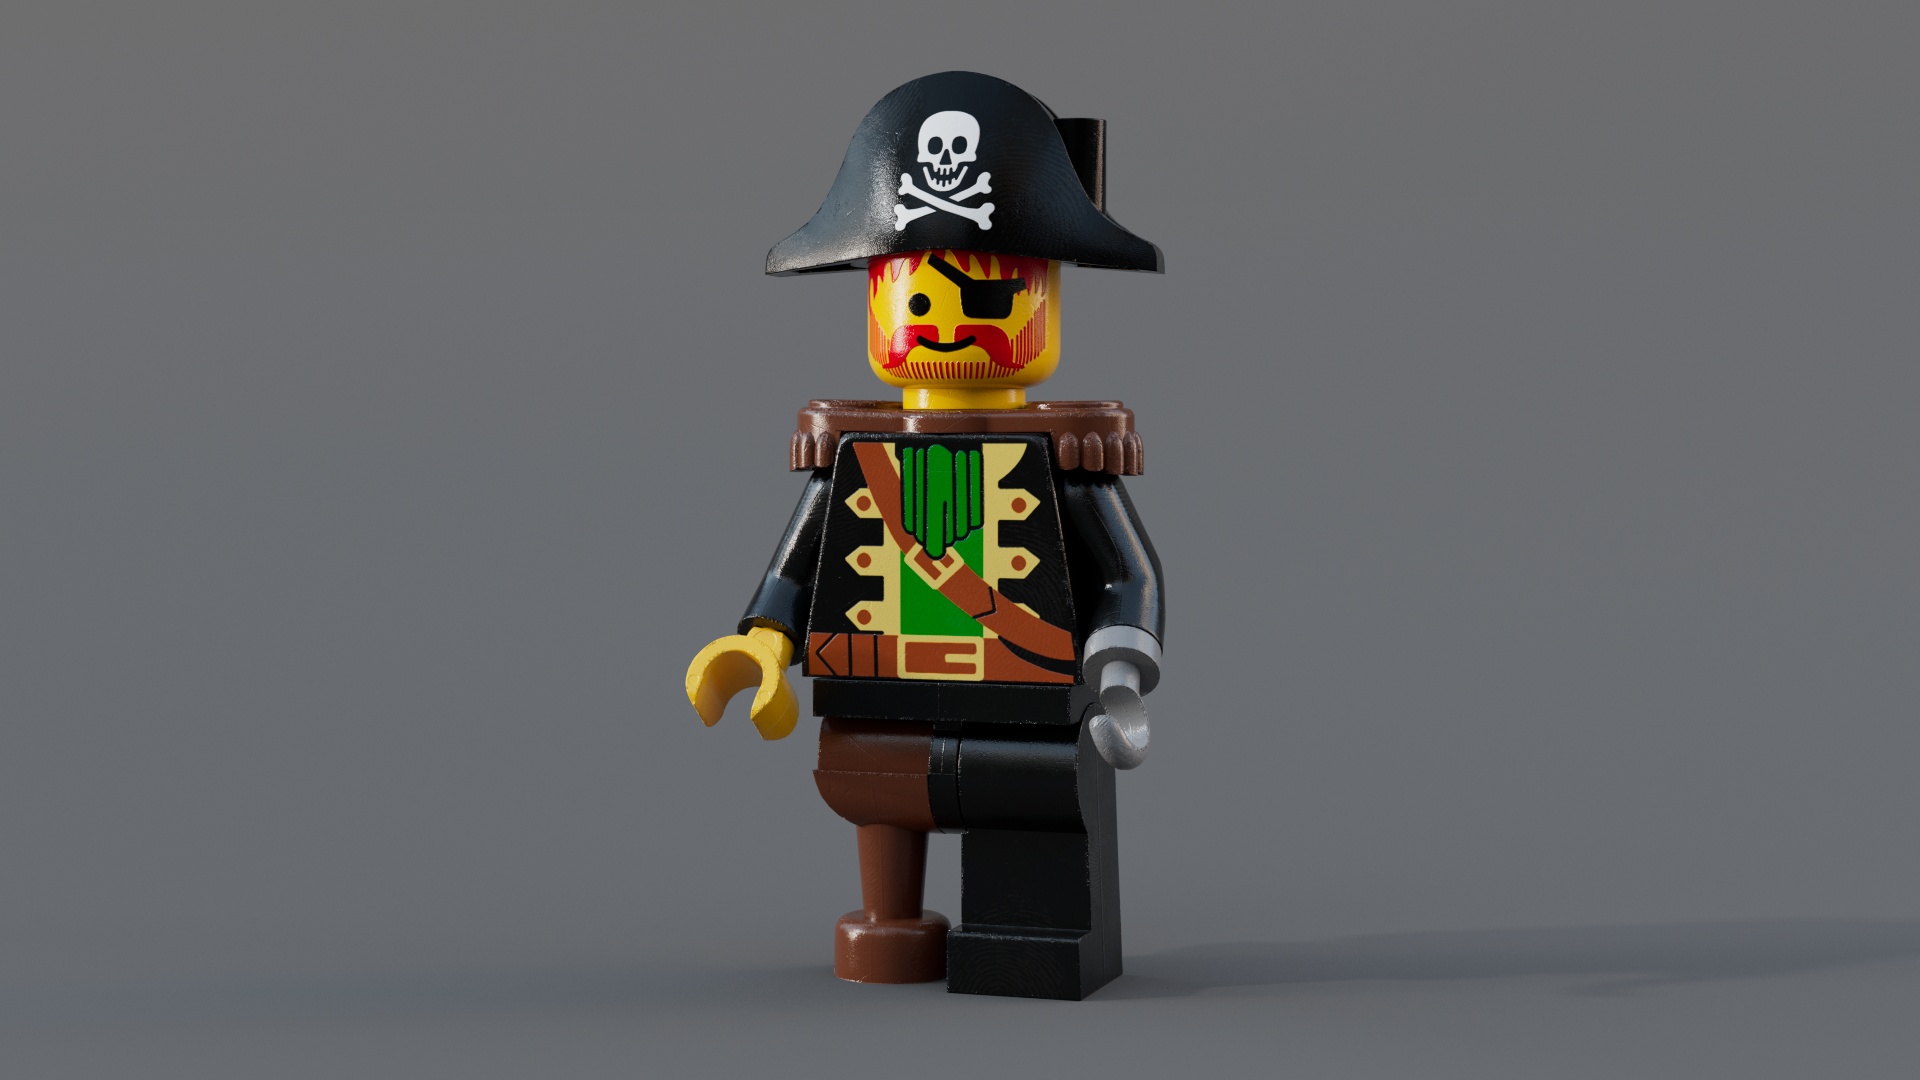
Turntable
Aaand it’s turntable time smile
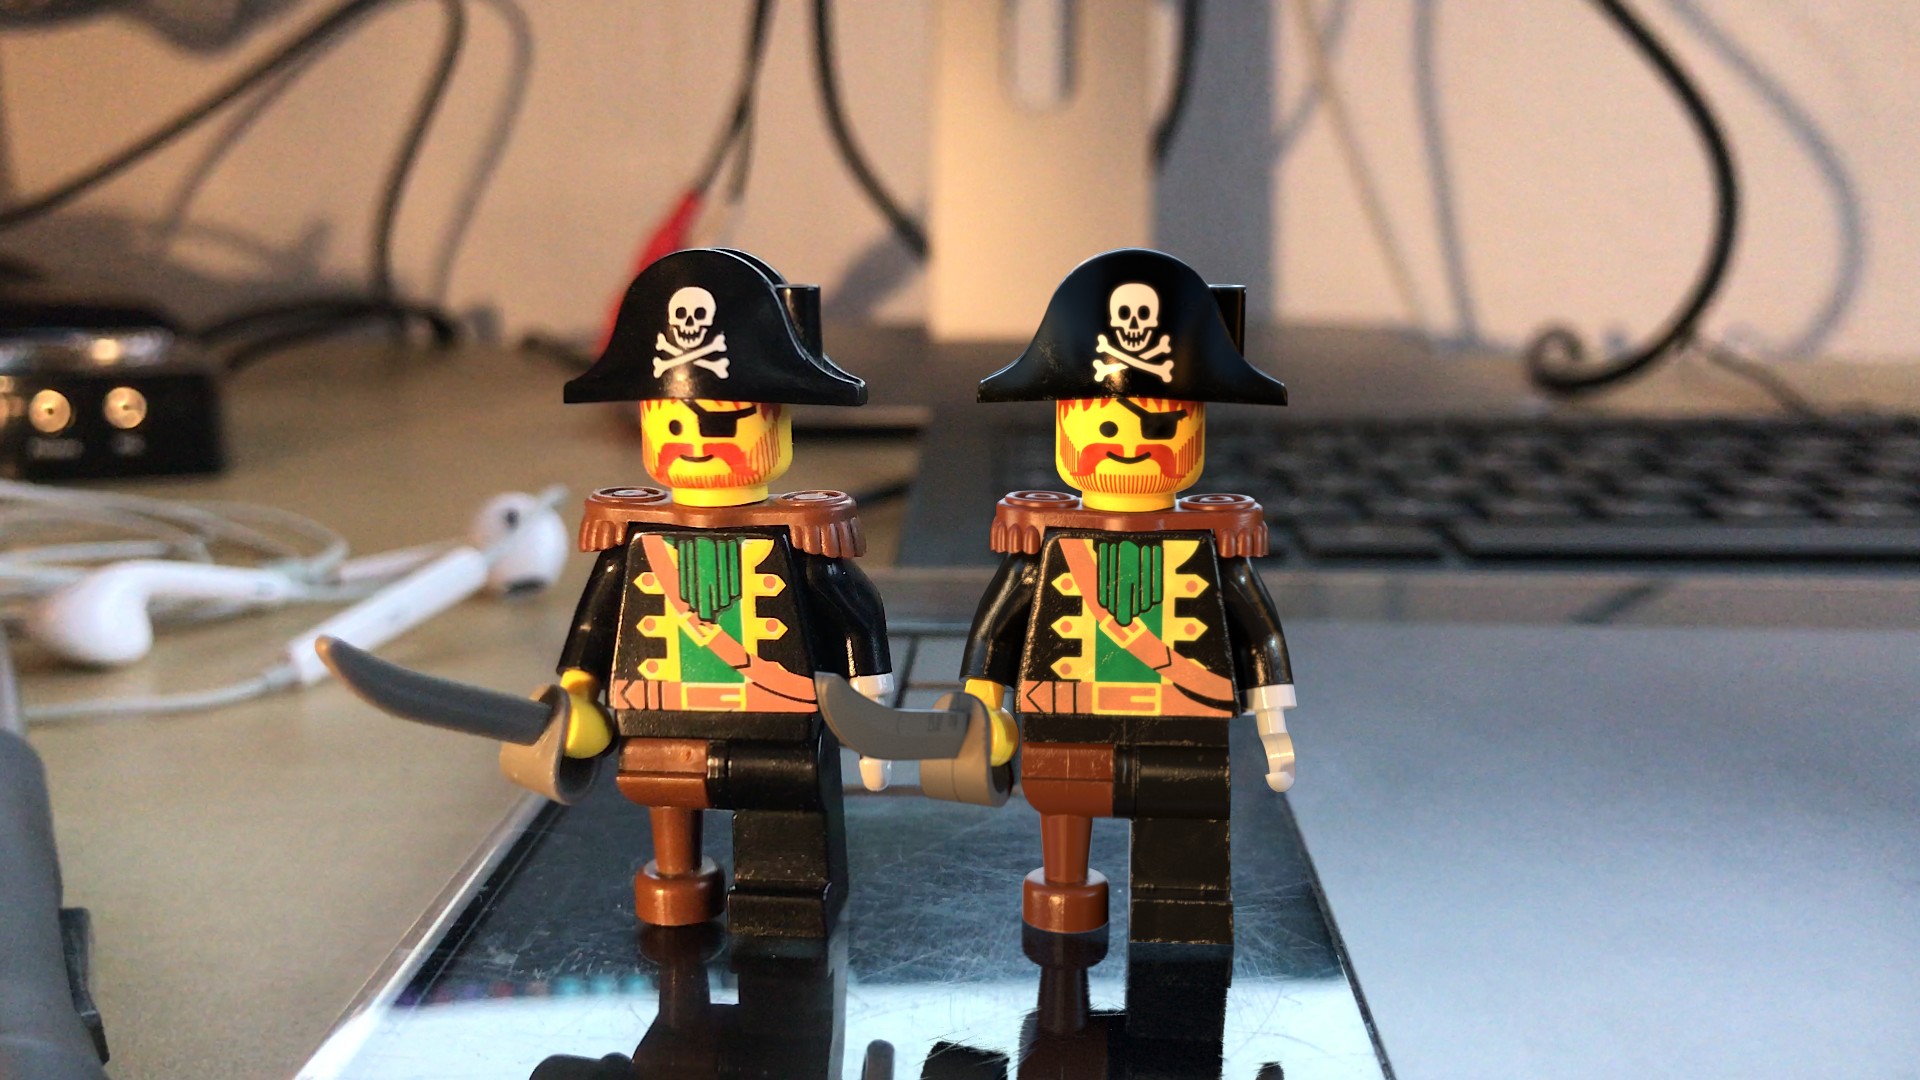
Does it hold up?
And this is a proof of concept with the CG Redbeard next to the real thing. I rendered this one with prman, and it has a slightly different setup. While the shader above is more procedural and could be universally applied, this one has a lot more individually painted maps, a separate shader for every piece, and specific adjustments to accommodate to the specific situation, but the overall concept is the same.
Leave a Reply to Redbeard’s Cove Cancel reply