Wow. It has been a while. But here we are opening the next chapter in our LEGO material journey. I realized, in order to push my cg imagery to the next level, that I needed to get closer to my favourite toy. Very close. Turns out, this is much easier said than done. My phone camera simply didn’t cut it, but even a proper interchangeable lens camera doesn’t help much if you don’t have the right equipment. After a lot of research, I decided to get the Sony Alpha 7CR with a FE 90 mm F2.8 Macro lens. Without going into too much detail, here are the main bullet points that lead me to this choice:
It had to be a full frame. Modern smartphones already take very impressive pictures. I wouldn’t want to carry a heavy camera body + lens around if the difference wouldn’t be substantial. However, the 7CR is still fairly compact, so it was the best out of both worlds for me.
The 7CR has 61 MP. There are potential downsides to having a high resolution sensor like stronger diffraction — more on that later — however, my main objective is to take highly detailed close up images, so there can never be enough pixels.
Macro Lens
Finding the right lens was the more difficult part. At first, I tried to compare the minimum focus specification of different models. However, I quickly realized that this doesn’t actually tell me anything about how large my subject is actually going to be in the image in the end, as other factors like the focal length would of course influence that. What you are actually looking for is the maximum magnification. A magnification of 1 means we can get a life-size projection on the image sensor. A full frame sensor is 36 mm × 24 mm. A minifigure is 4 cm tall, so you can go so close, that roughly half of the minifigure fills the frame in height! A maximum magnification of 0.5 would mean you could roughly fill the frame with the full minifigure in height.
The other important bit I had to figure out is how to get an image with the deepest depth of field (as much in focus) as possible. There are several factors that influence the depth of field: focal length, aperture (f-number) and distance to subject:
- longer focal length = shallower depth of field
- larger aperture = shallower depth of field
- closer to subject = shallower depth of field
Unfortunately, you quickly run into physical limitations here. Changing distance to subject wasn’t really an option — I needed to be as close as possible. I didn’t want to go with a short focal length, as I didn’t want my LEGO to look too bulgy. Closing down the aperture results in diffraction, resulting in a softer image.
Focus Bracketing
The solution that people came up with is a technique called focus bracketing. The idea is to take several pictures with different focal points and blending the in-focus areas of the different images into one fully sharp composited image. One option to do this is to utilize a focus rail. This would allow you to move the camera in tiny increments to shift the focal plane. However, I didn’t really want to go with this as it felt a bit clunky. Luckily, newer Sony cameras have a focus bracketing mode built-in. The only requirement for this, is a compatible lens with autofocus. Autofocus capability is not necessarily the norm for macro lenses. And I get why — usually you would want to be in full control over your focal point anyway. However, for my purposes I needed it. Long story short, the Sony FE 90 mm F2.8 Macro ticked all the boxes. Maximum magnification of 1, Auto focus, and it’s a G lens, so the quality should be very high.
Enough talking, let’s get into it!
Light Setup
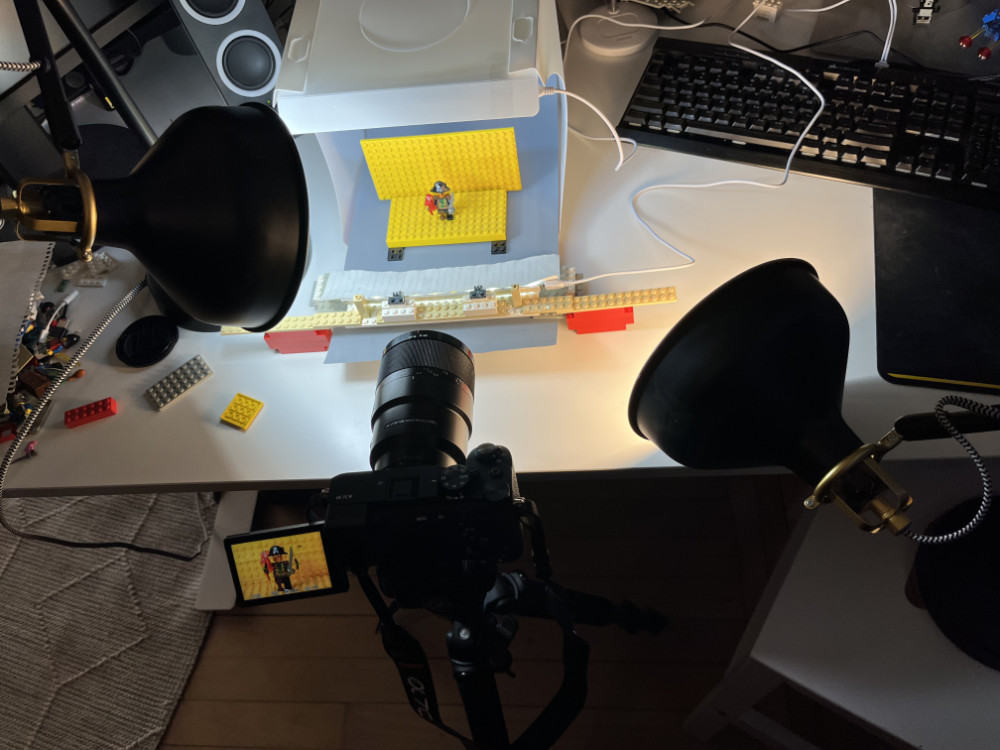
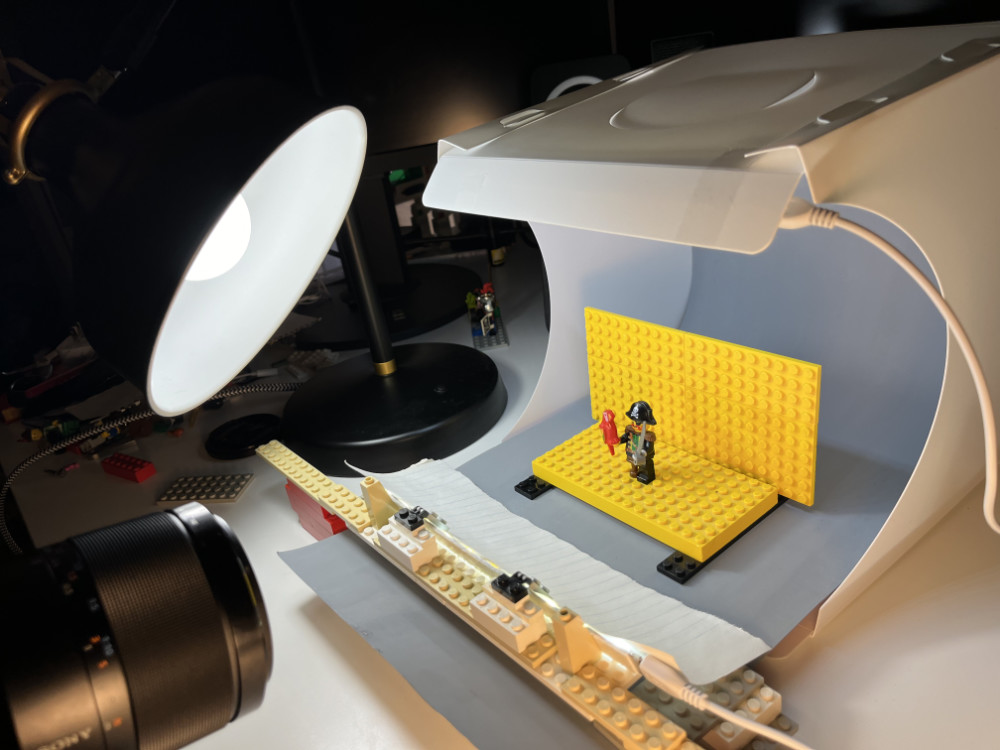
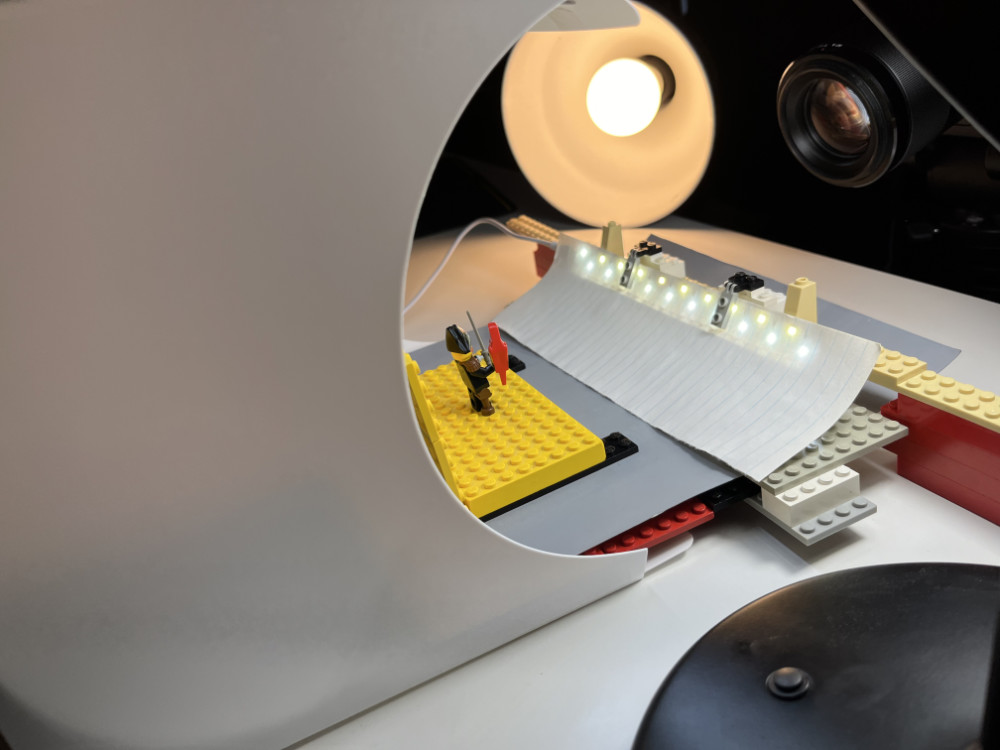
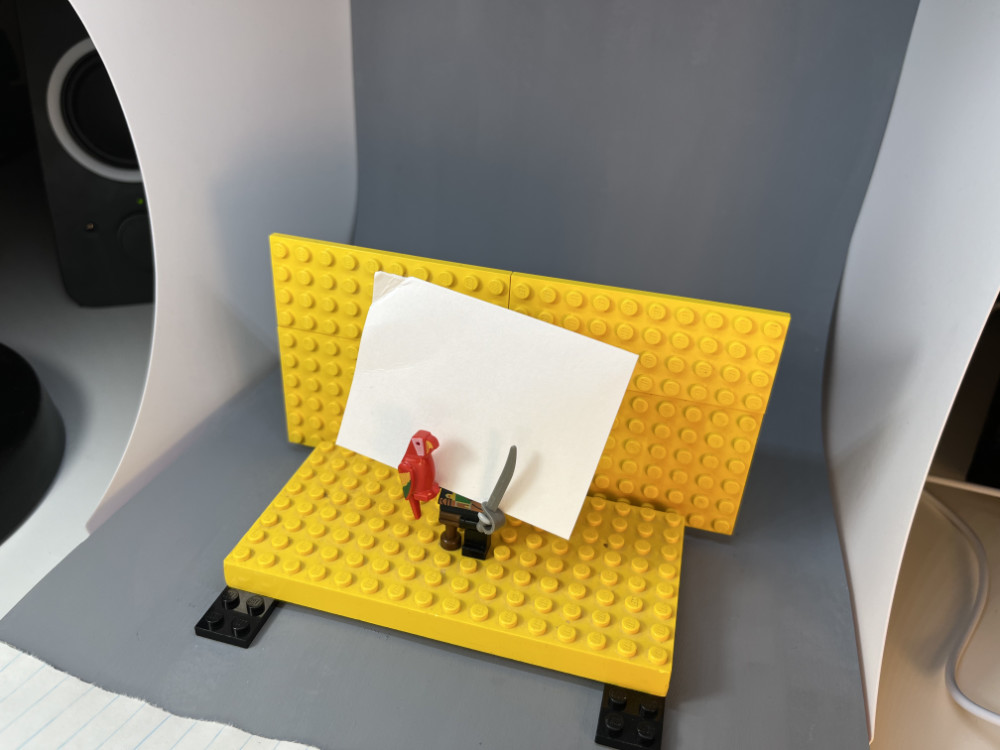
My “photo studio” — as you can probably tell — is much more crafty/DIY and by no means as professional as my camera gear. I got a super cheap light box on Amazon that came with 2 LED strips. I placed one at the top, the other one right in front to get some frontal reflections. However, the frontal reflections were a bit strong, so I put a piece of paper in front of it to diffuse/dim it. My key + fill light are just regular IKEA lamps — the fill with a cool light bulb, the key with a warmer one. My white balance card is also just a regular piece of white paper.
Note: all following photos have been downsized heavily to keep loading times reasonable. There is a link at the very end where you can download the full res photos.


Since I’m a CG artist by nature, of course I had to split out my “multilights” by photographing each light individually. Actually fun to see them isolated like that.
In Pursue of Ultimate Sharpness
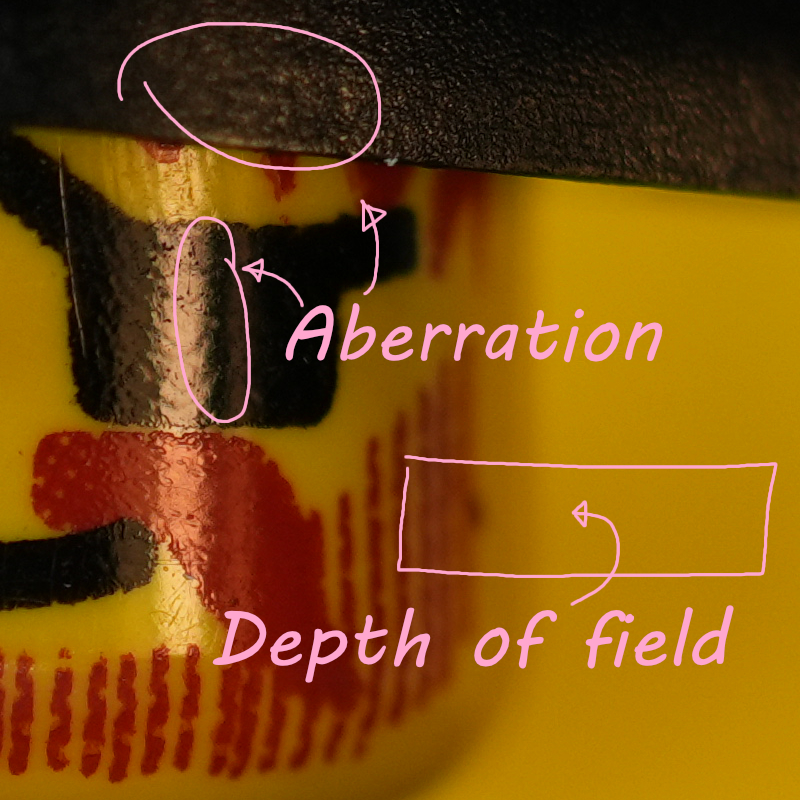
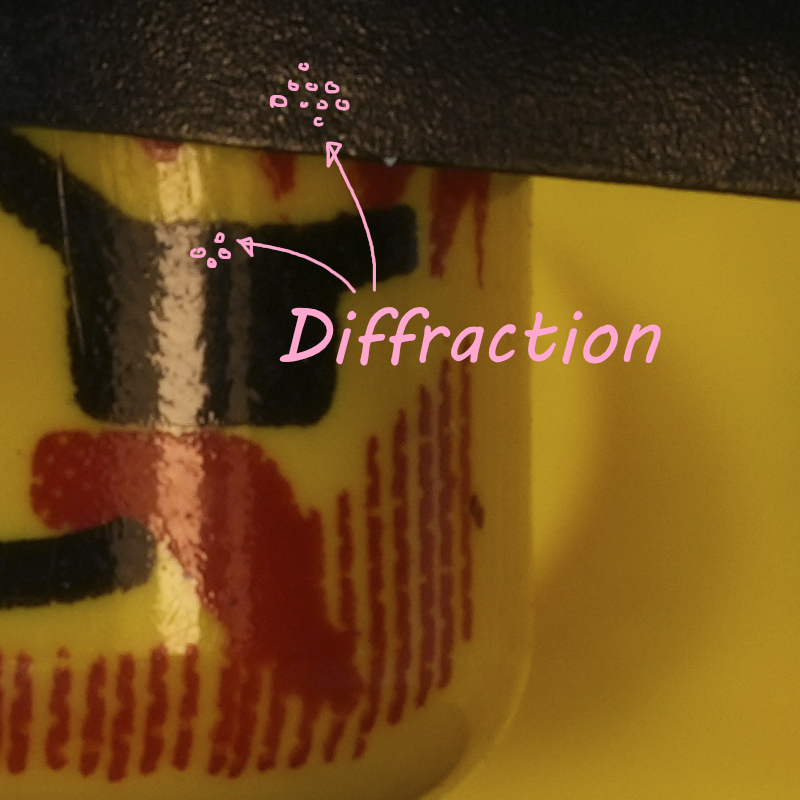
Before going any further, I had to run some tests to find the perfect exposure settings. First item on the agenda: Finding the perfect aperture (f-number). At first glance f/22 might look like an obvious choice, as it has the deepest depth of field — however, at closer inspection…

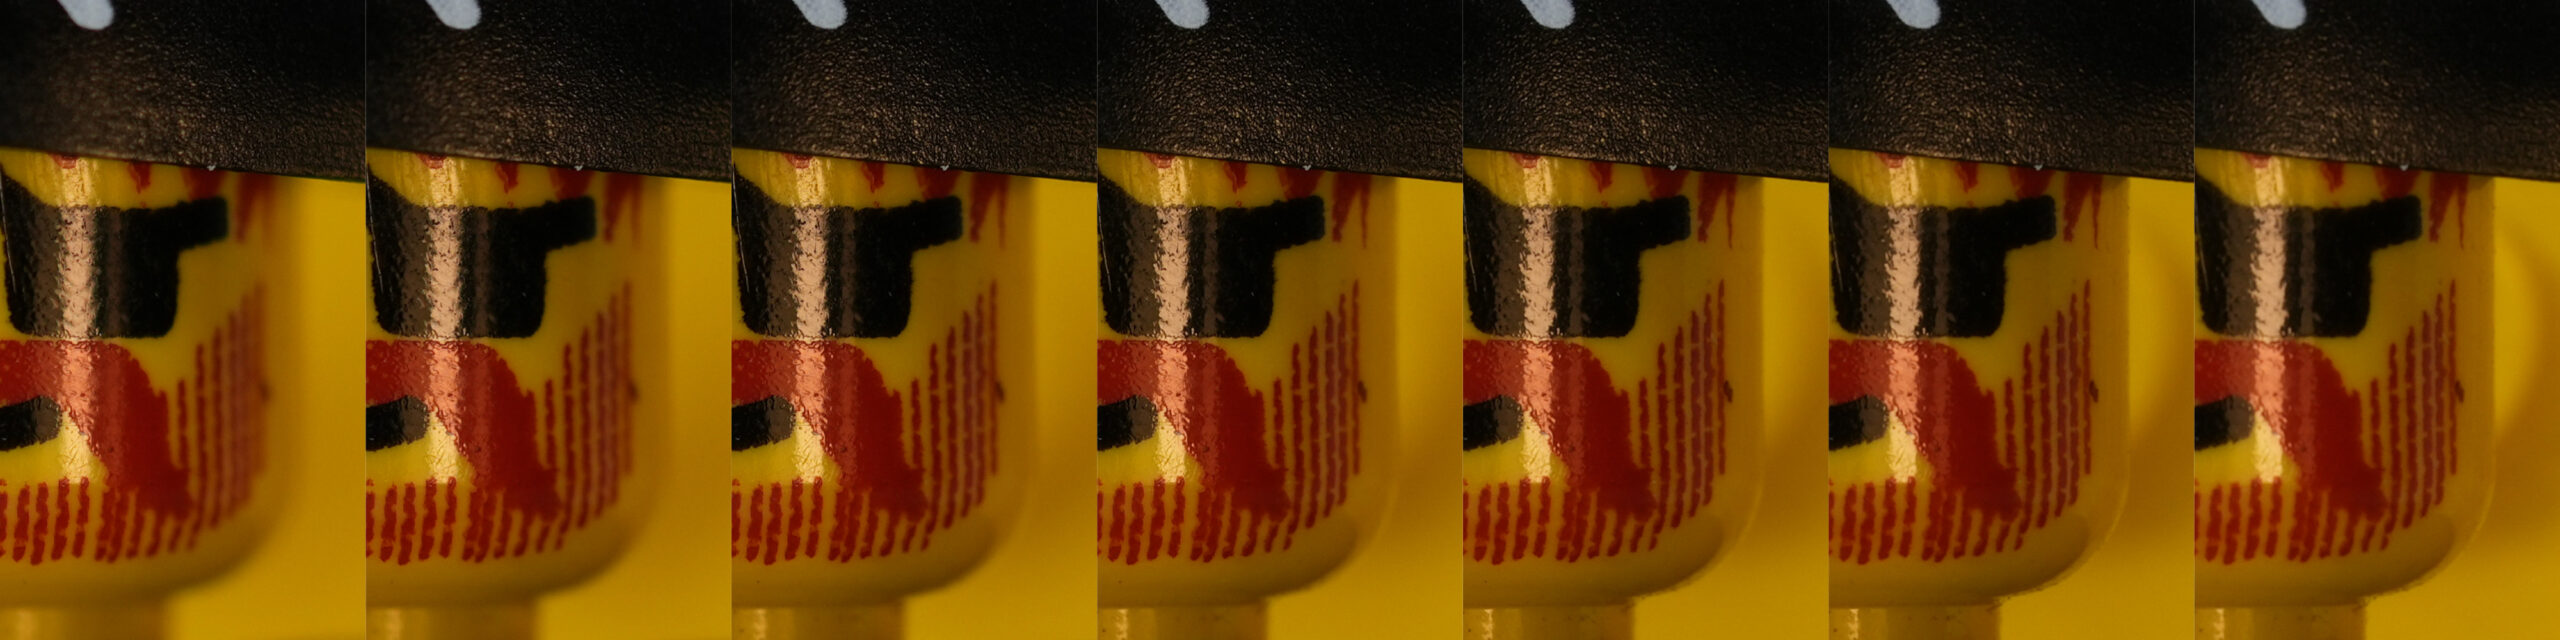
If you enlarge the image (see below) you’ll see that there is a big difference in sharpness.
- Larger apertures have visible aberration – color fringing around the edges of the highlight
- They also have a much shallower depth of field
- Smaller apertures suffer from diffraction which results in an overall soft looking image.
This was very fascinating to me, as we essentially have 3 different types of “sharpness” all having very different characteristics.
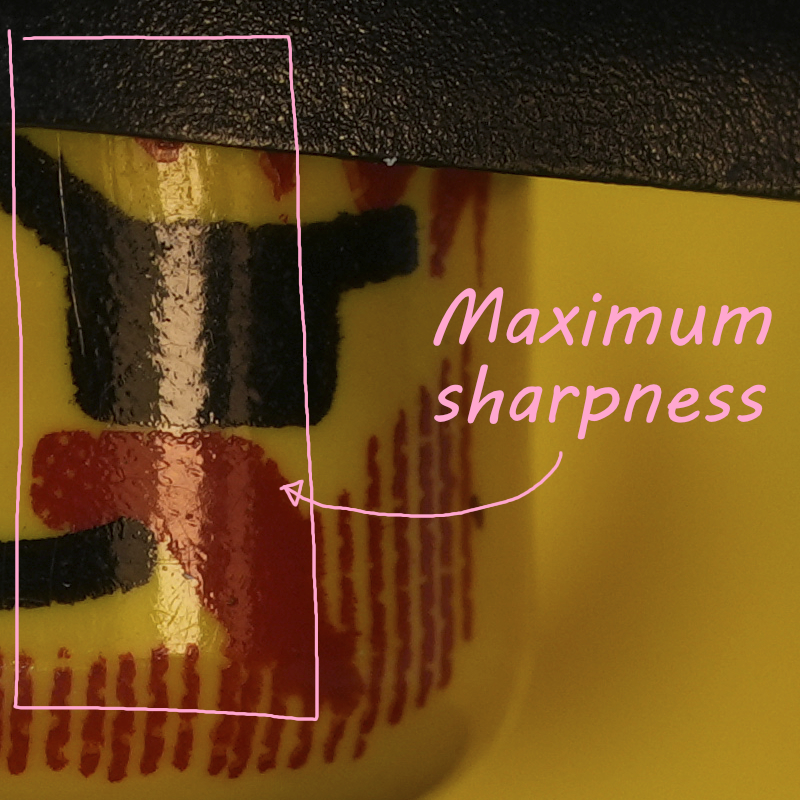
For this particular lens, the perfect sharpness was somewhere between f/5.6 and f/8. I think, I am still able to see a tiny bit of aberration at f/5.6. f/8 might trade a tiny touch of sharpness but would allow for more overlap for the focus stacking, because of the deeper depth of field. So I decided to go with f/8. However, both apertures would probably be valid choices, I think.
ISO
The lowest film speed of ISO 50 would obviously yield the best possible quality. However, such a low film speed would require an insane amount of light or long exposure times. Since I’m only photographing non-moving objects — unfortunately I haven’t figured out yet how to make Captain Redbeard come to life — I could theoretically shoot with as long exposure times as necessary. However, there is still a certain amount of risk that comes with this. I had to shoot with a mechanical shutter, since the electronic shutter could give me banding from my artificial light sources. So there would be a potential shutter shock, resulting in motion blur. Furthermore, my studio setup was a tad fragile, and I’m living in an old apartment with a VERY slanted floor prone to vibration. So I decided to go with ISO 200 as a safety net. The in-focus area of the image looks very close to ISO 50, but it would allow me to increase shutter speed a bit.
Focus Stacking
Now that I got my ideal exposure settings, I was ready to take my bracketing sequence. I chose the widest (10) step size, which still resulted in ~50 images to get front to back sharp.

As you can see, there is one issue with this technique. Focus breathing. Just by shifting the focal point, the lens zooms quite considerably. Certain cameras and lenses have methods to mitigate this effect. My Sony camera does in fact have a breathing compensation option, but it only works in movie mode for some reason. So I had to deal with this issue in post.
I tried many pieces of software. Unfortunately, all free tools either failed miserably, took forever to process, or both. Affinity Photo can do a very decent job, if the focus breathing isn’t too strong. However, there are no options to tweak the algorithm and it’s a bit slow. (~3 minutes for 50 61MP JPGs)
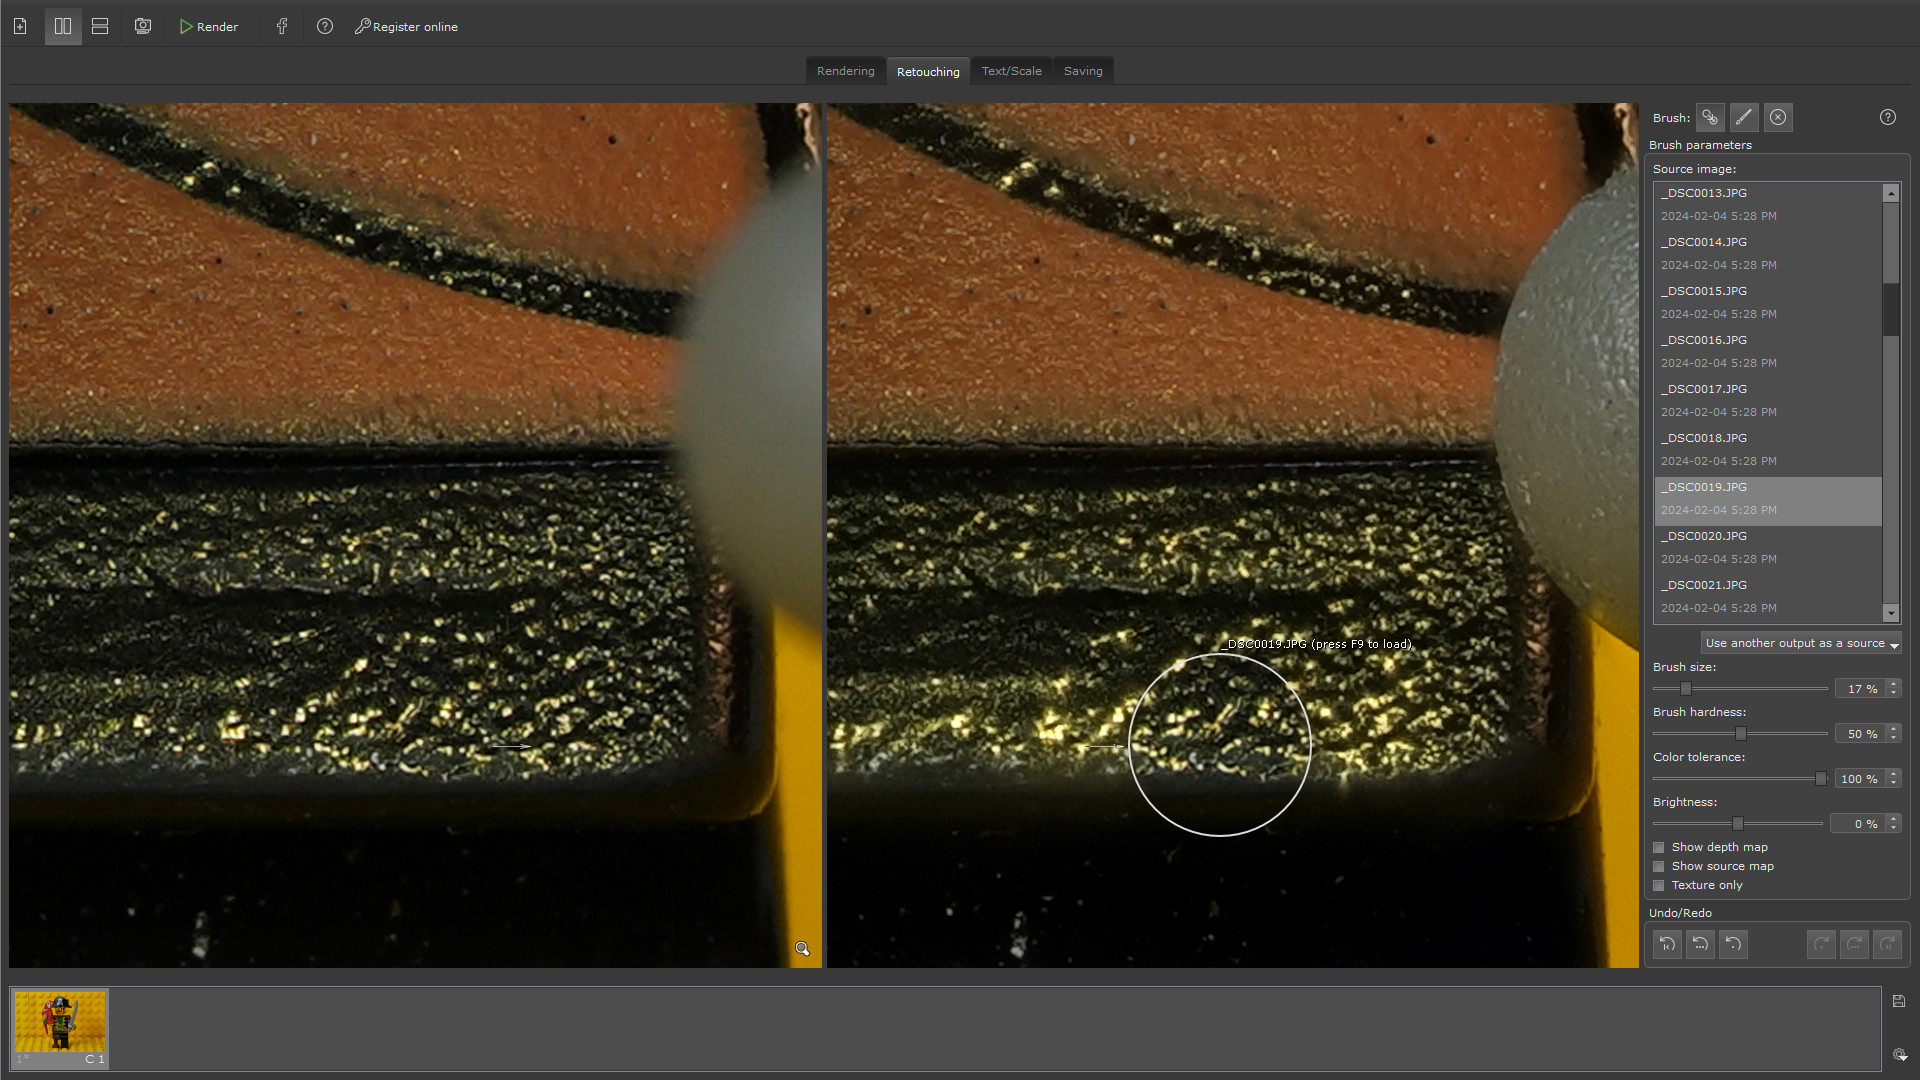
Helicon Focus — a tool designed for the job, worked incredibly well, and it’s lightning fast. Even faster if you enable GPU processing. (~7 seconds for the same image set). It was able to auto align stacks that had a huge amount of focus breathing. You can also choose between different methods. Method B (depth map) keeps surfaces very sharp, however it has trouble when there is a large distance between overlapping objects in depth. Method C (pyramid) deals much better with these cases, however it has a fairly glowy look.
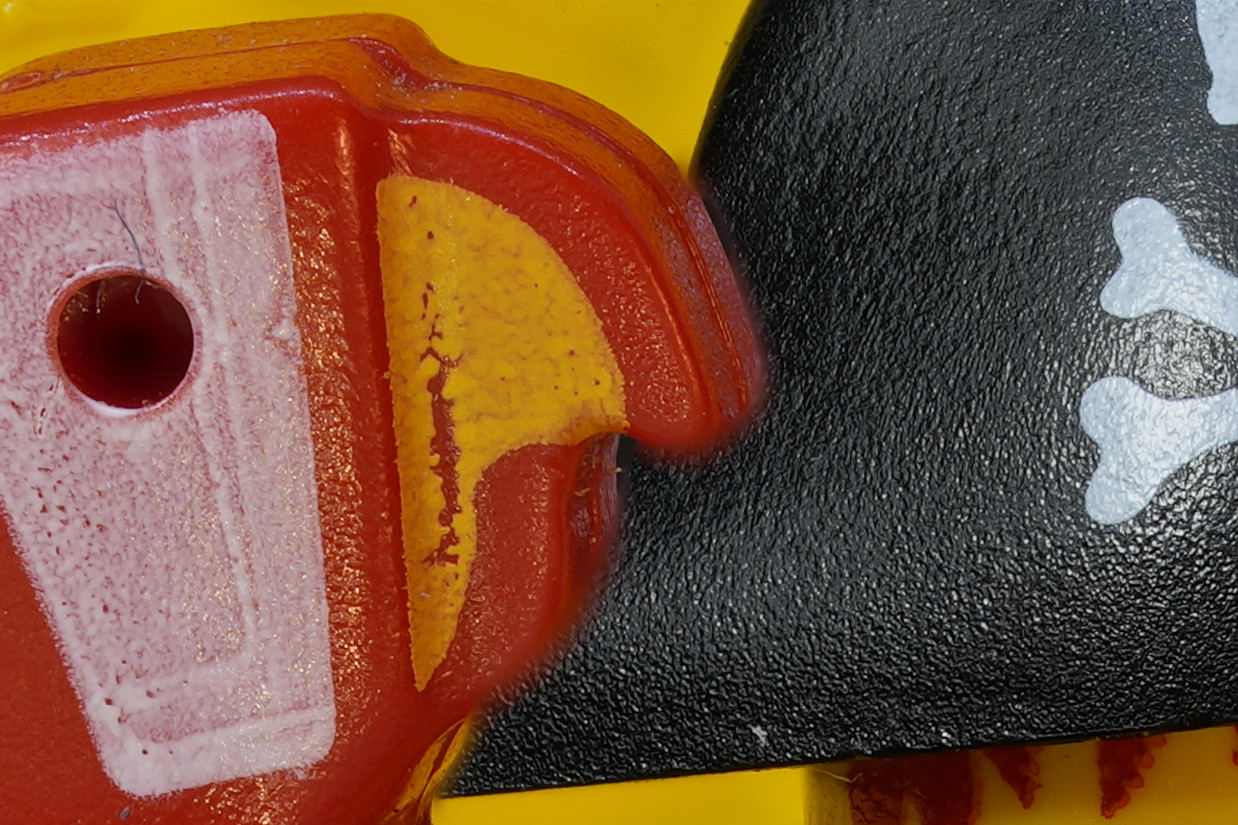
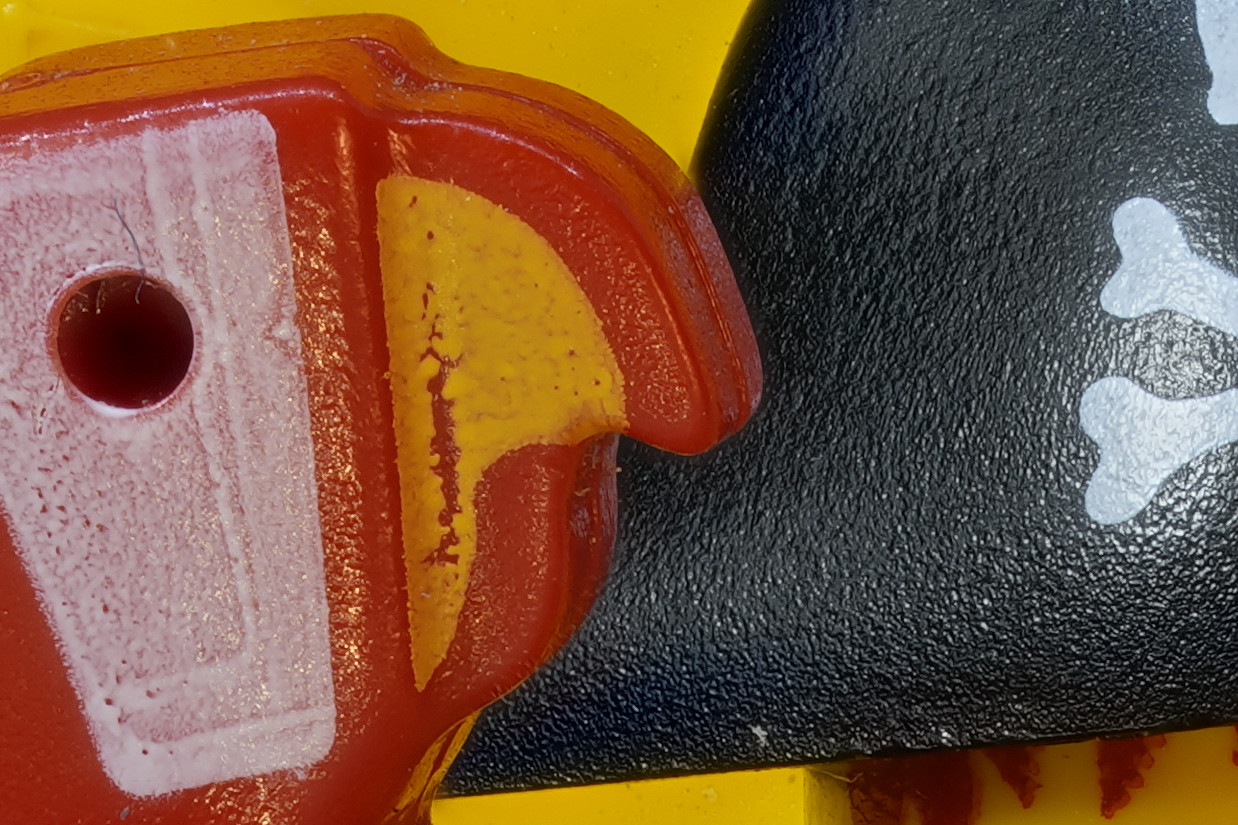
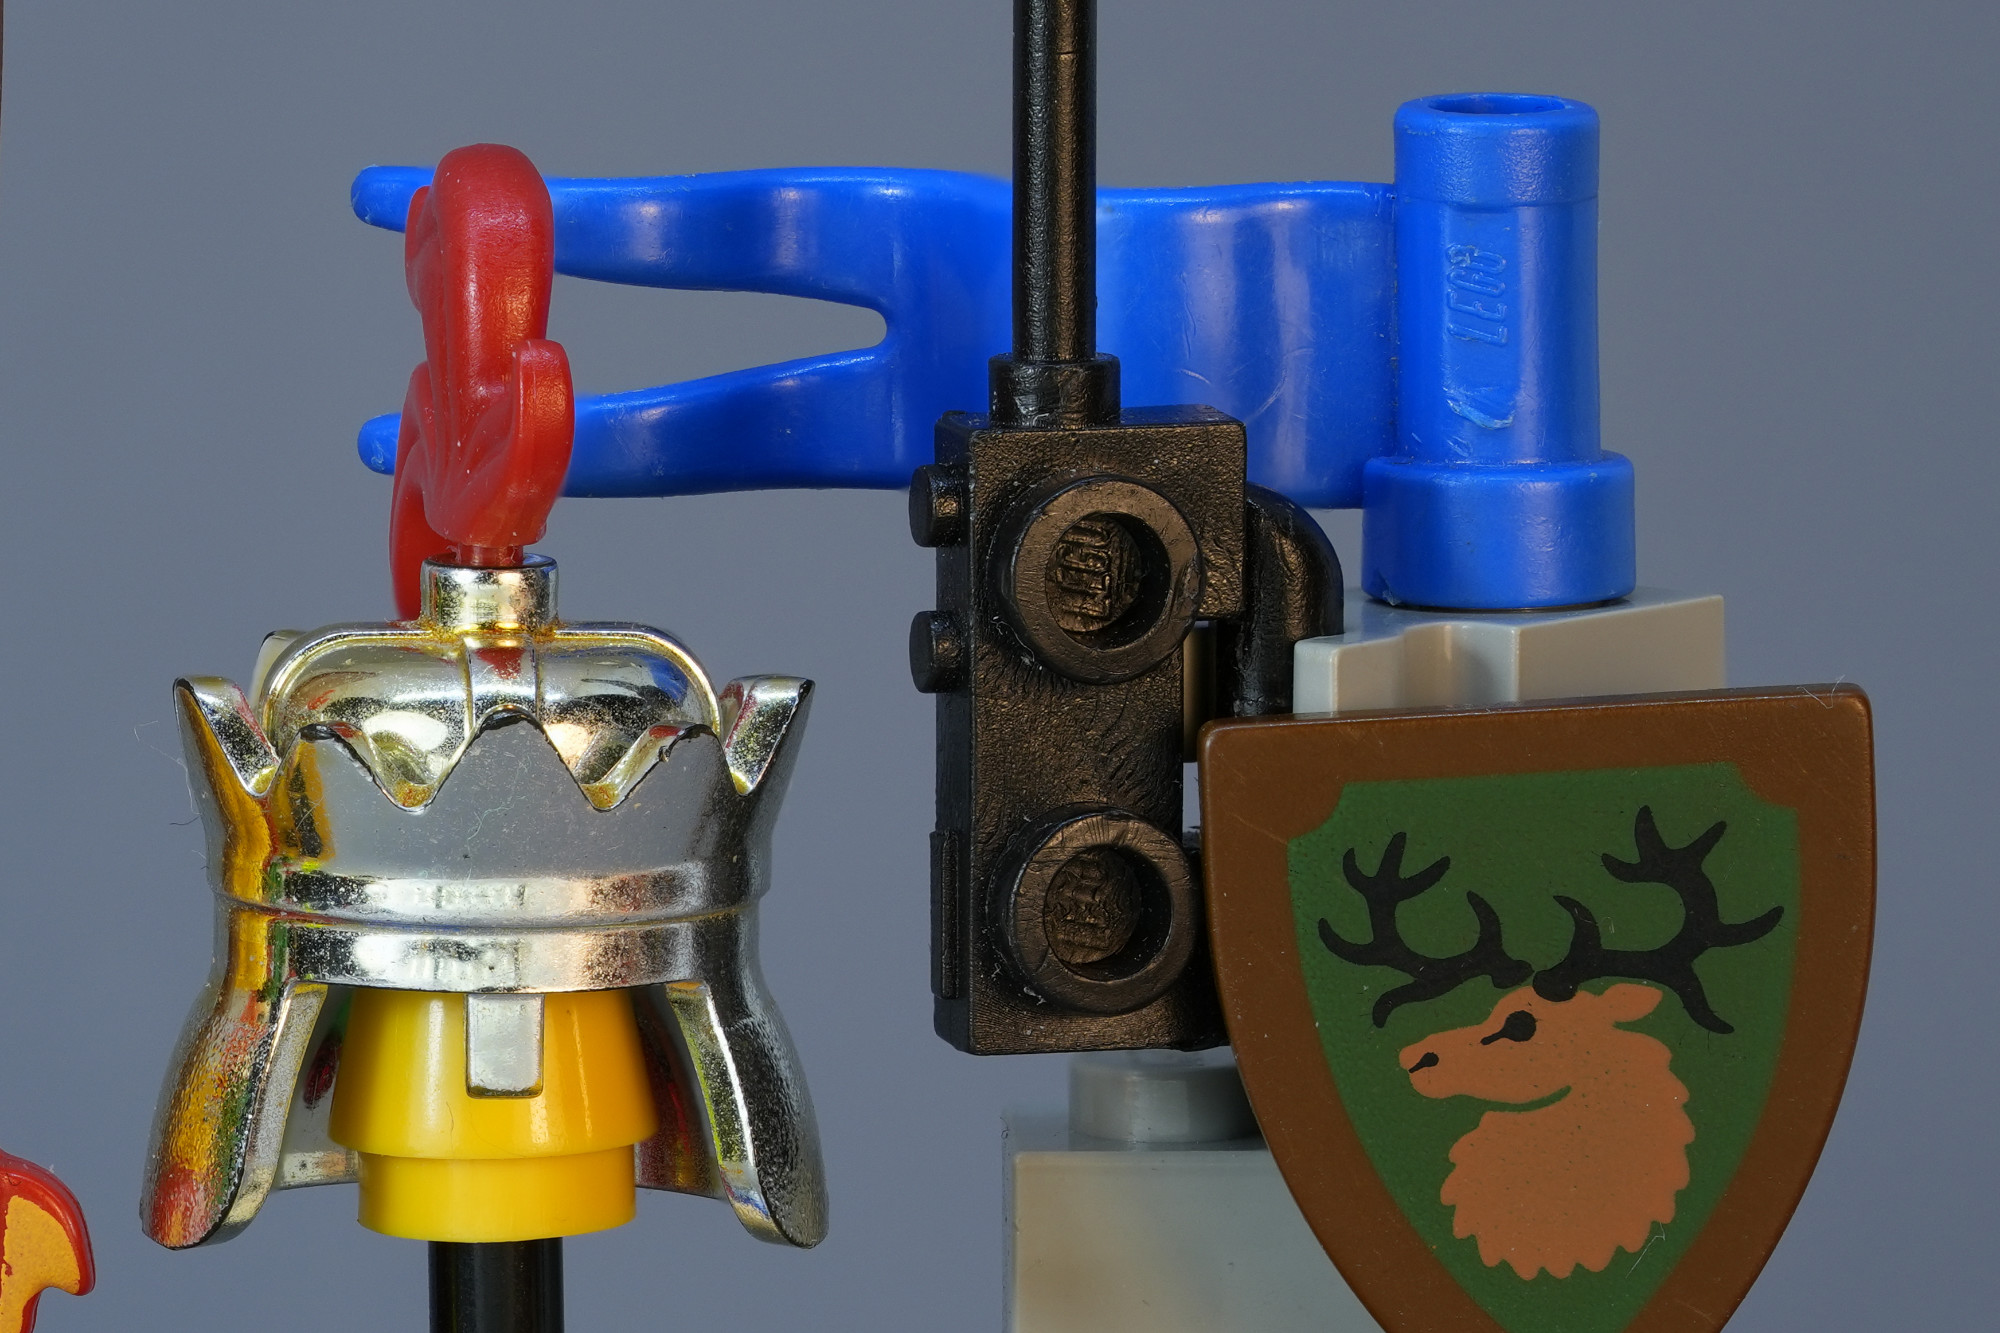
The good news is that Helicon comes with excellent retouching tools that let you get the best out of both worlds. For example, we could start with Method C to get the good edges, and then we choose the image from the stack that is the sharpest for any given surface and paint over the glowy highlights. Below screenshot also shows why intersecting objects in depth are such a problem. The image which is the sharpest for his torso/hips has a huge blur on the edge of his cutlass. Considering this, it’s actually impressive Helicon was able to deliver such a good result here.
In hindsight, it was actually a good choice to go with f/8 instead of f/5.6. The latter would have resulted in even stronger blur for overlapping objects. Maybe we would have also needed more images with smaller increments, which would have made any clean up work more tedious.
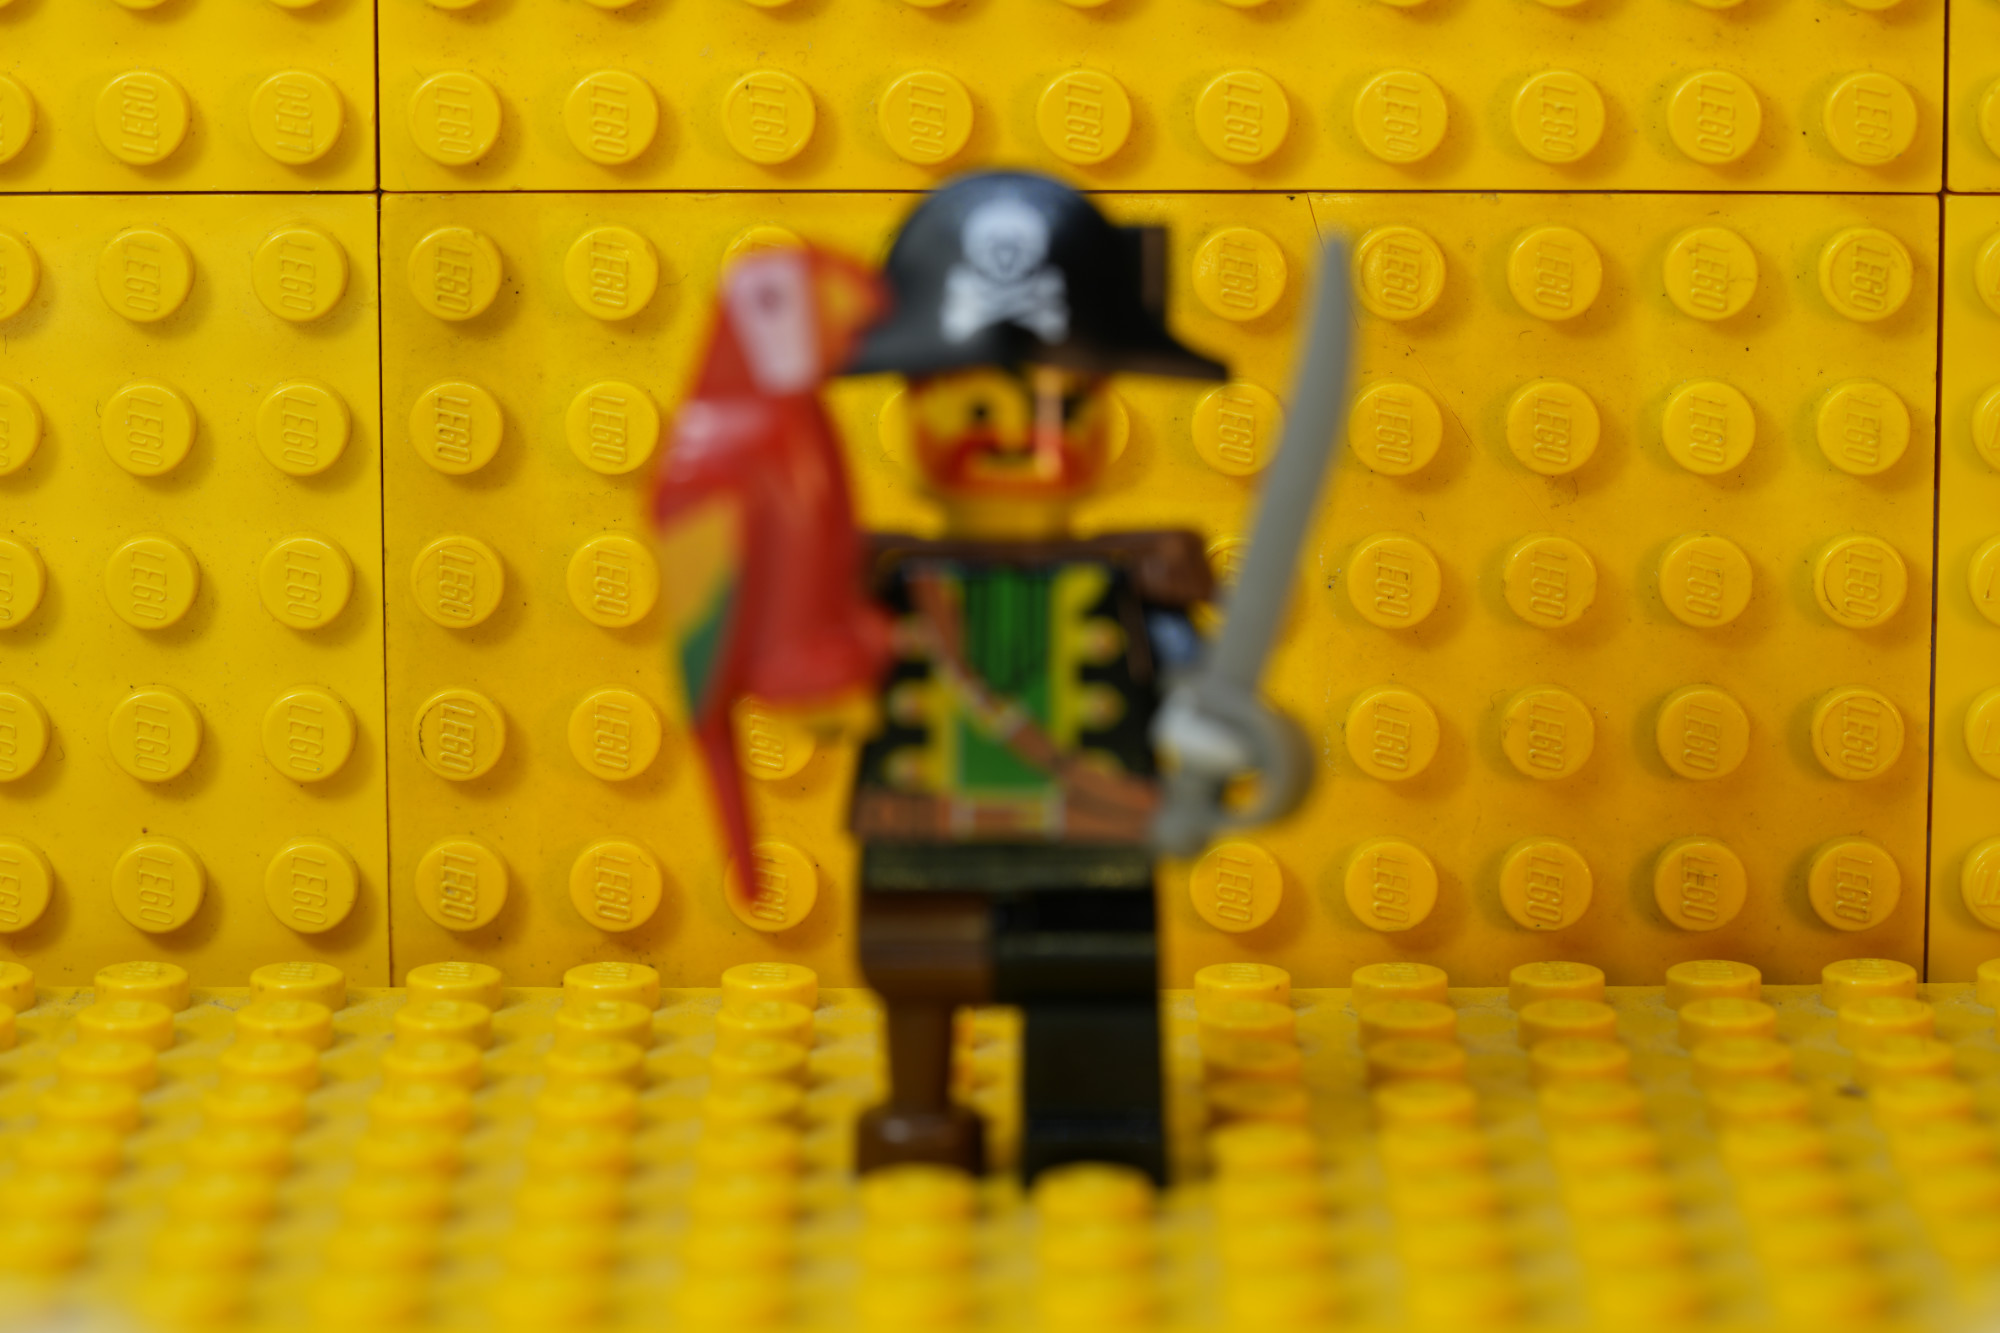
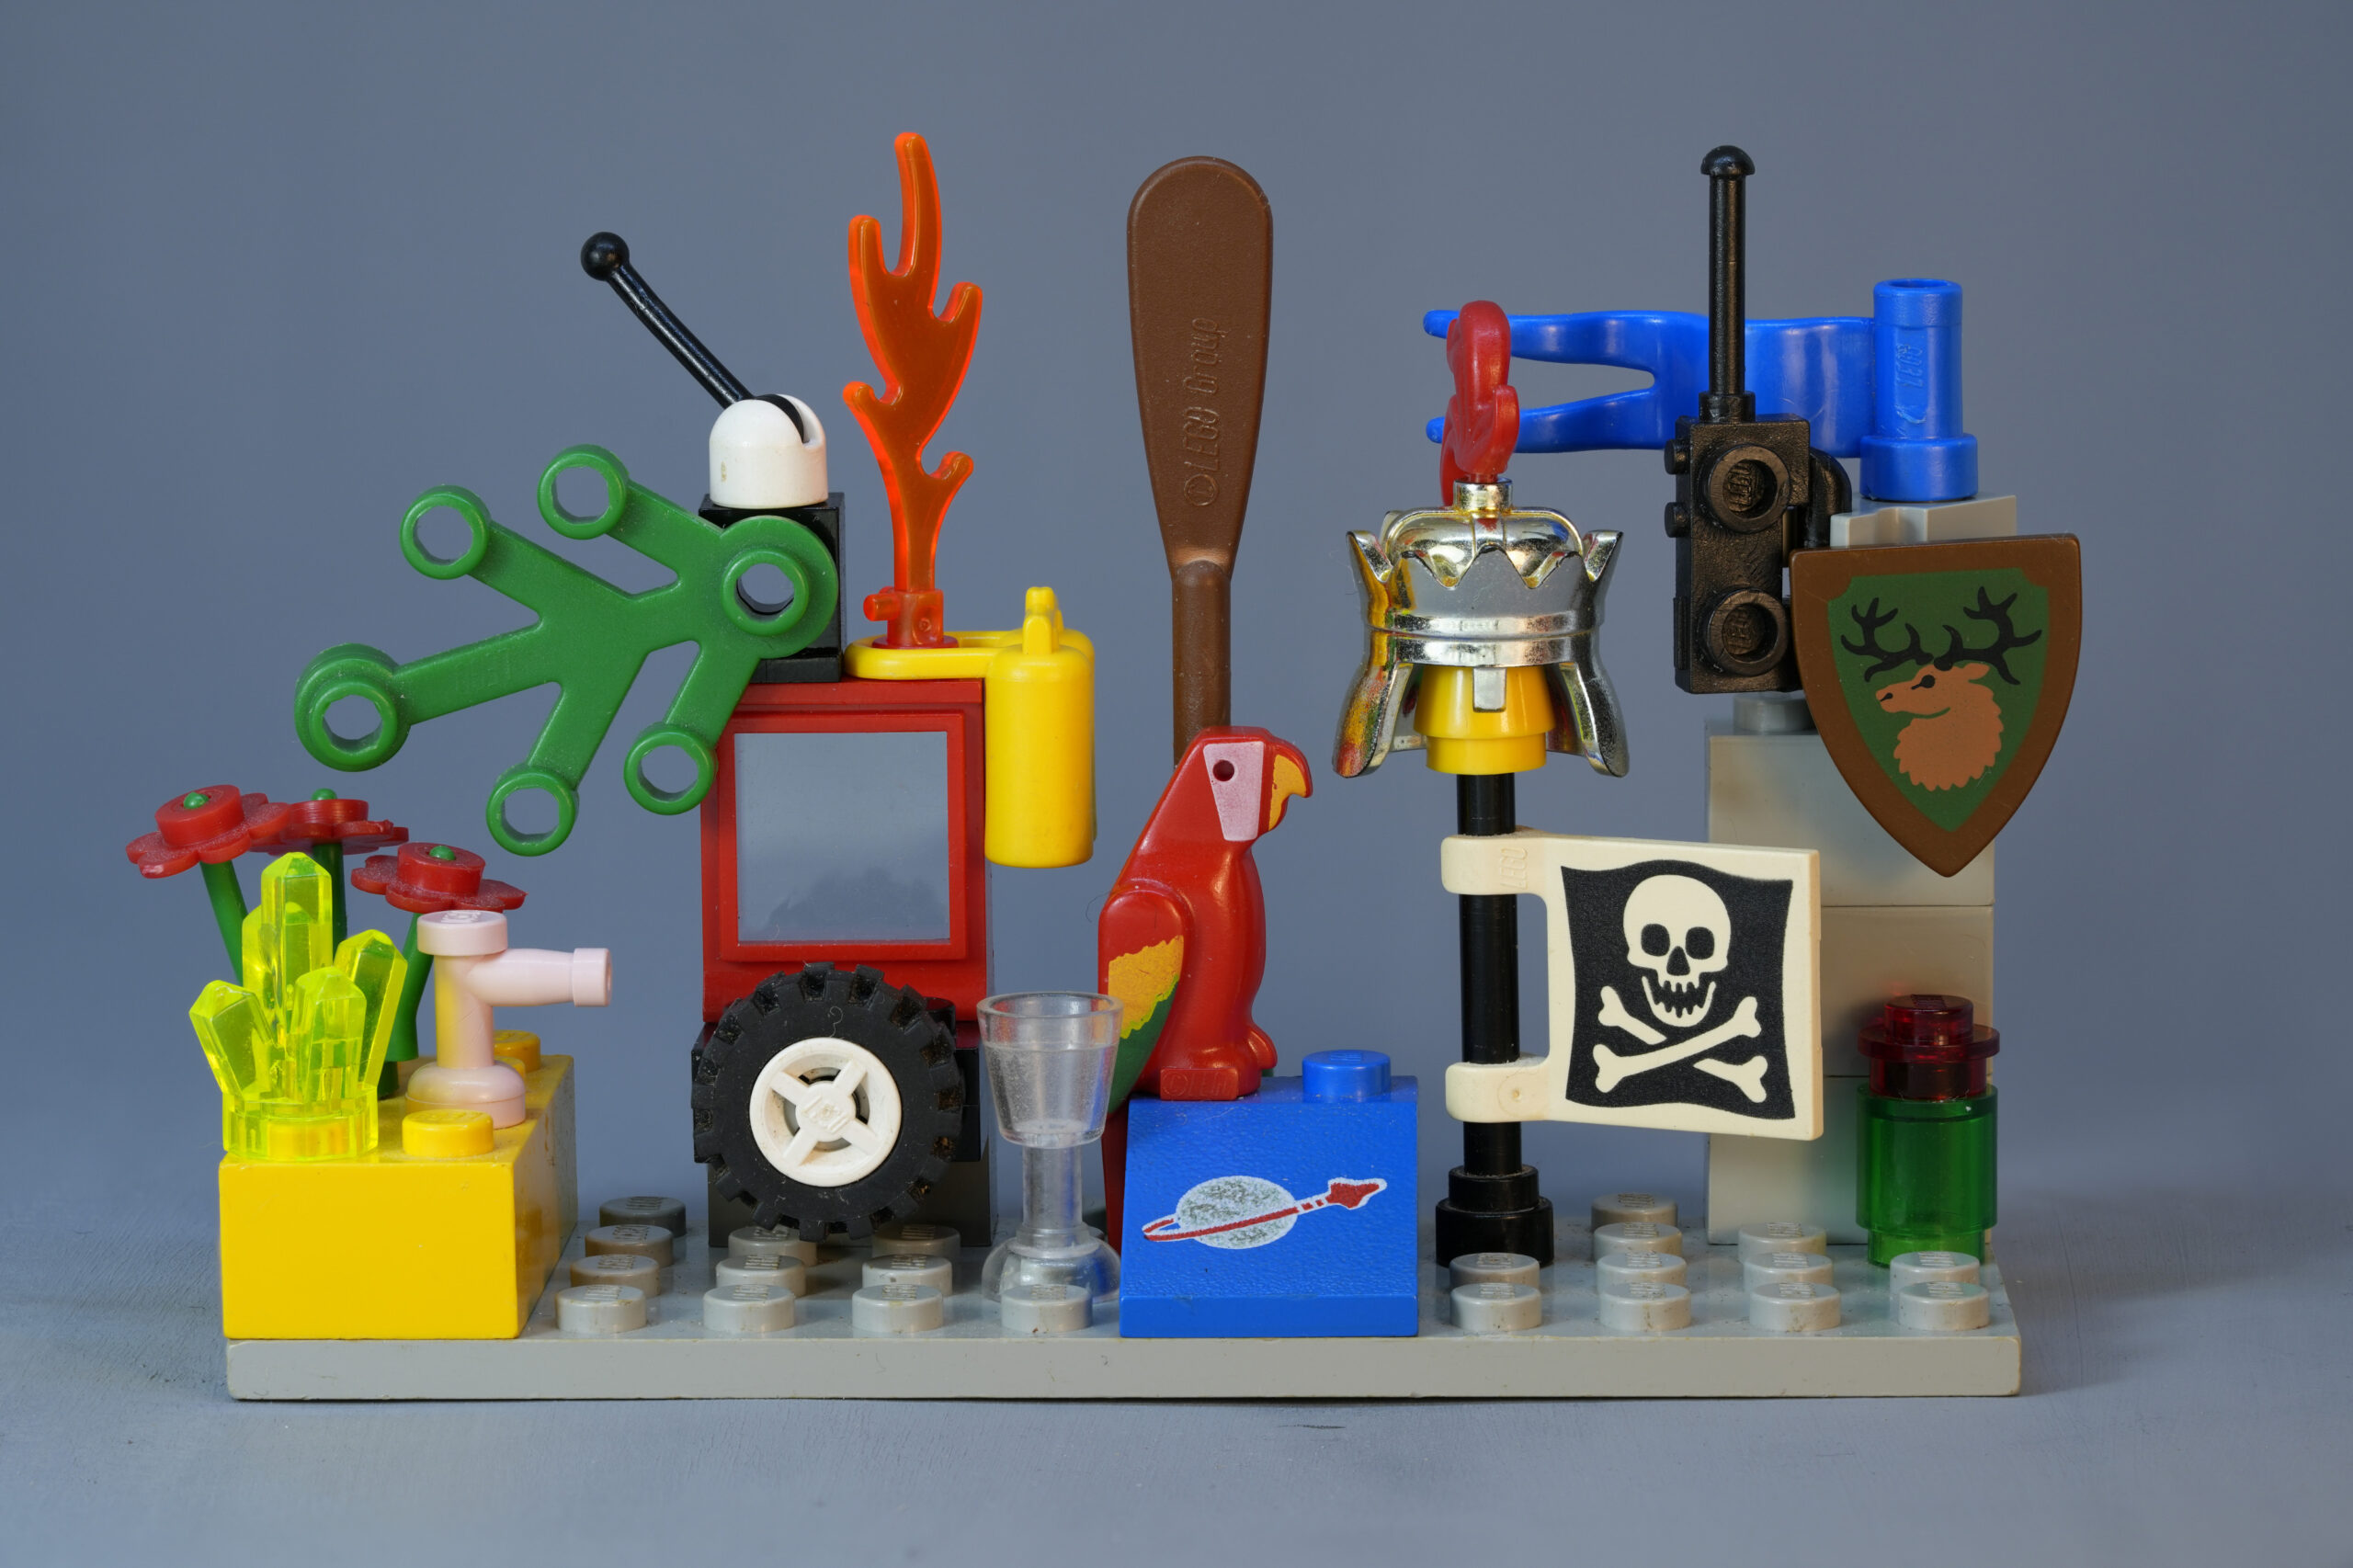
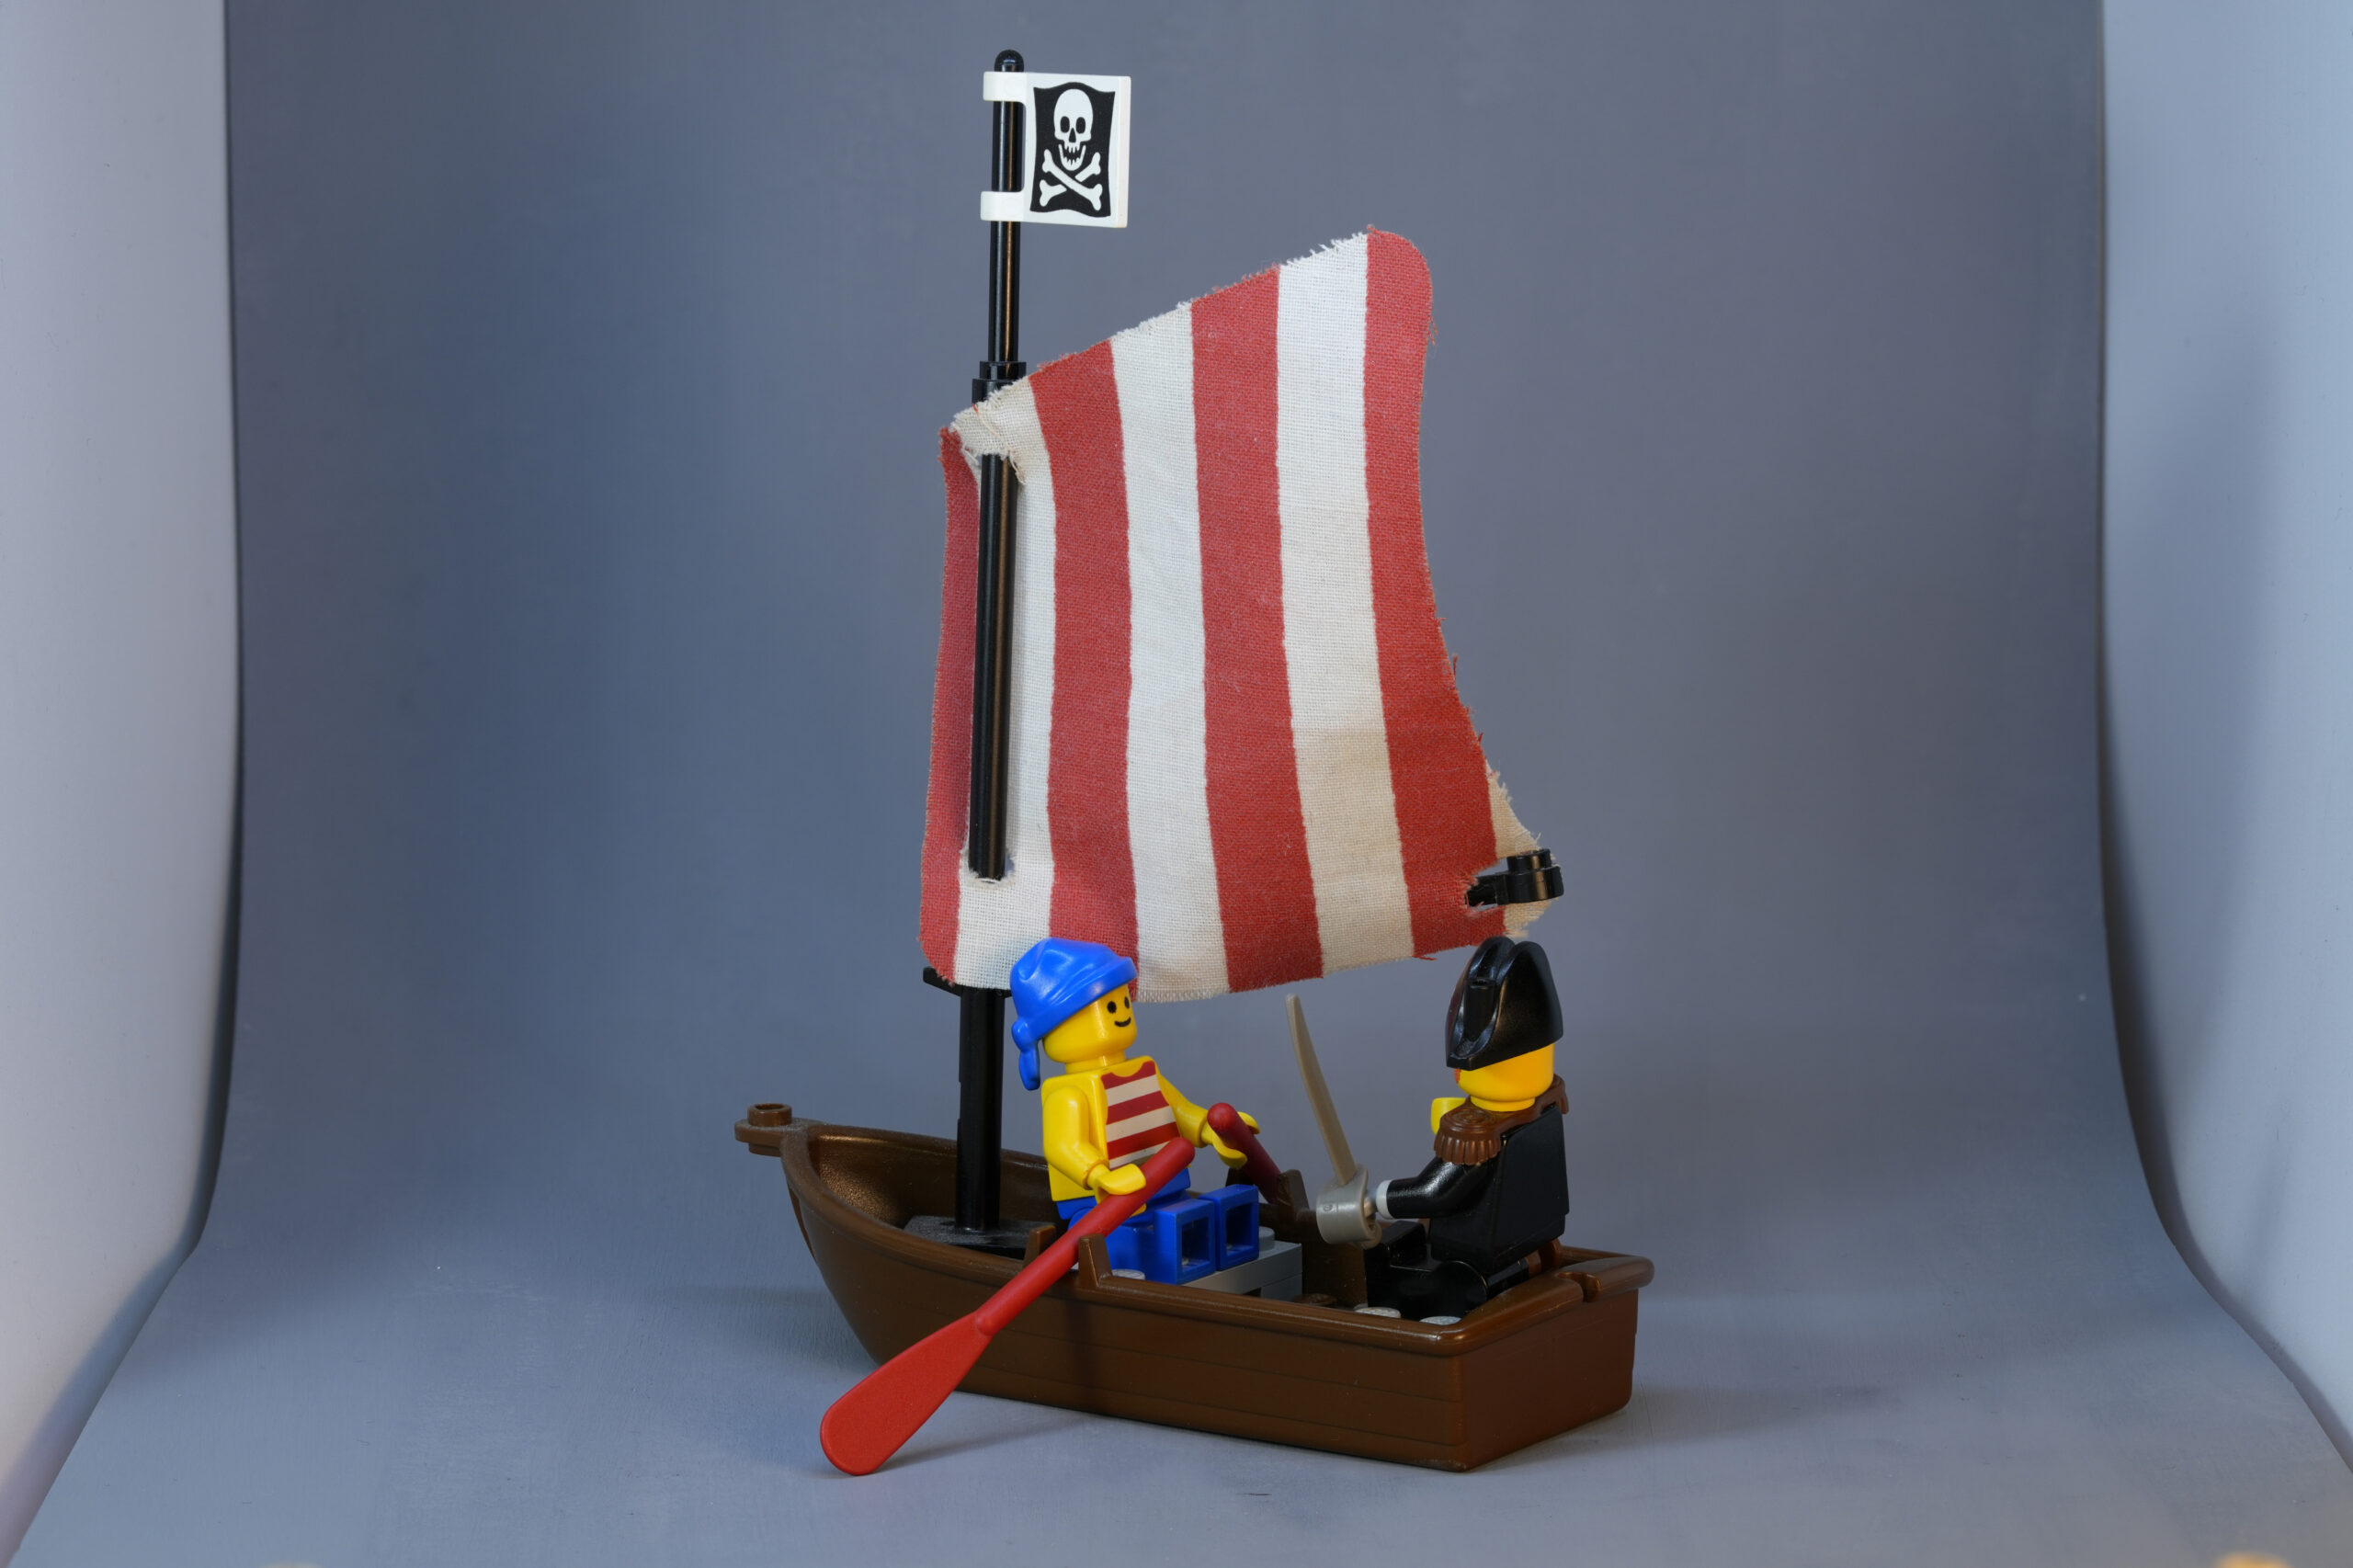
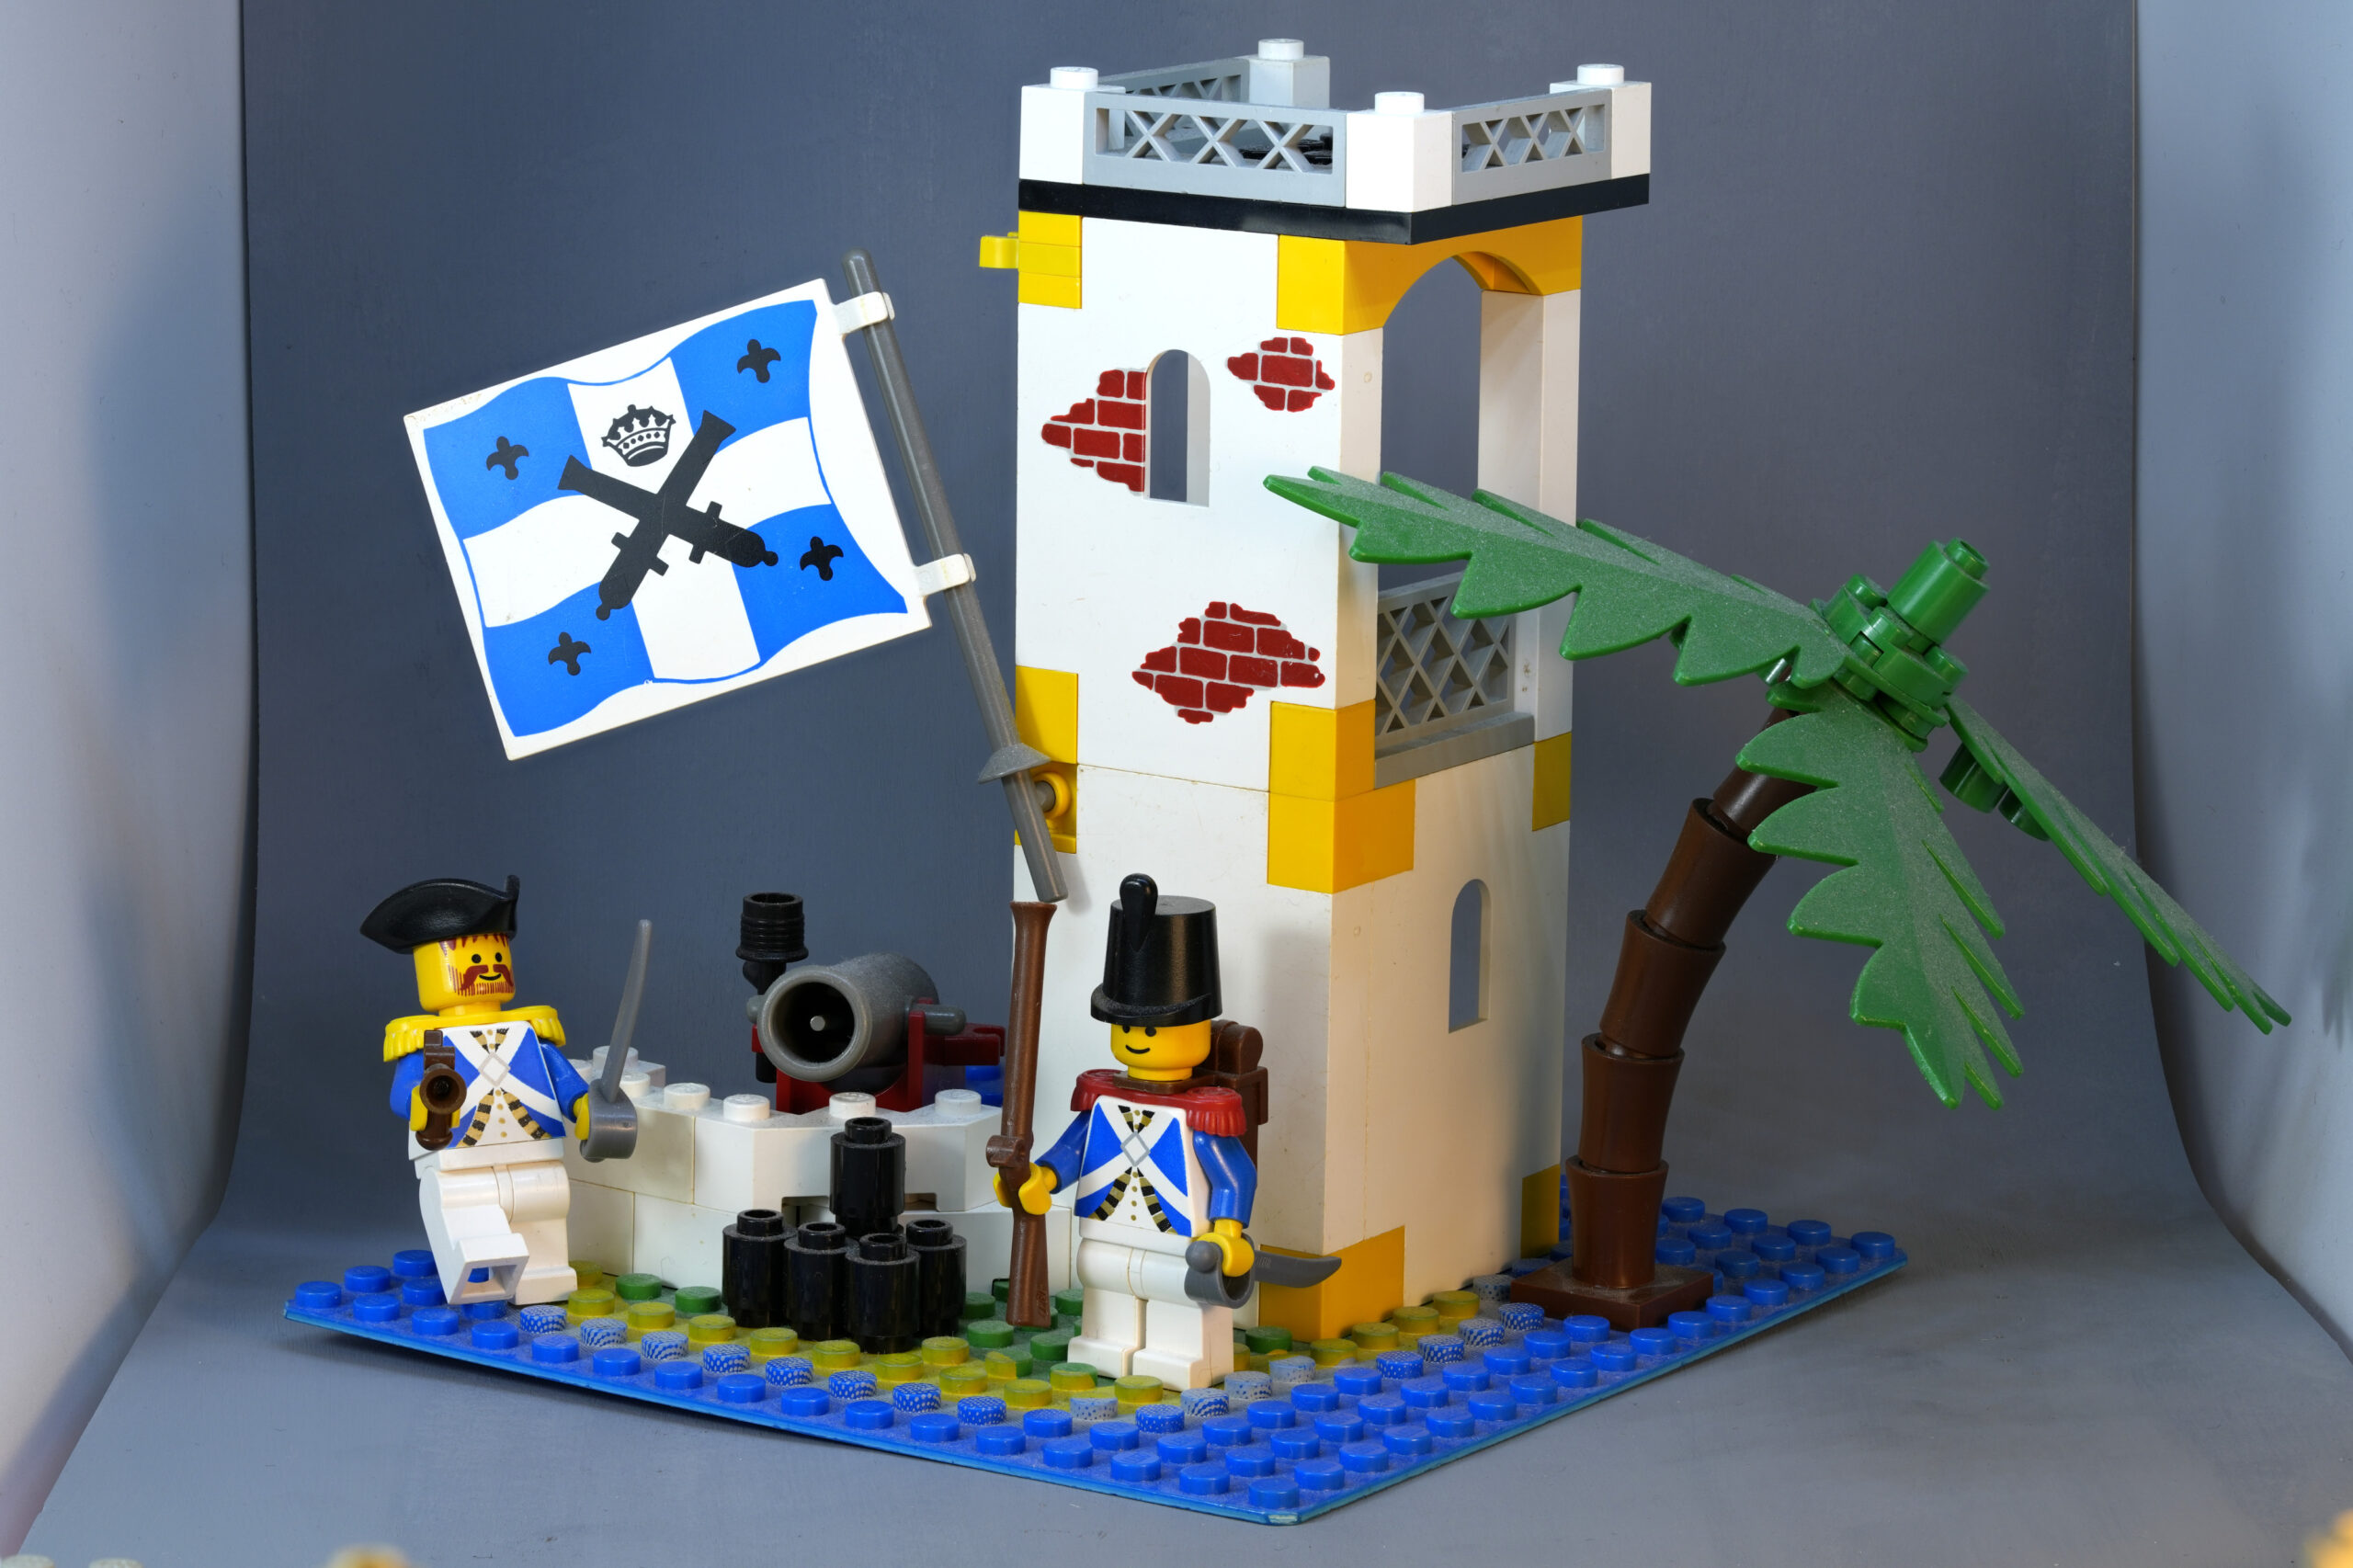
Results

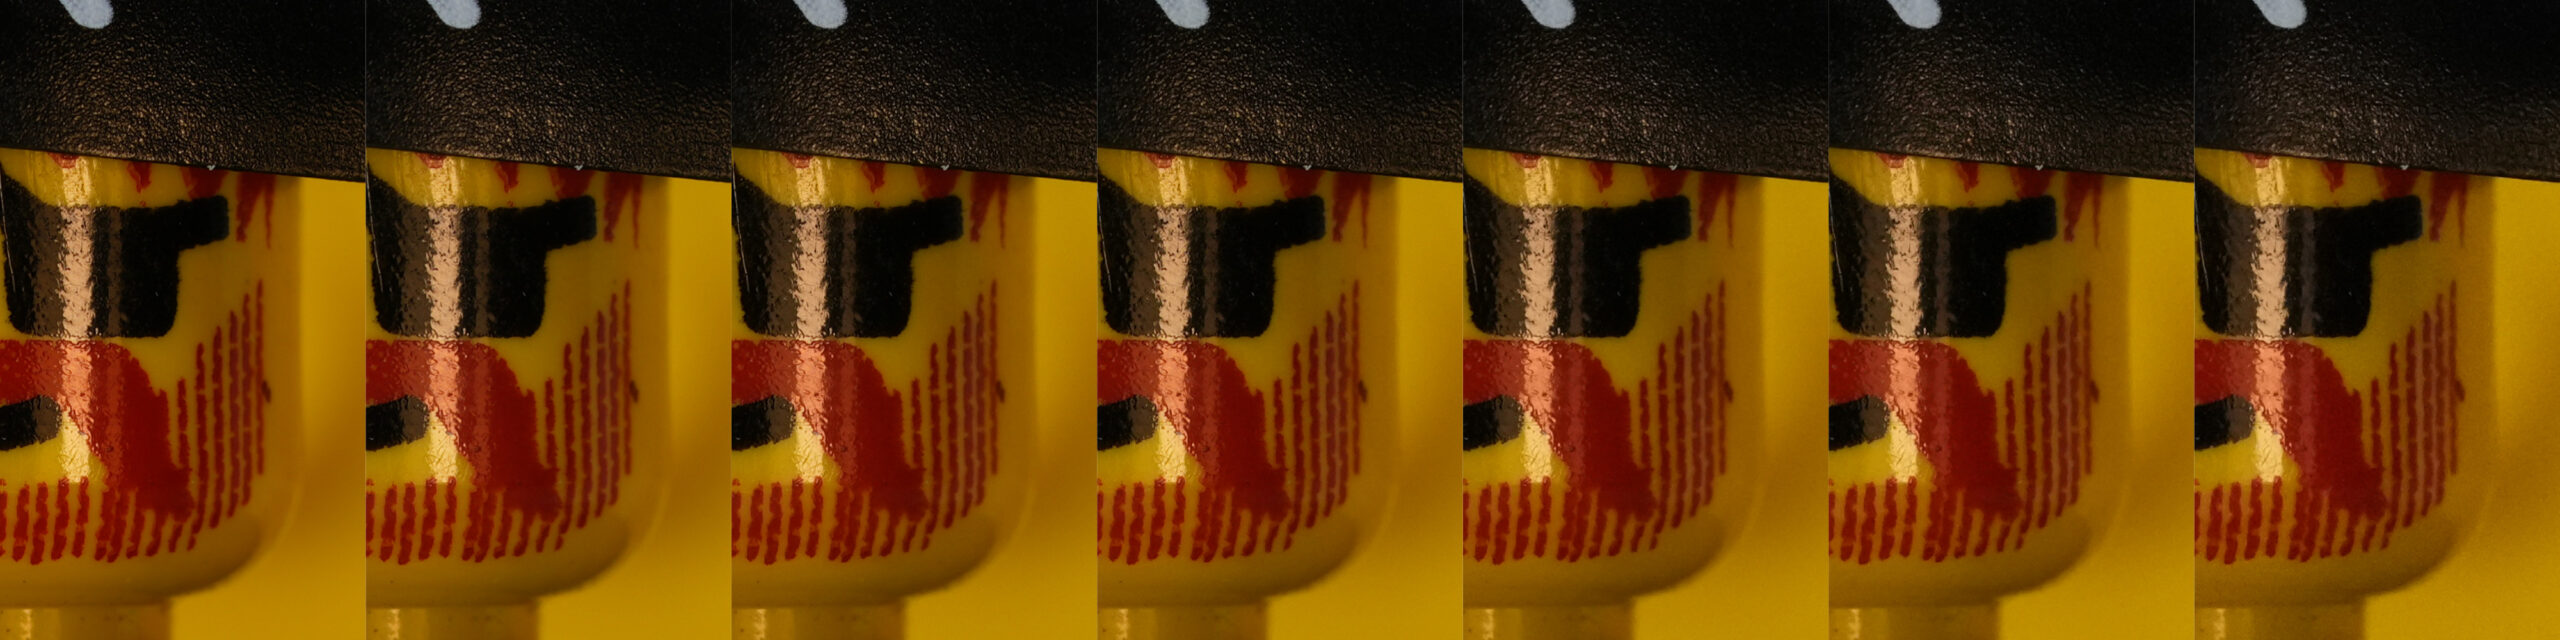
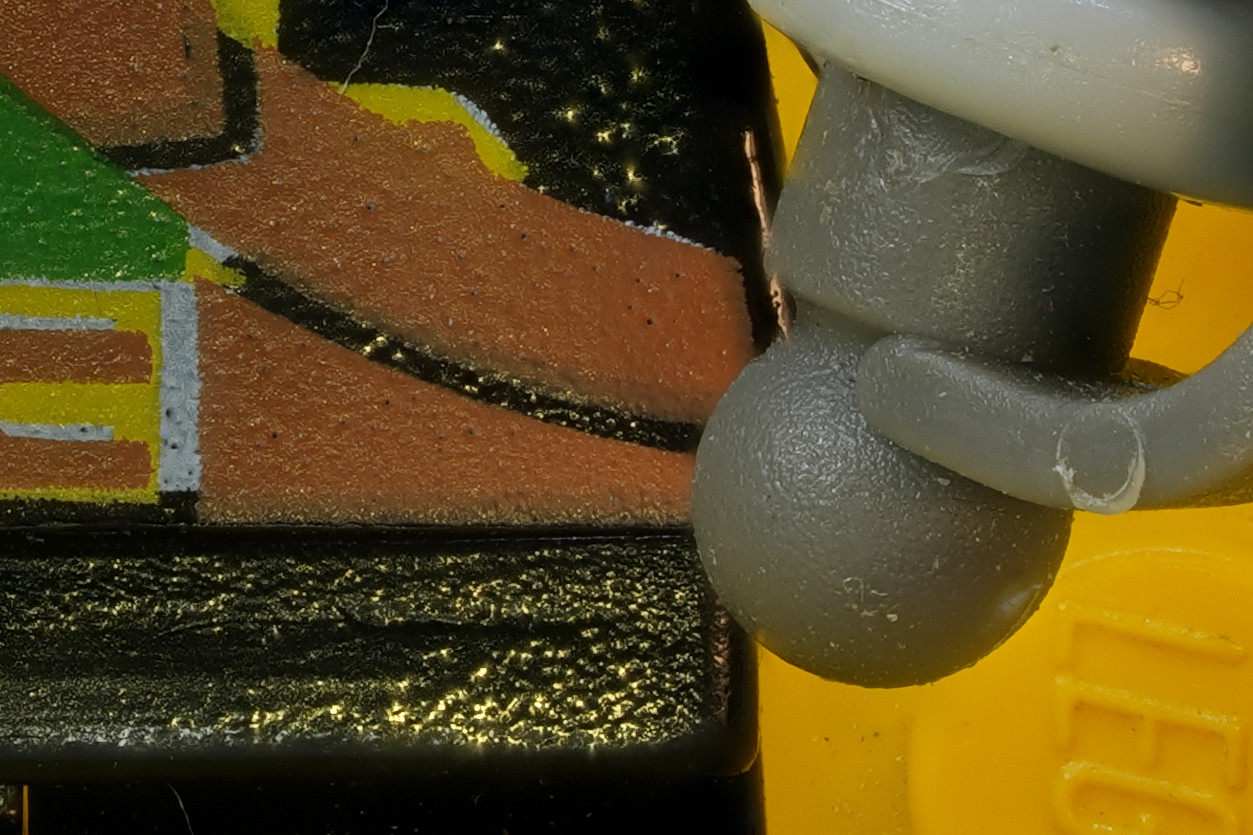
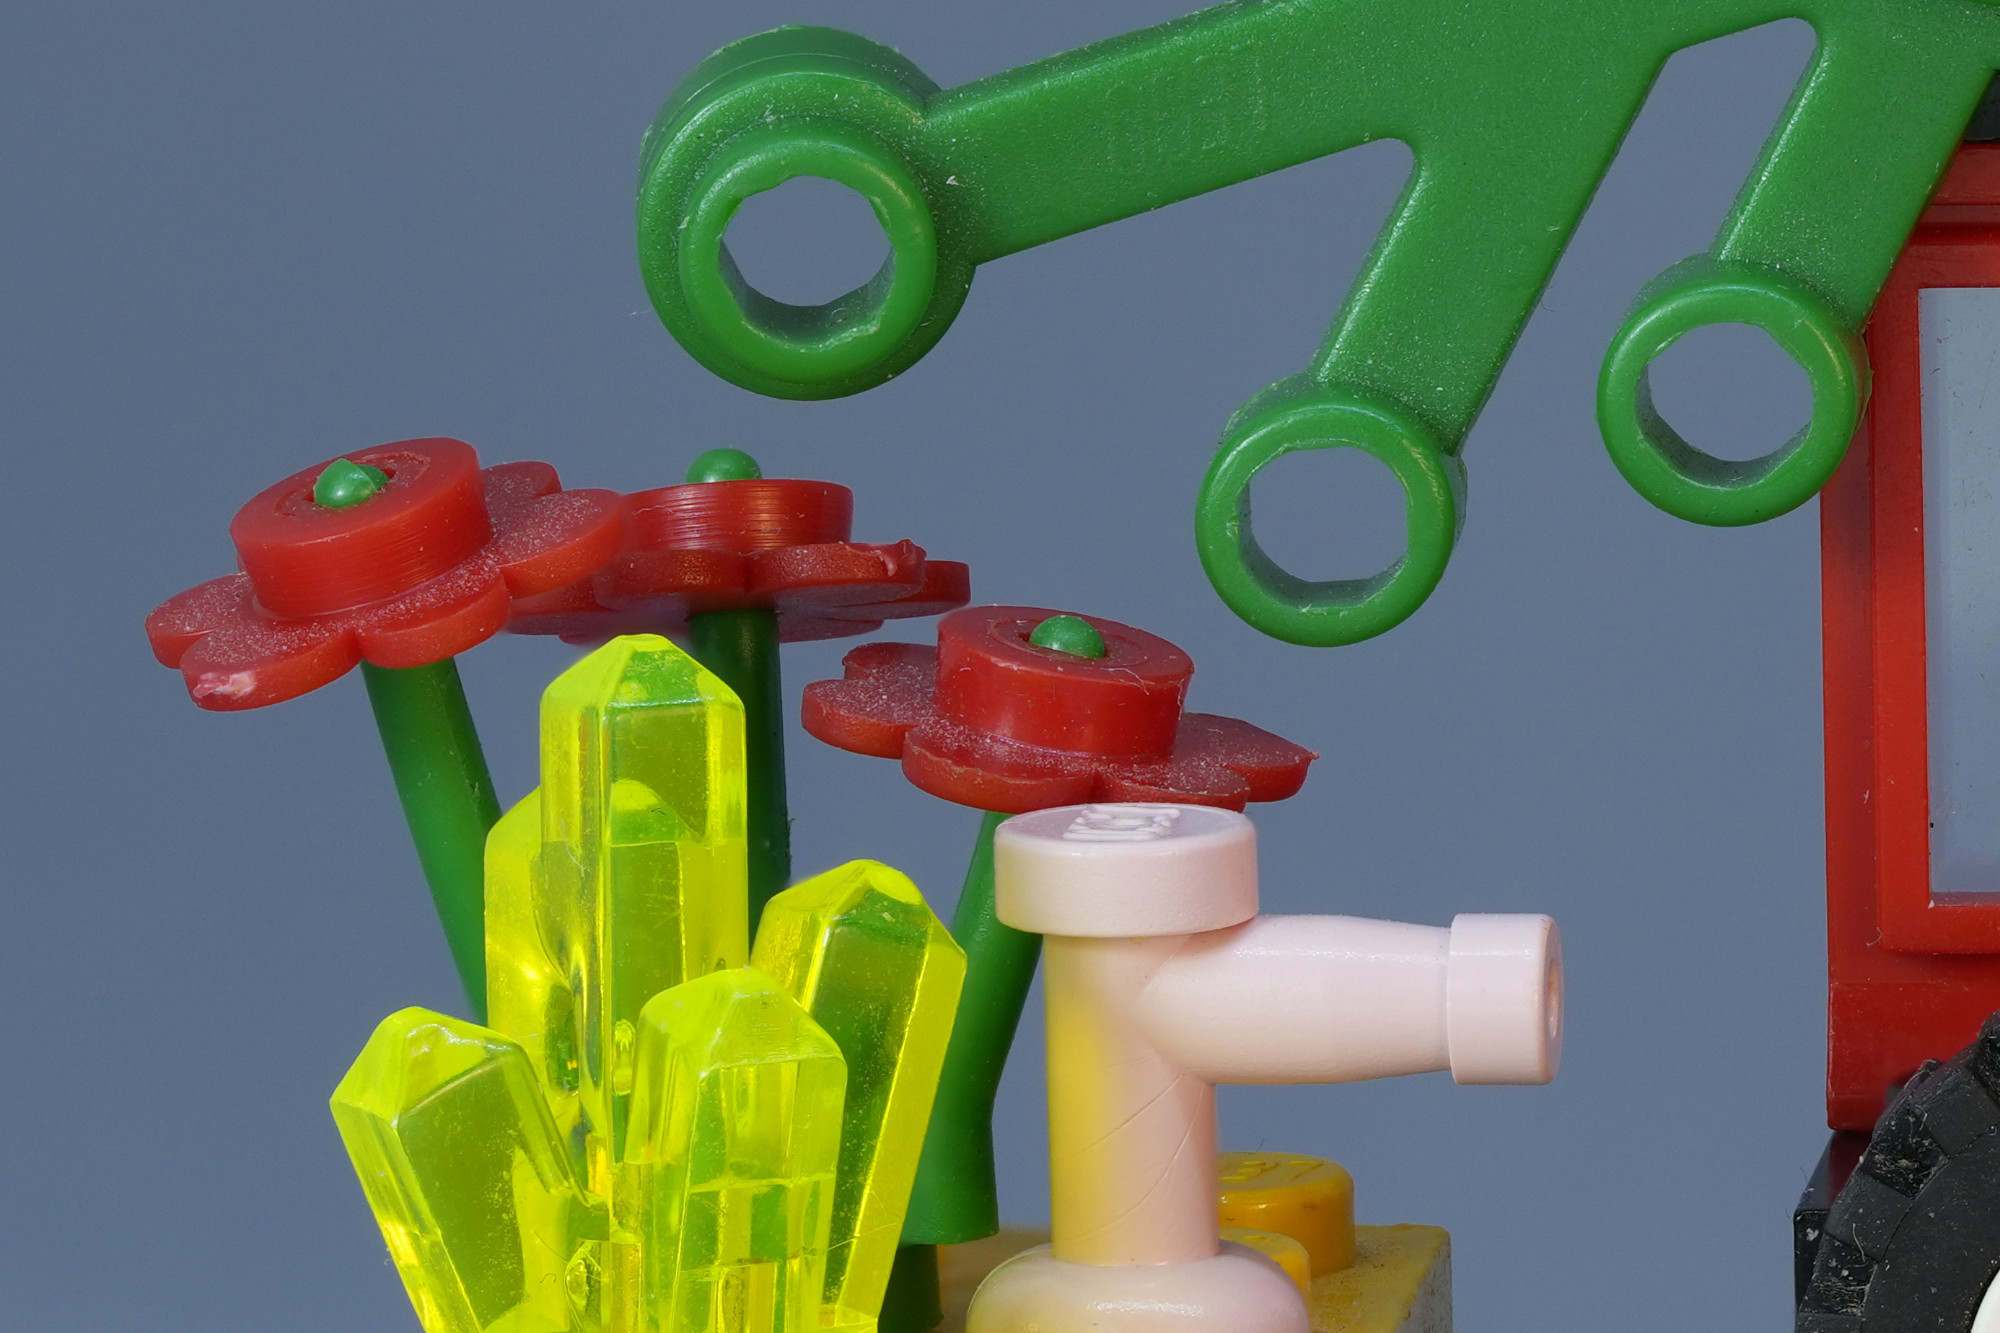
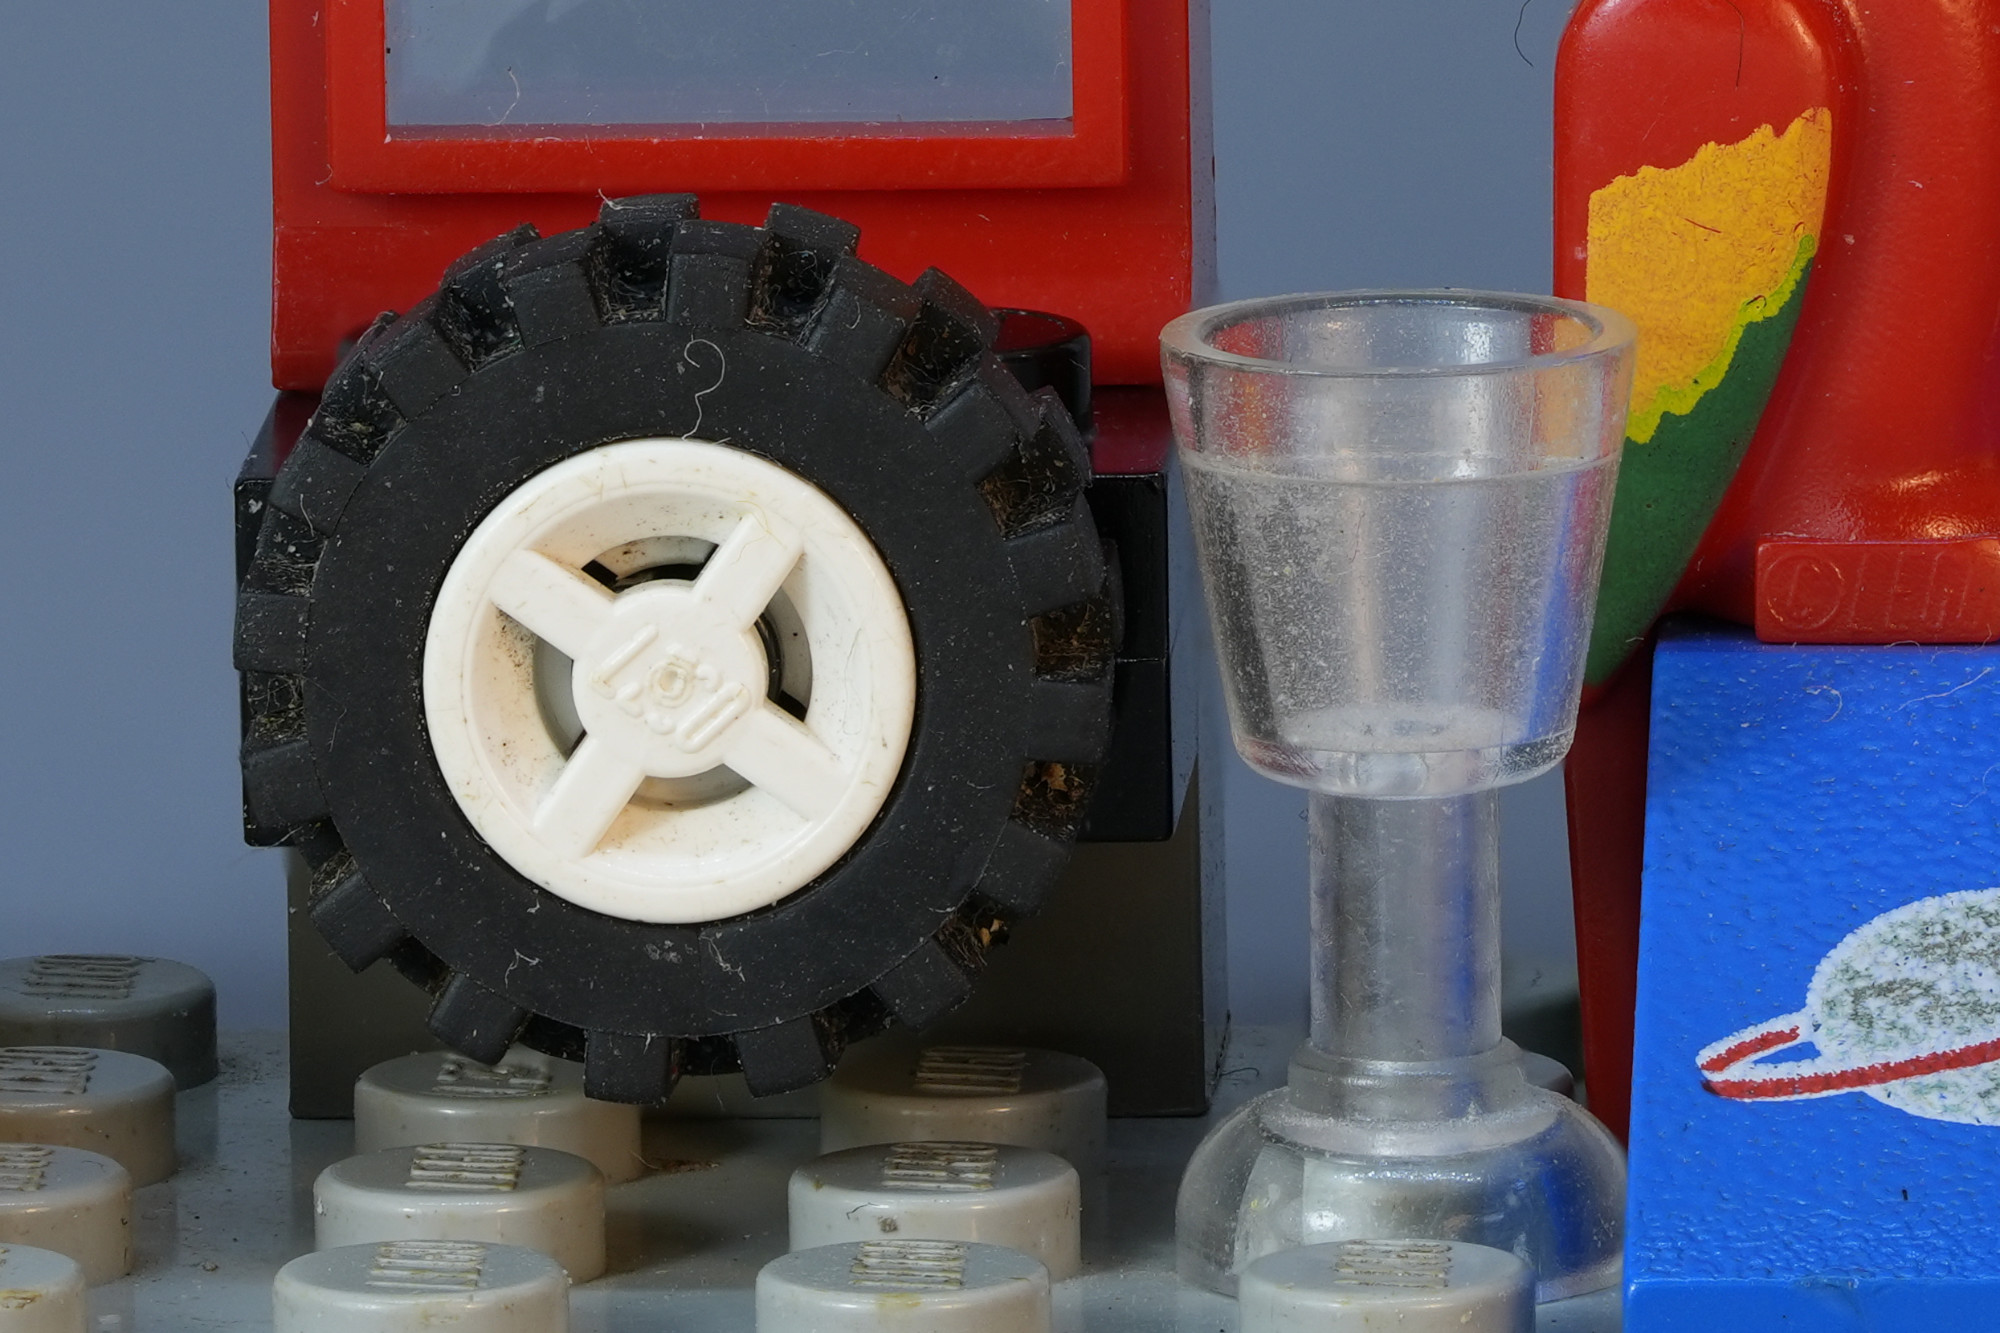
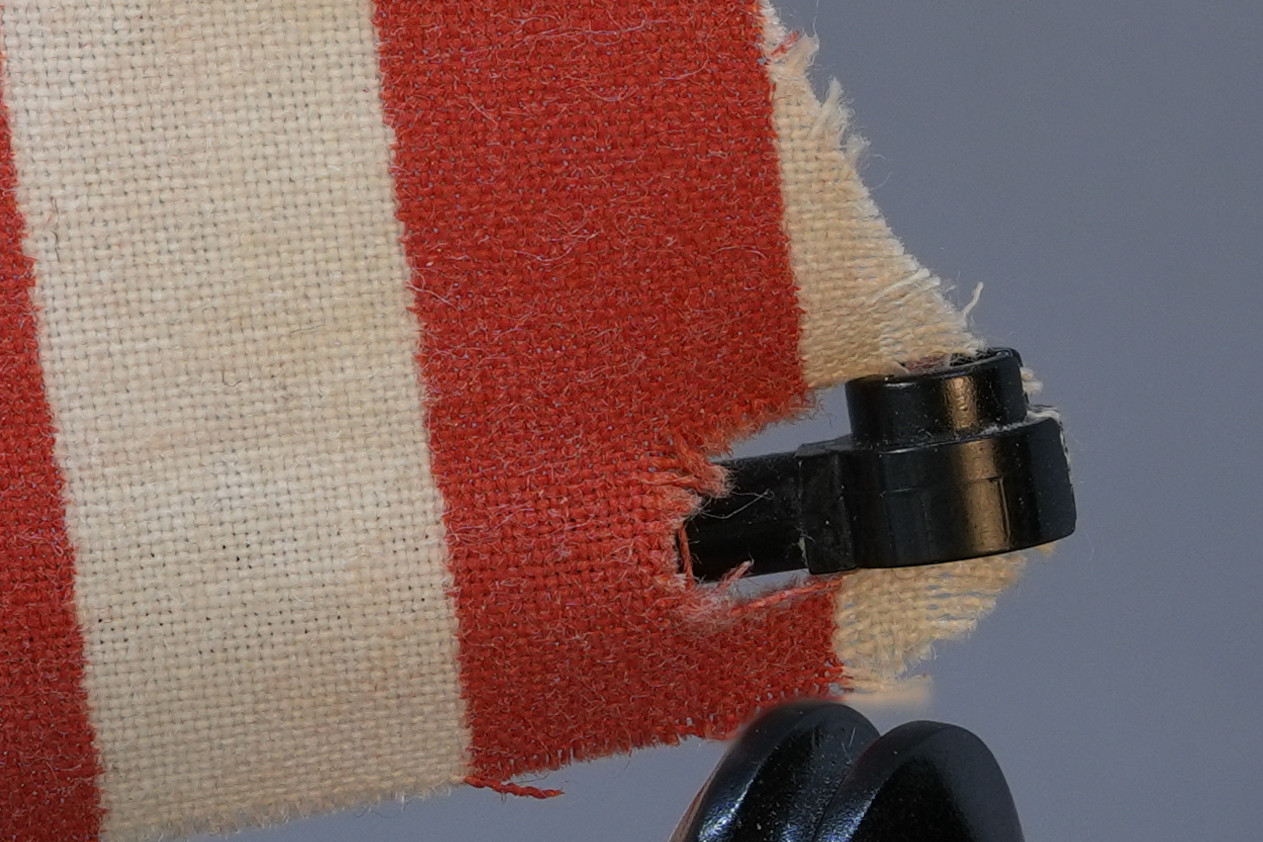
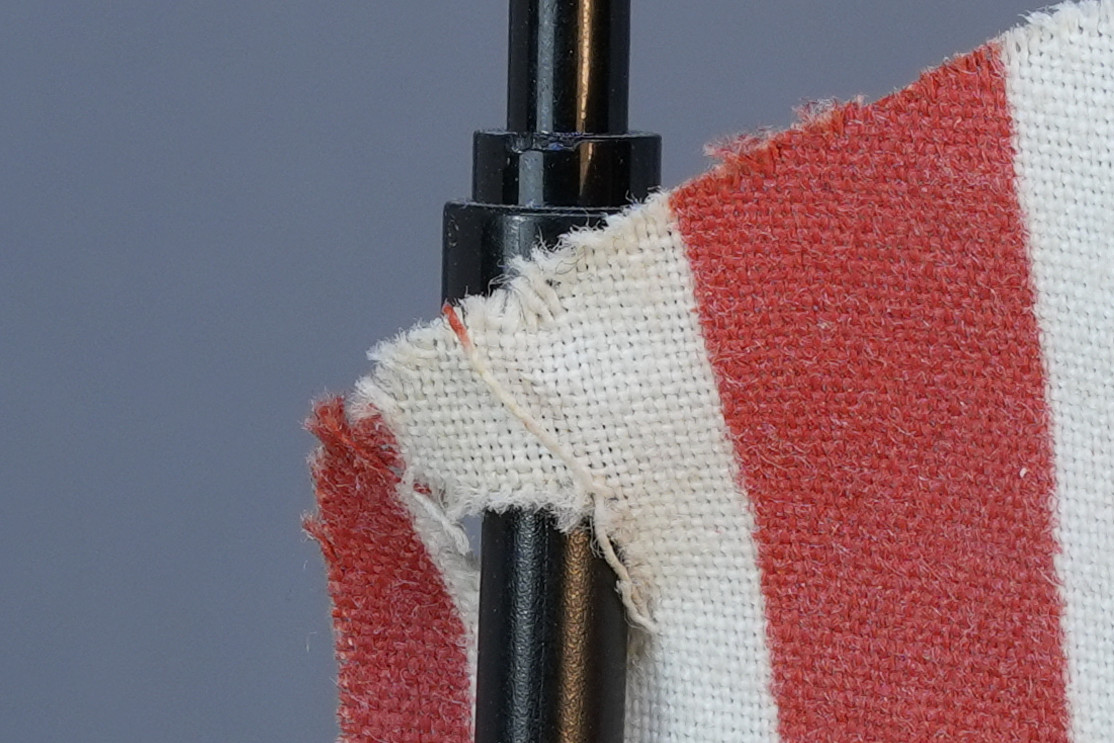
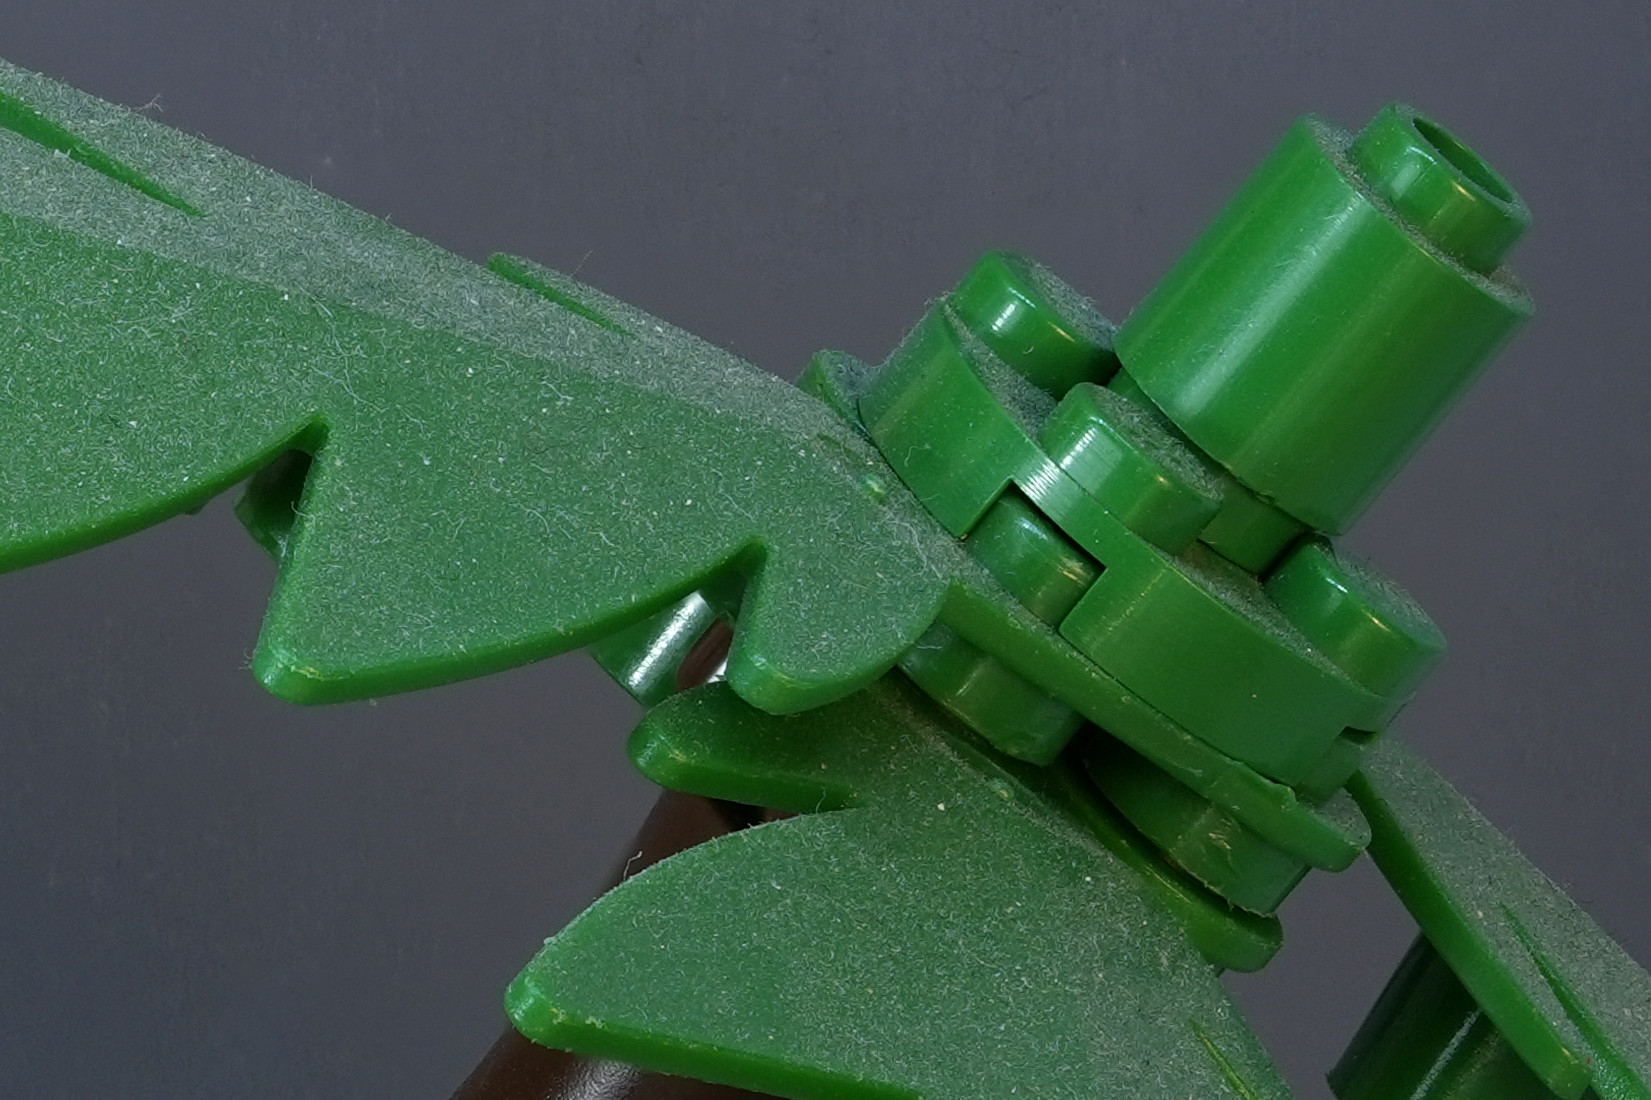
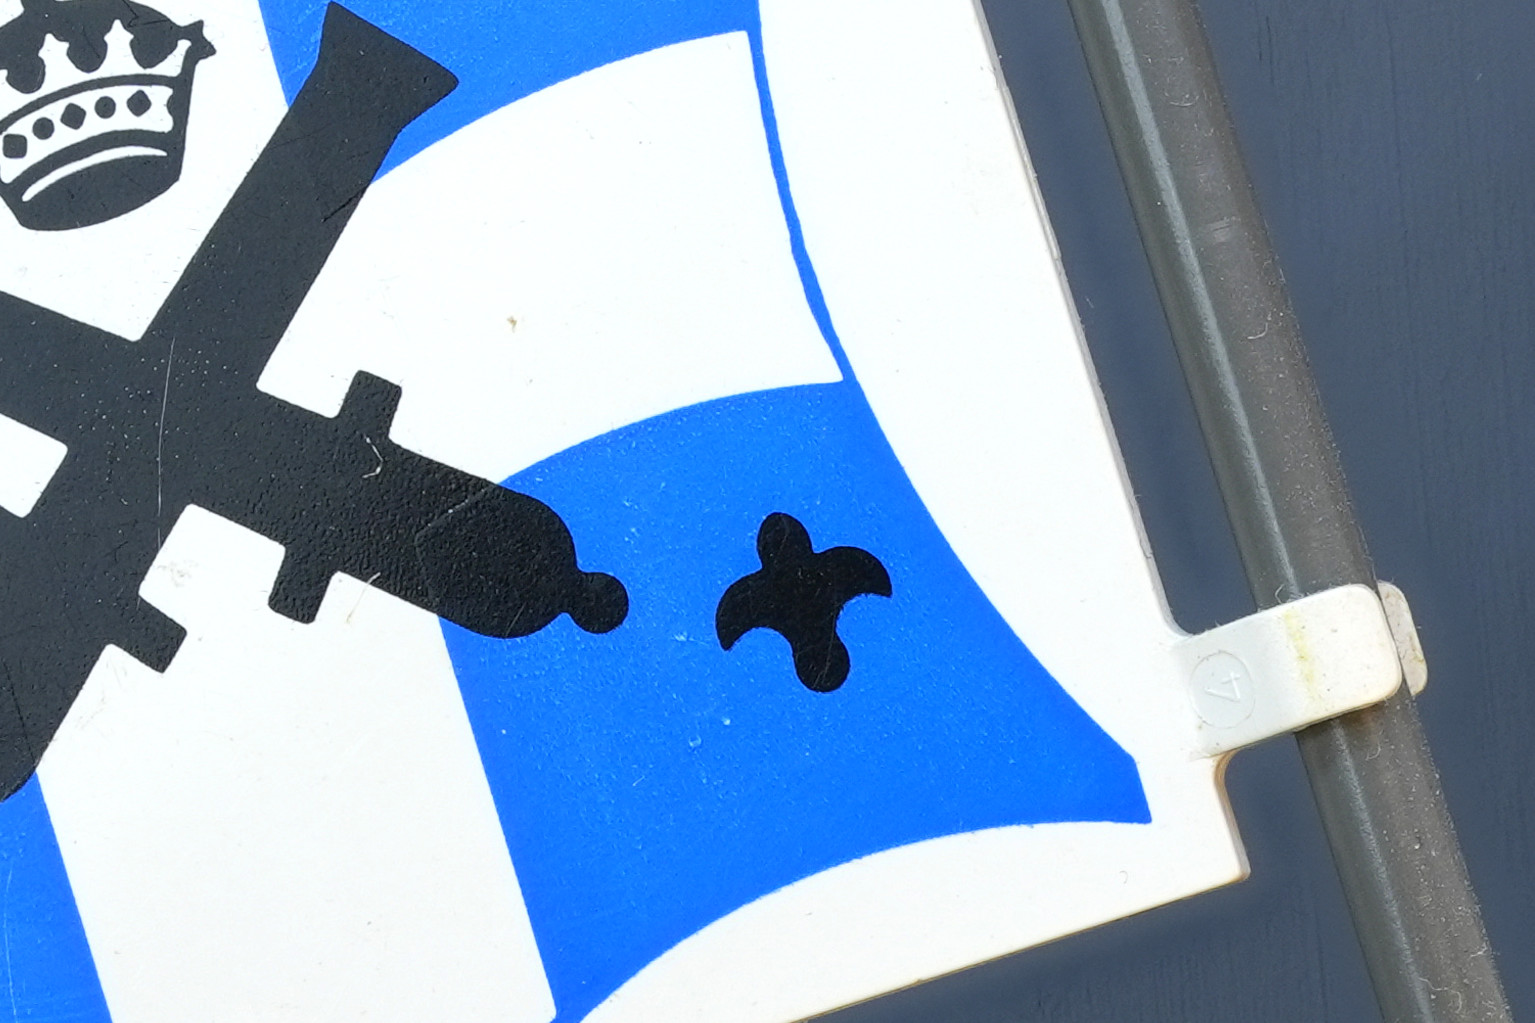
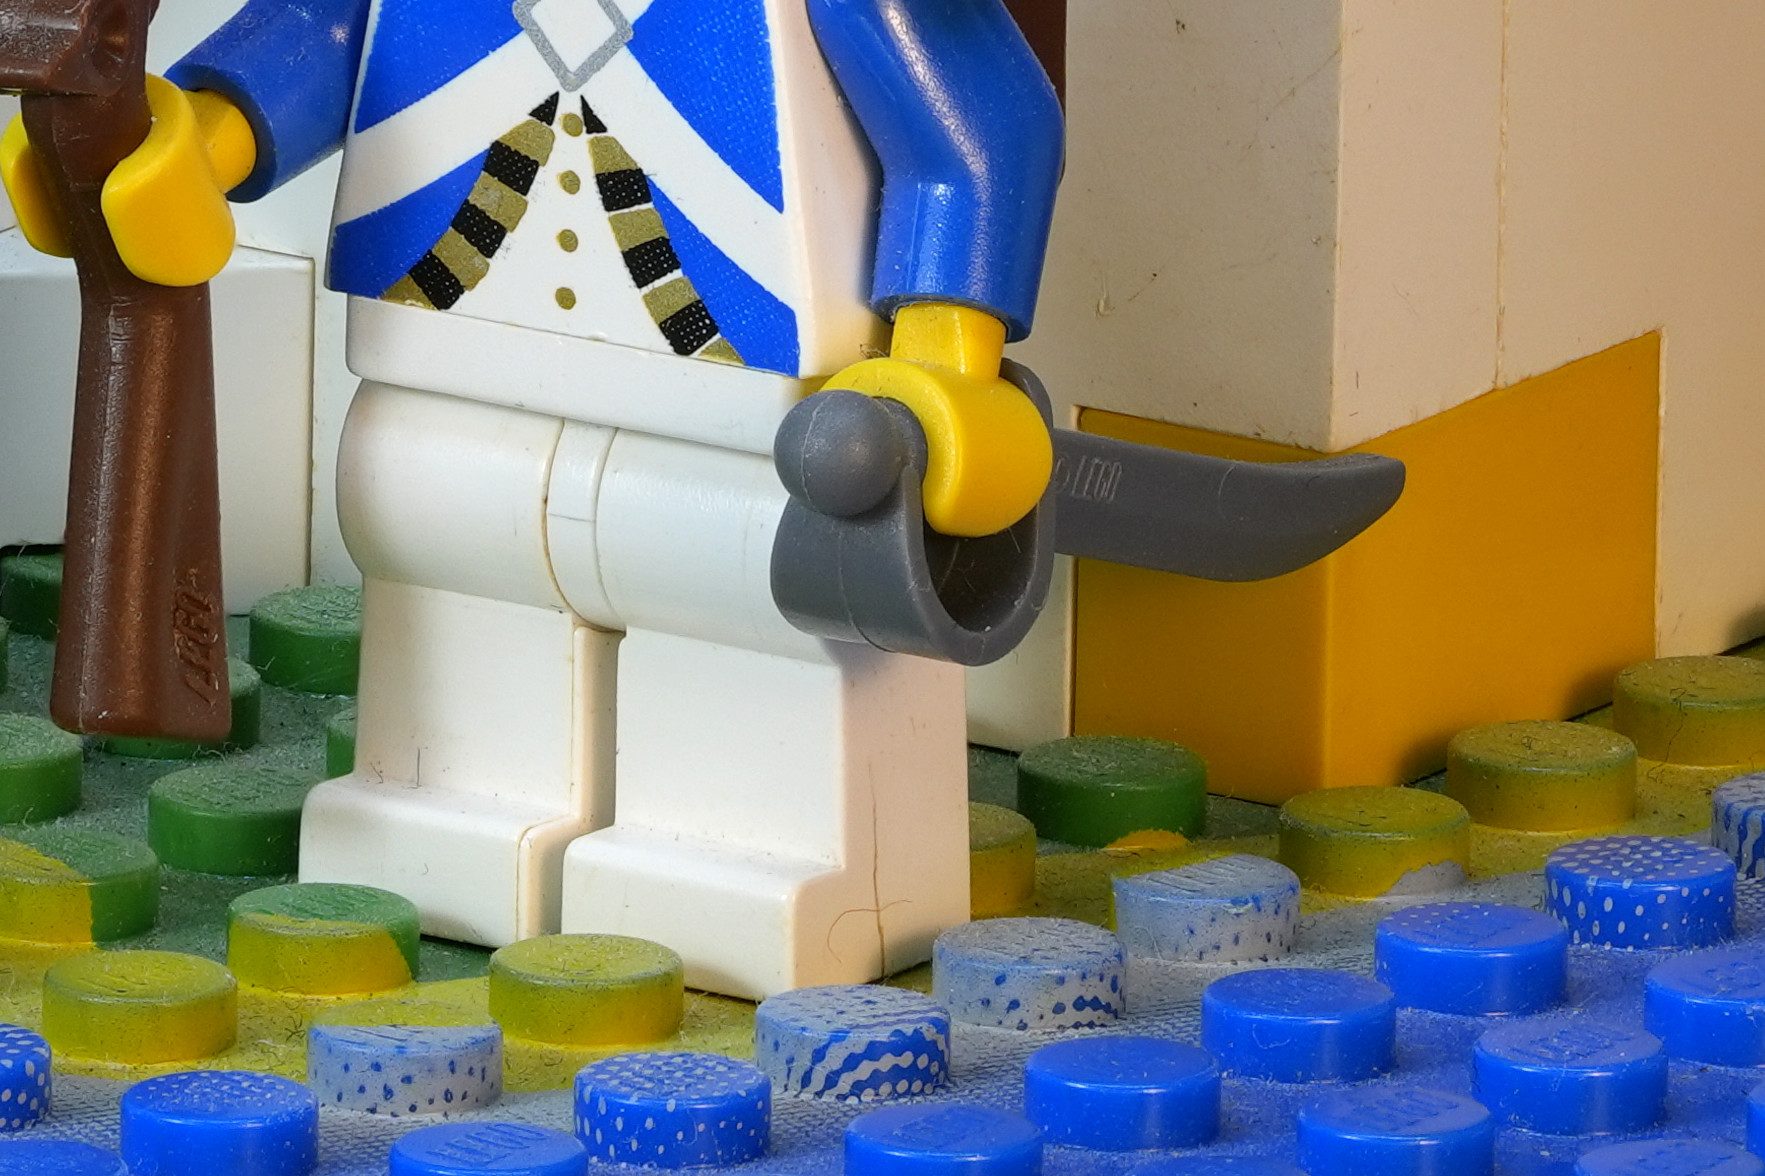
Some close ups cropped from the main photo
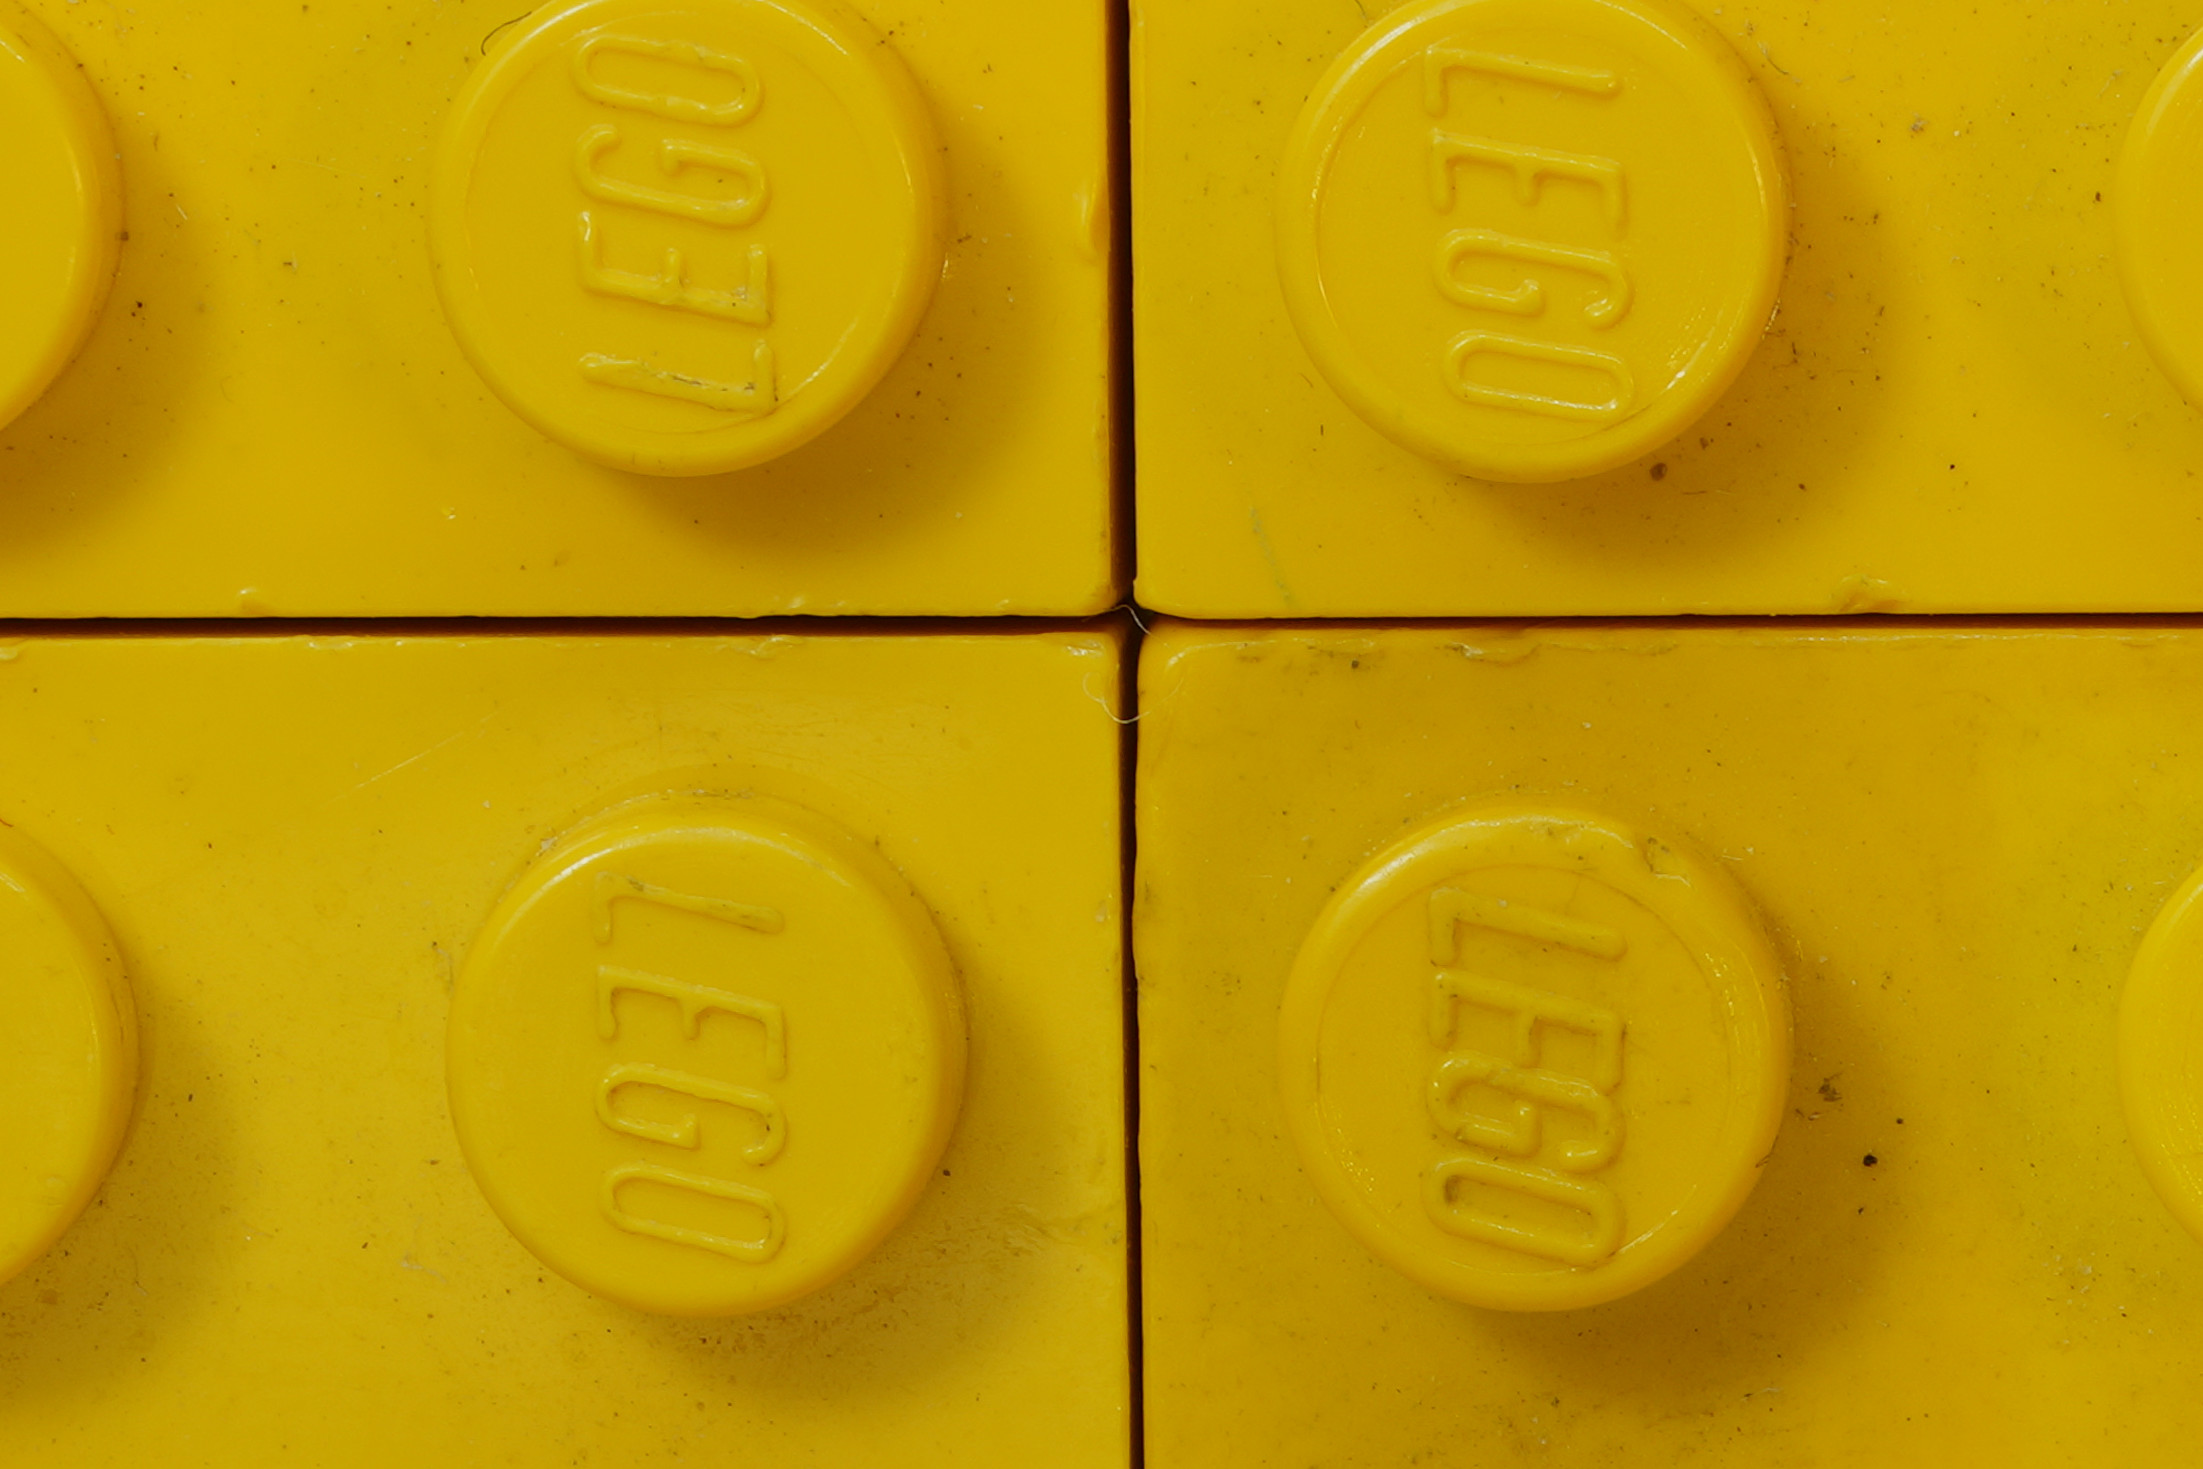
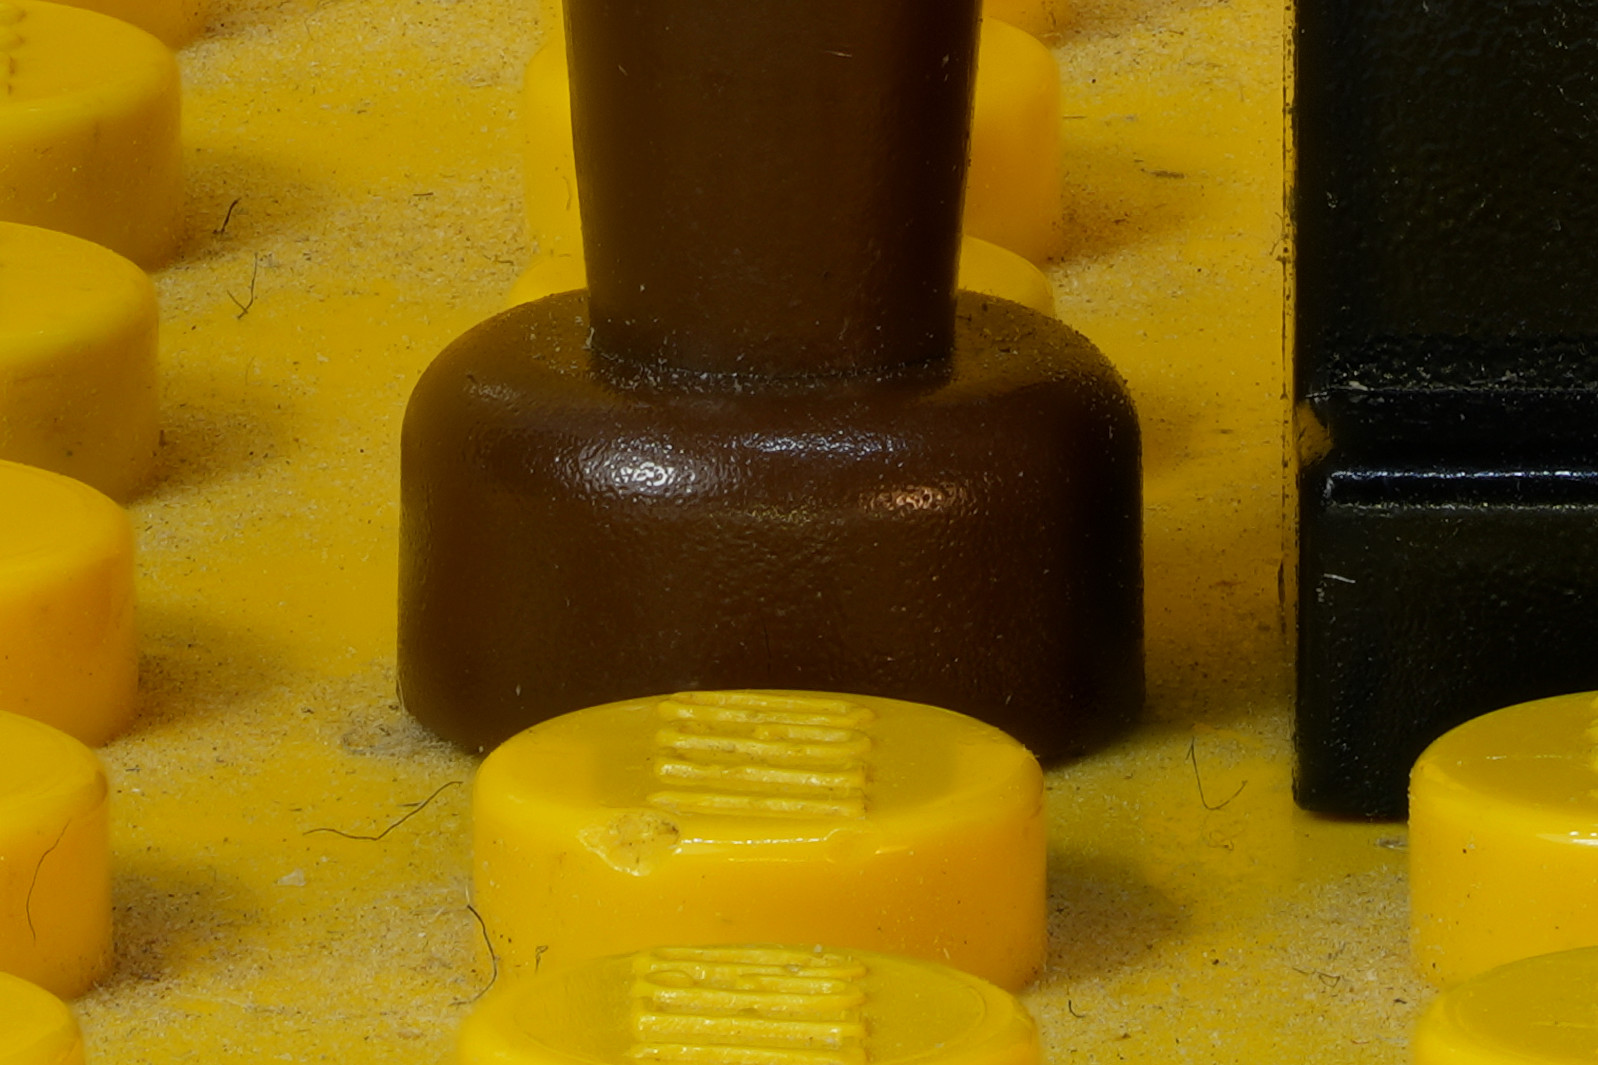

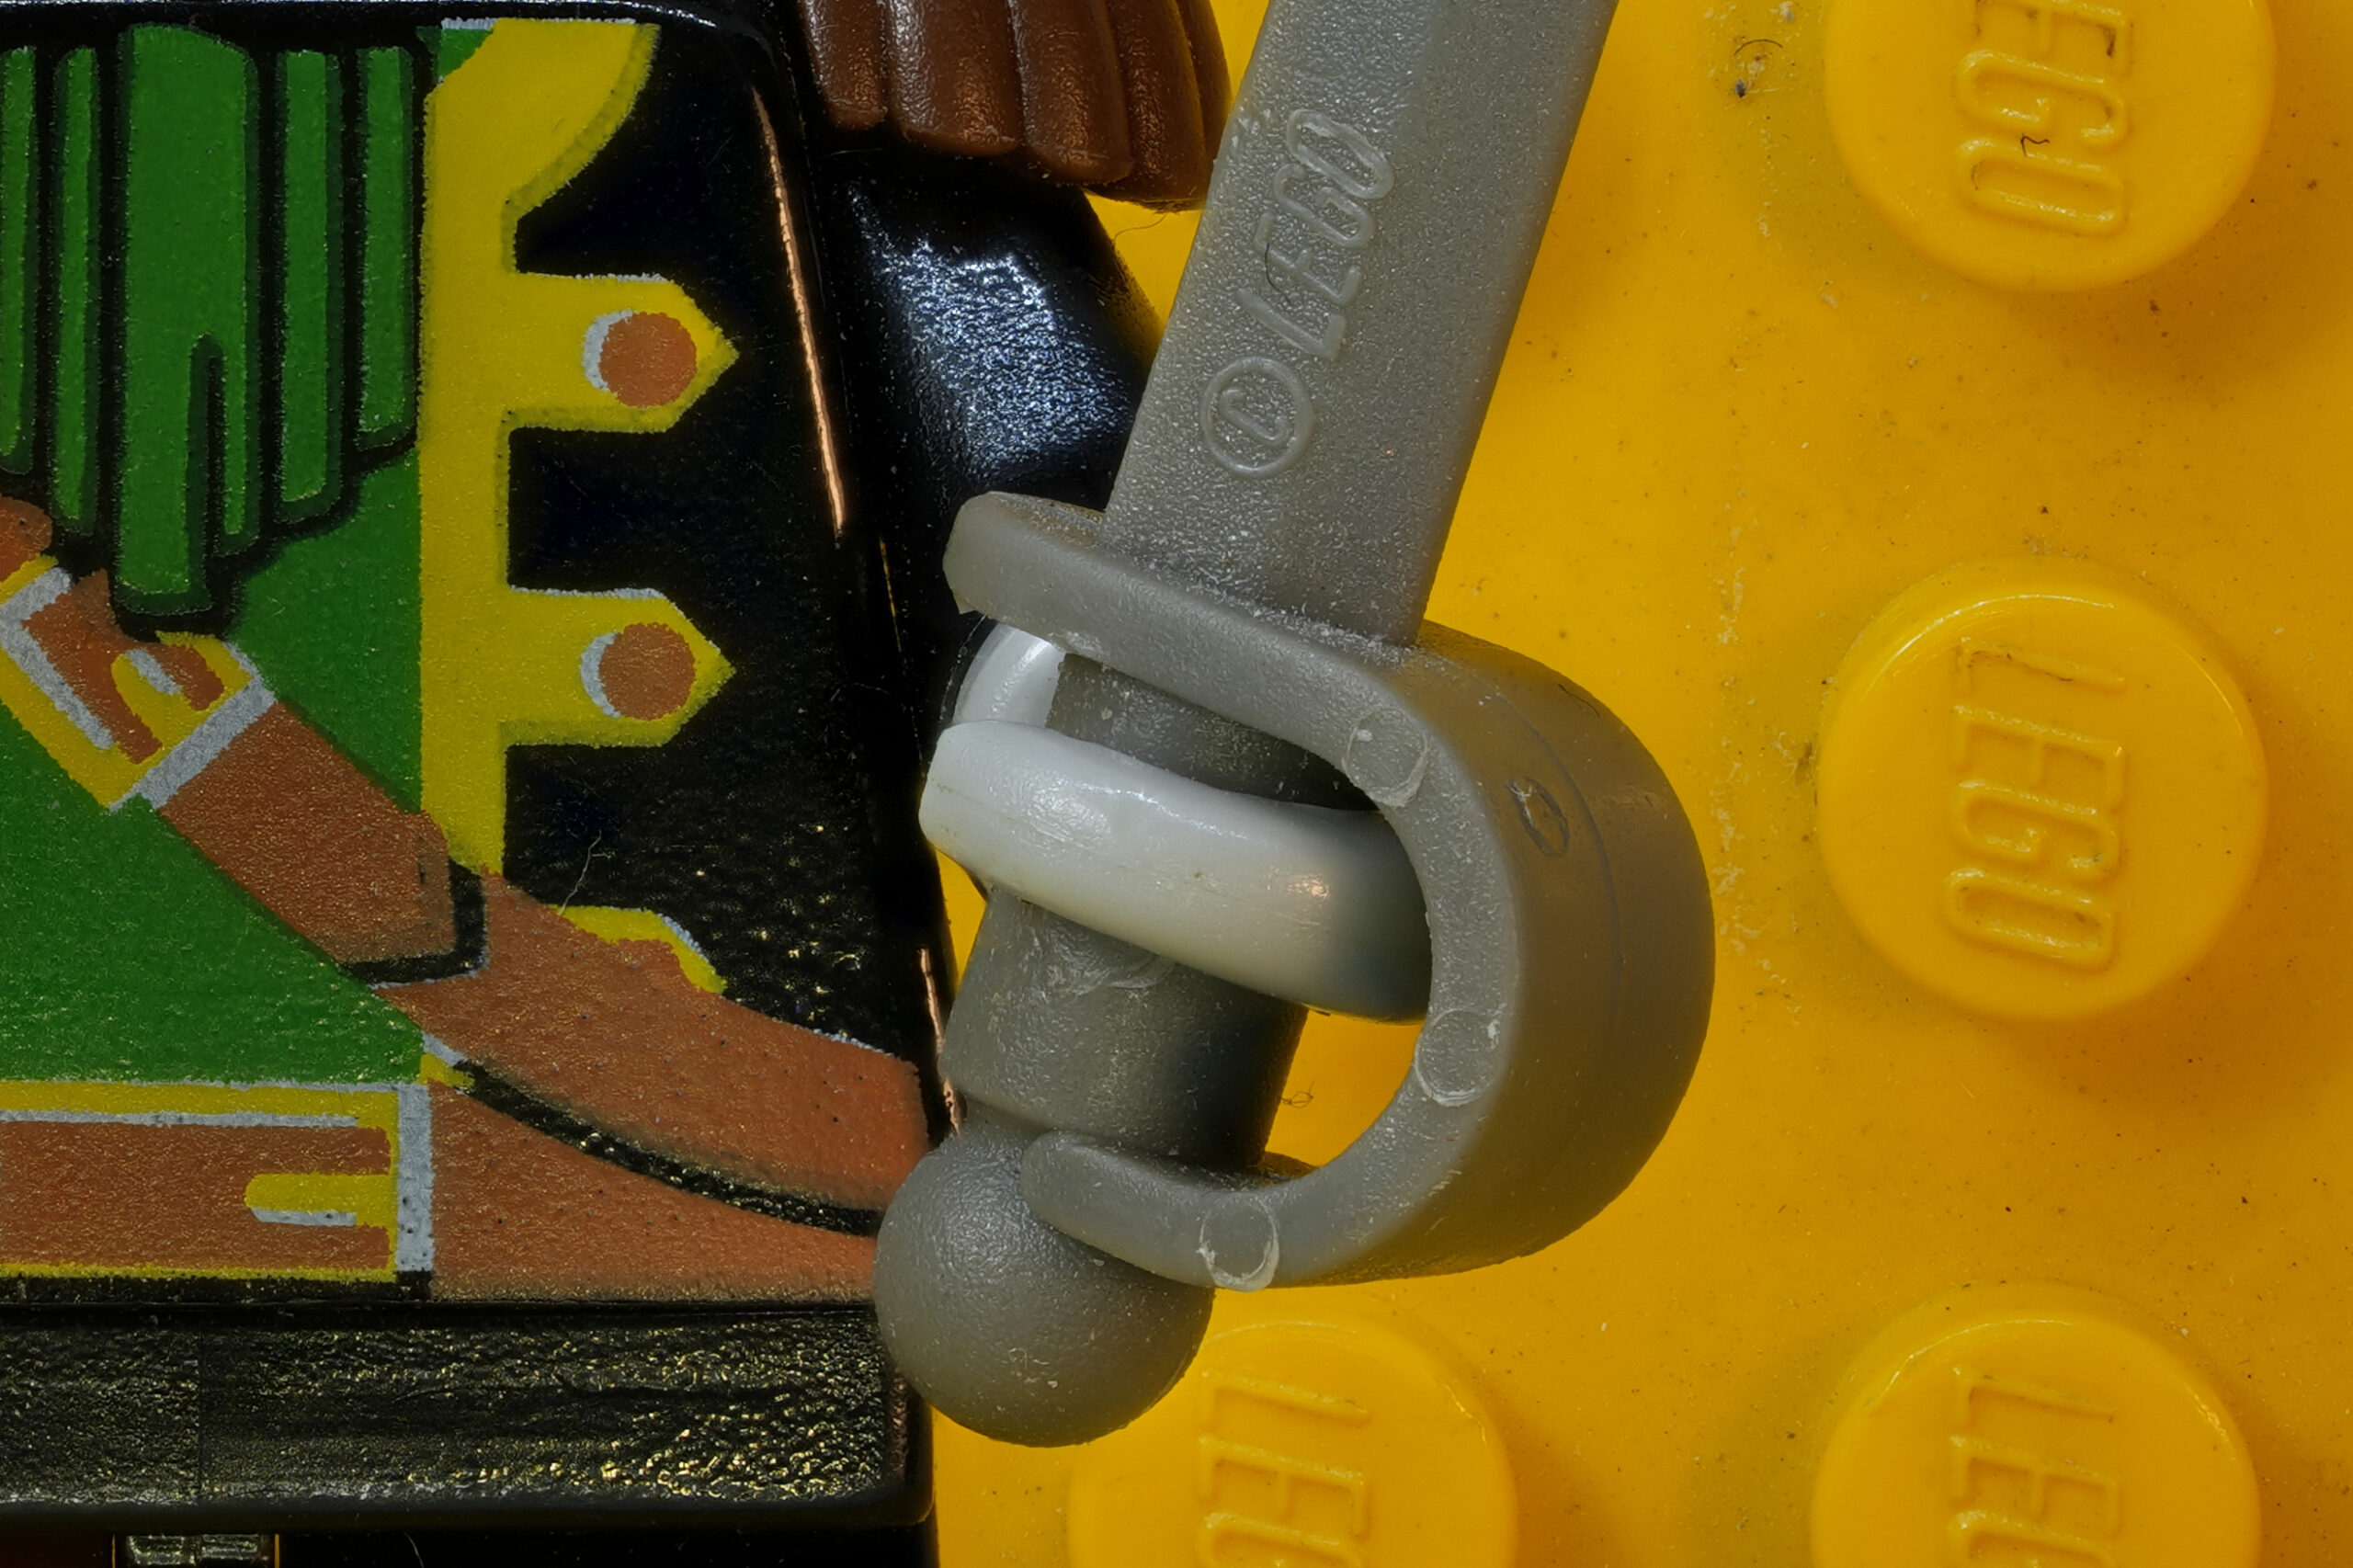
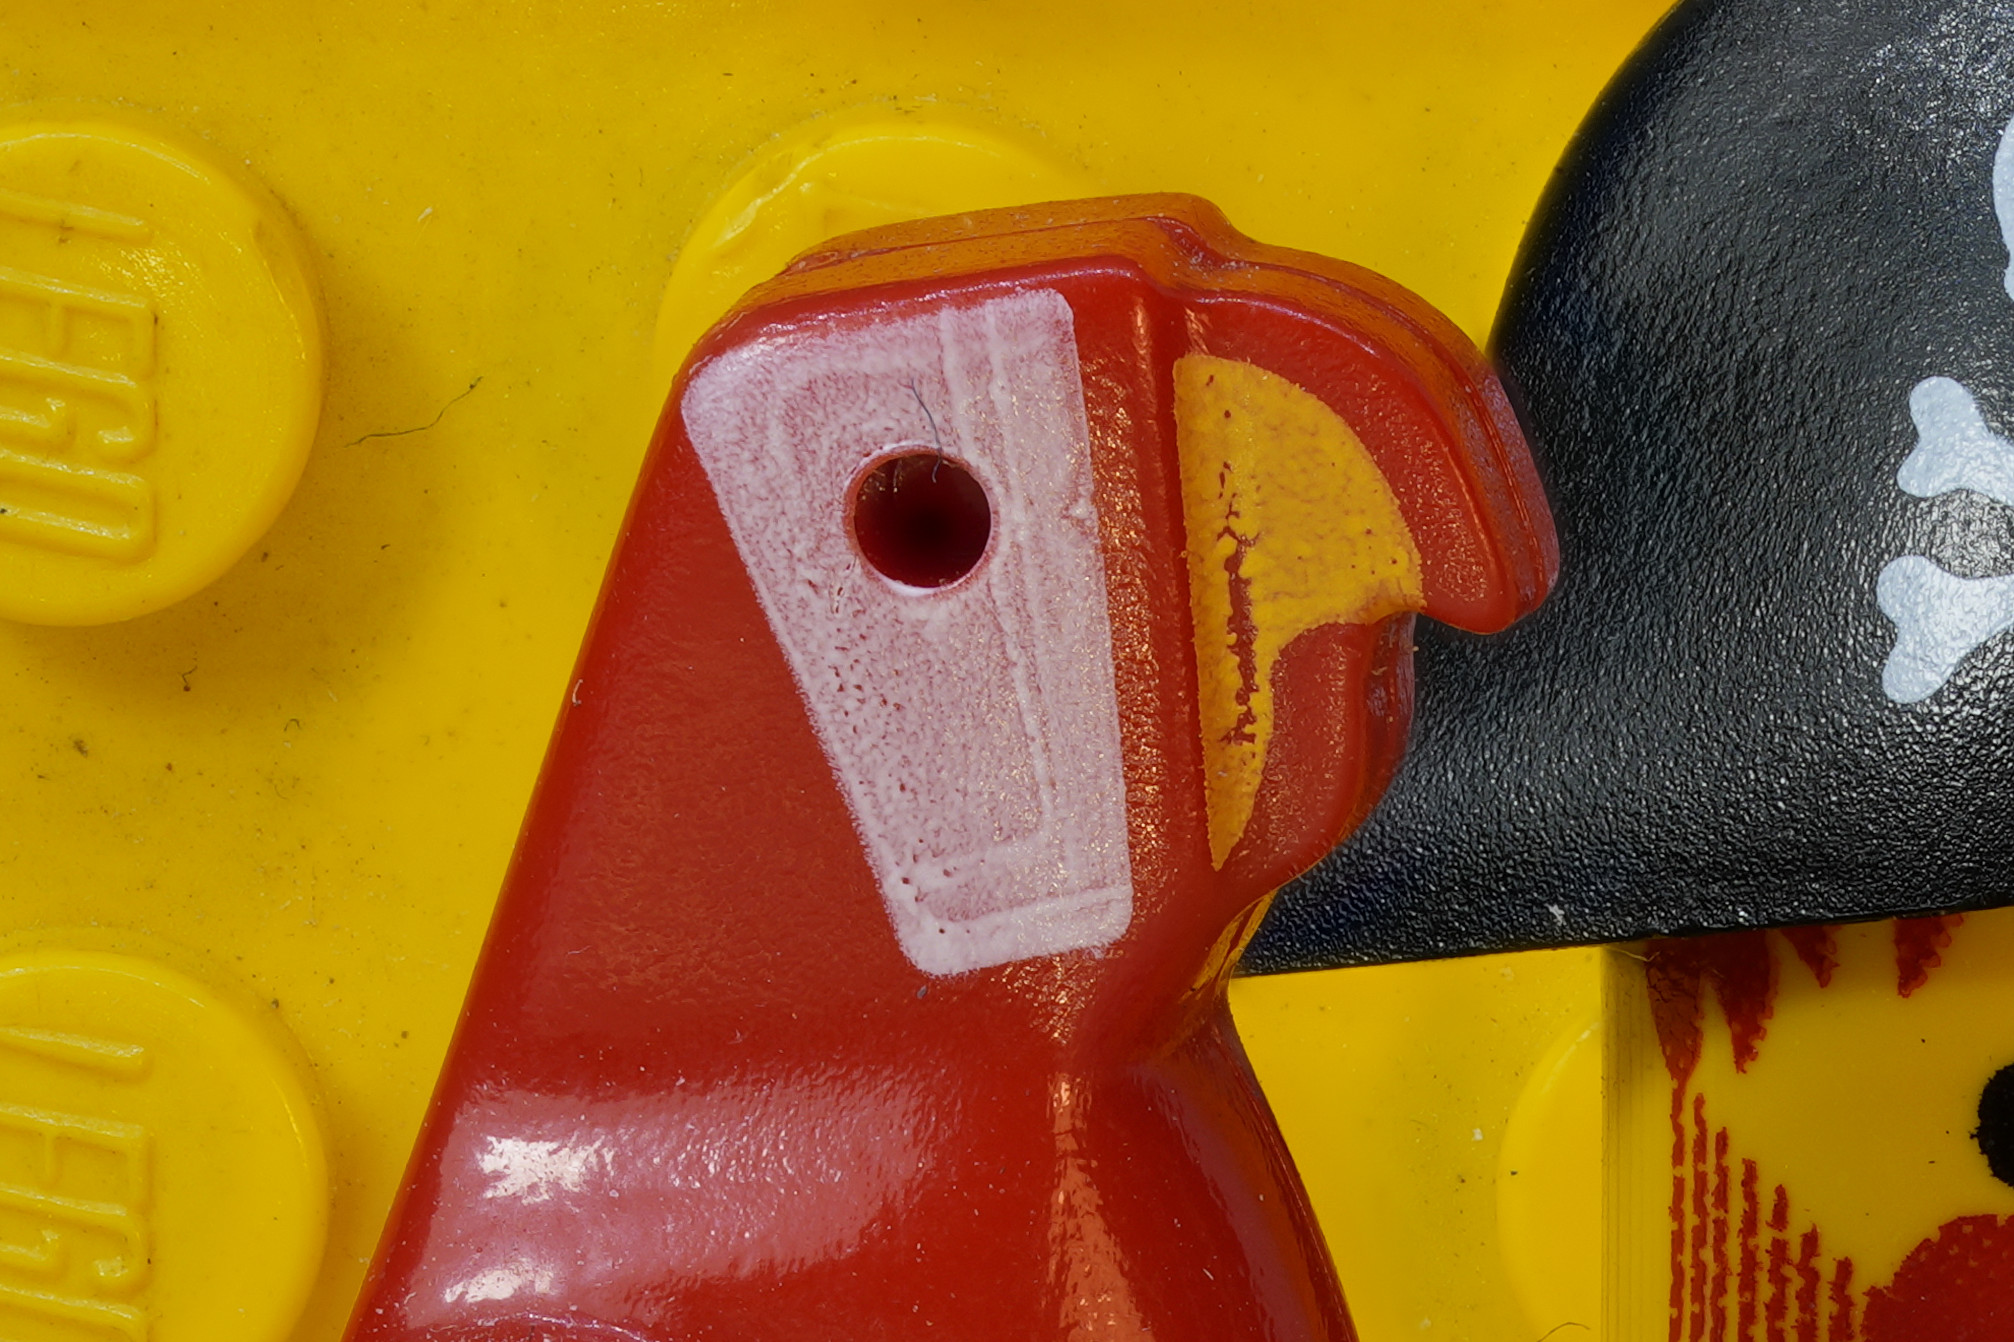
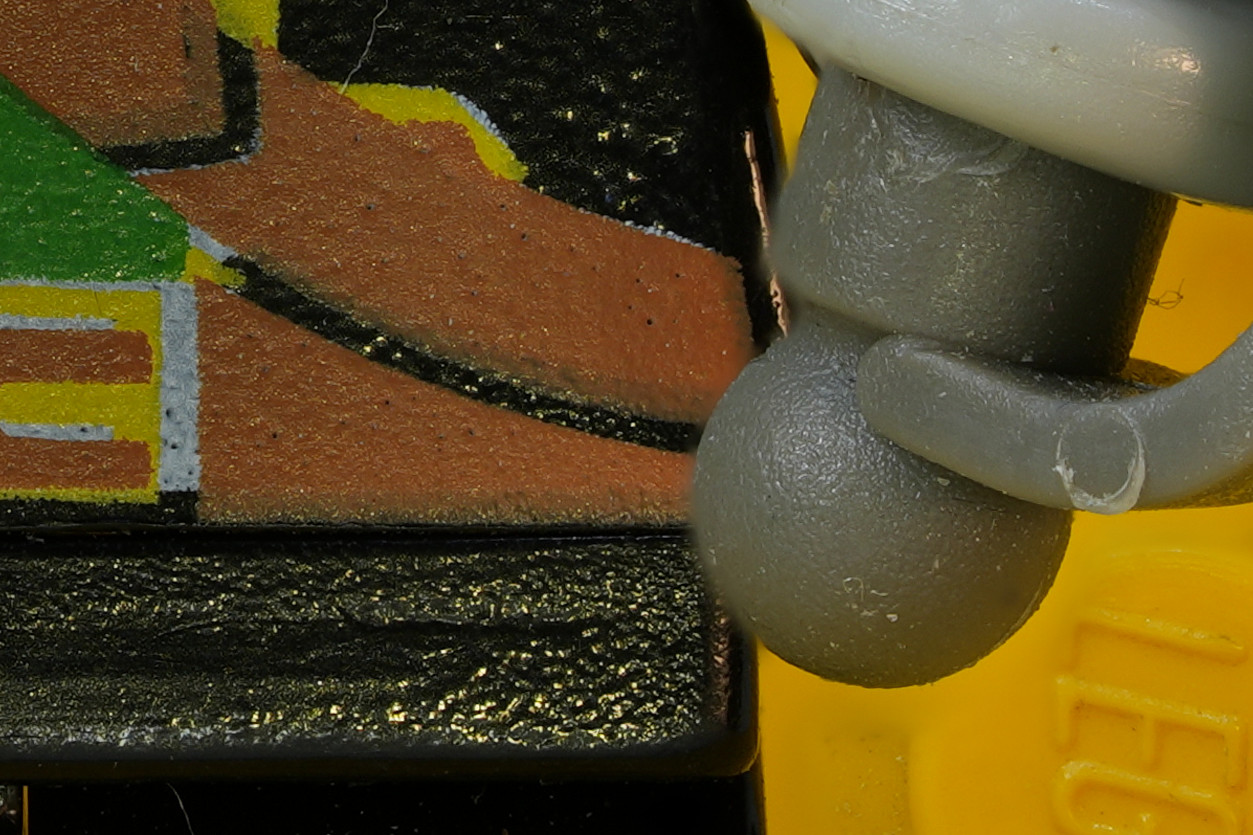
Overall, I’m pretty happy with the output. The lens delivers impeccable results at the right aperture, the high resolution sensor allows me to zoom in much further than I would have ever dreamt, and I discovered new details that are pretty much invisible to the naked eye. The parrot this up close looks fascinating but also quite eerie at the same time. It’s definitely something you don’t see every day.


And as promised the 61 MP stacked images as a zip. It’s quite fun to zoom around in these. There is a lot to discover!
Leave a Reply