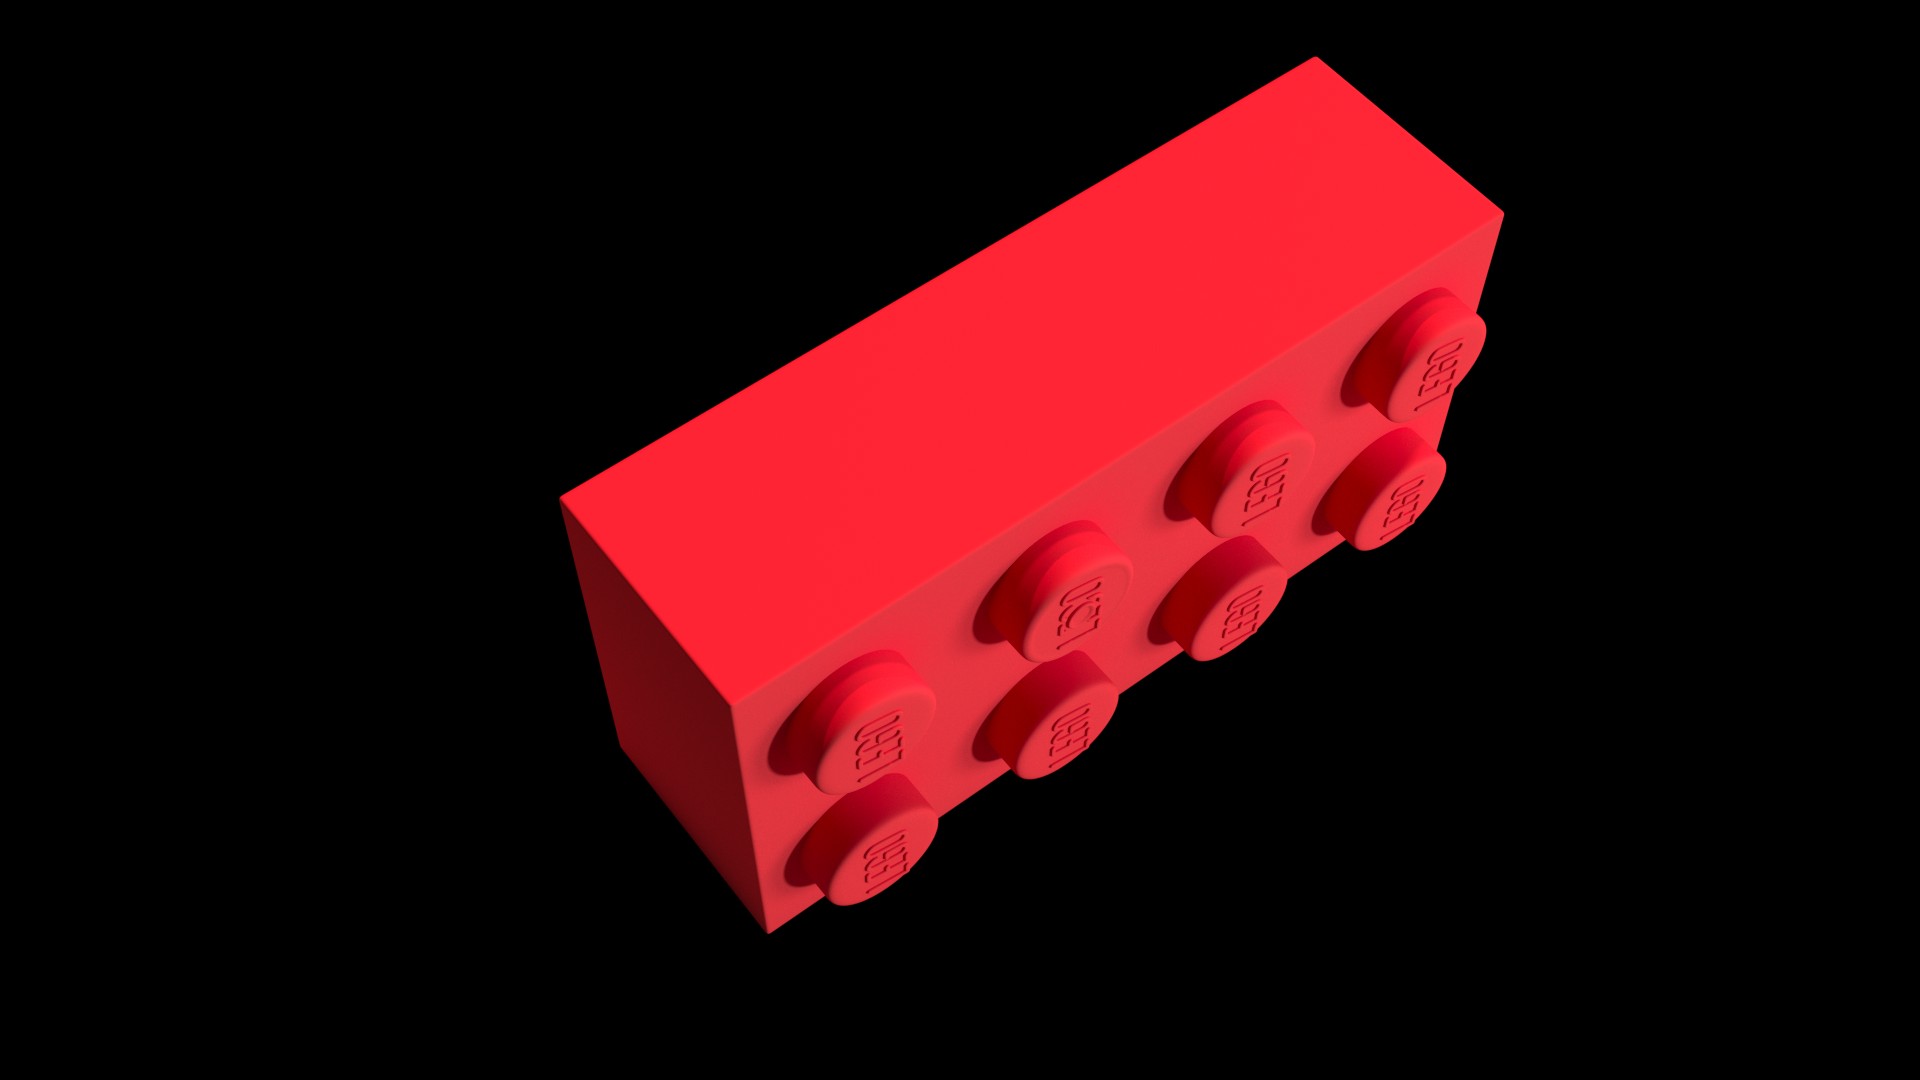
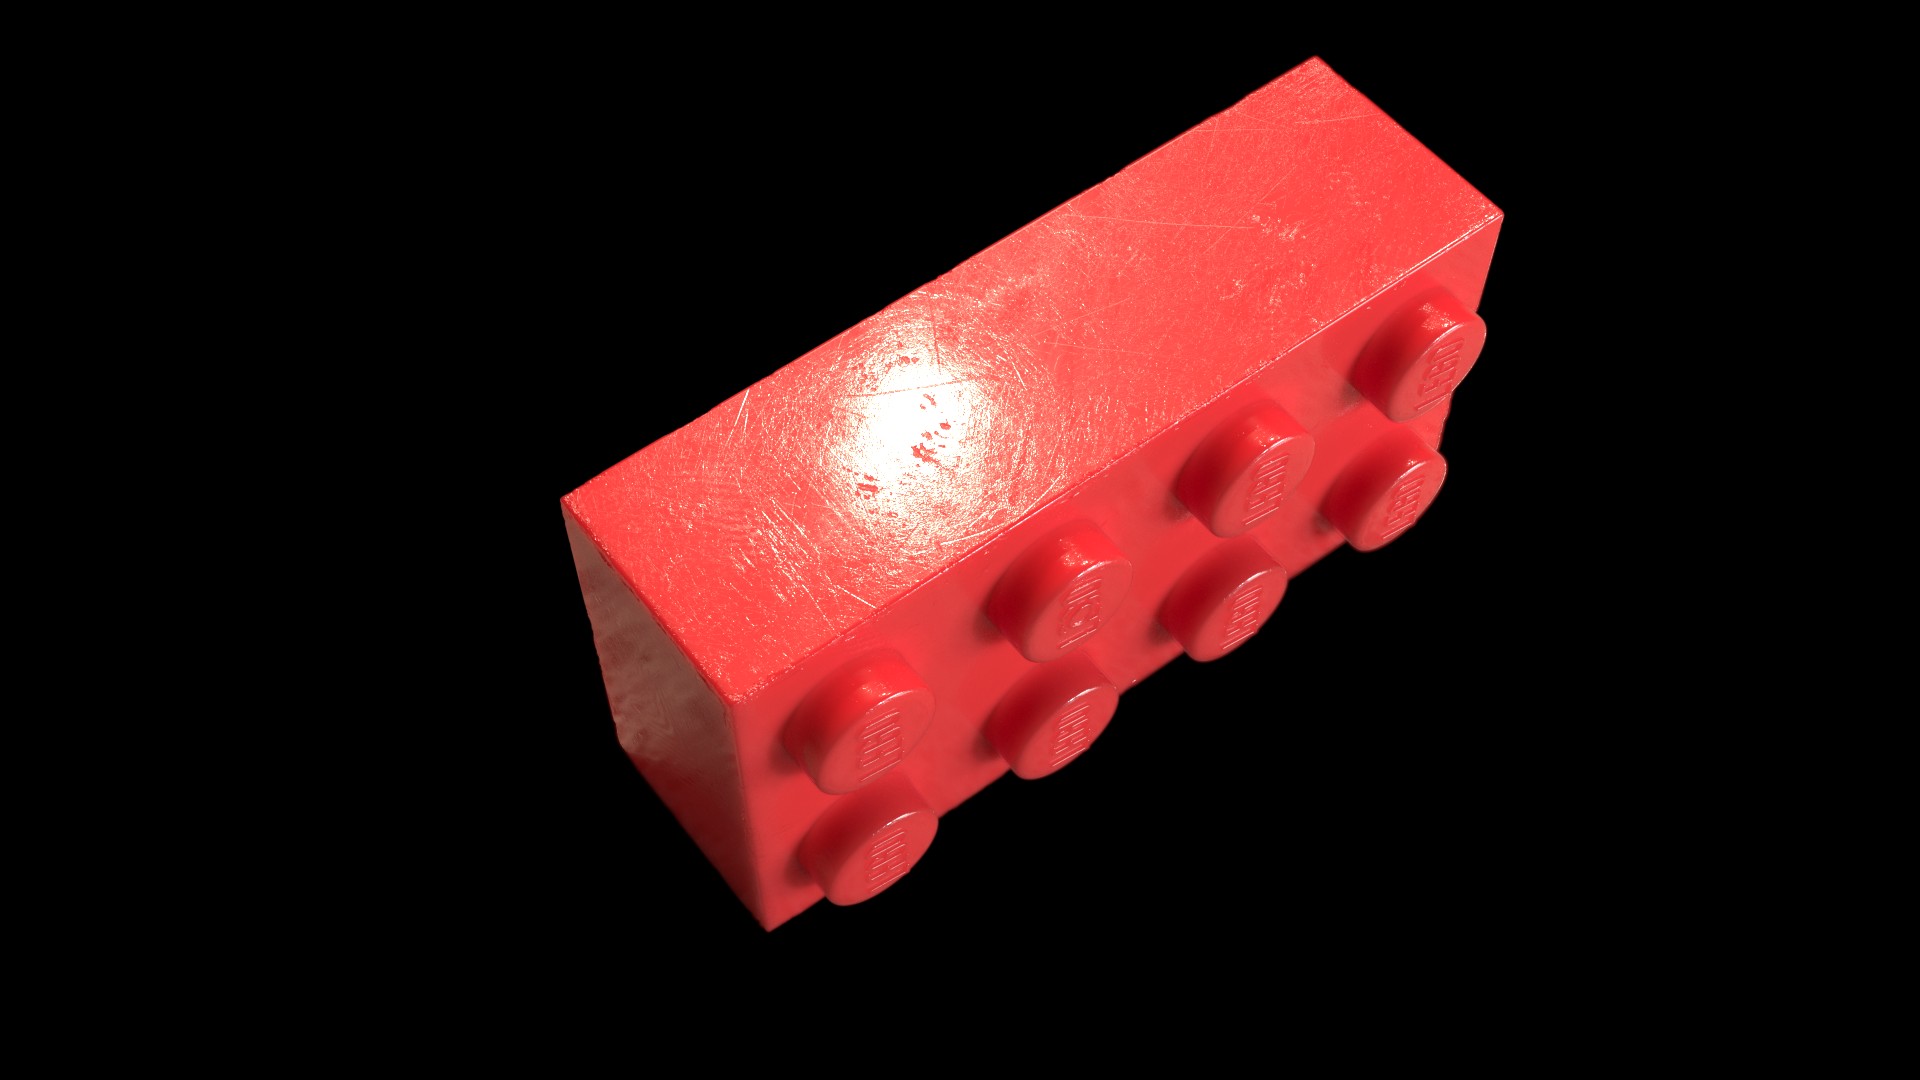
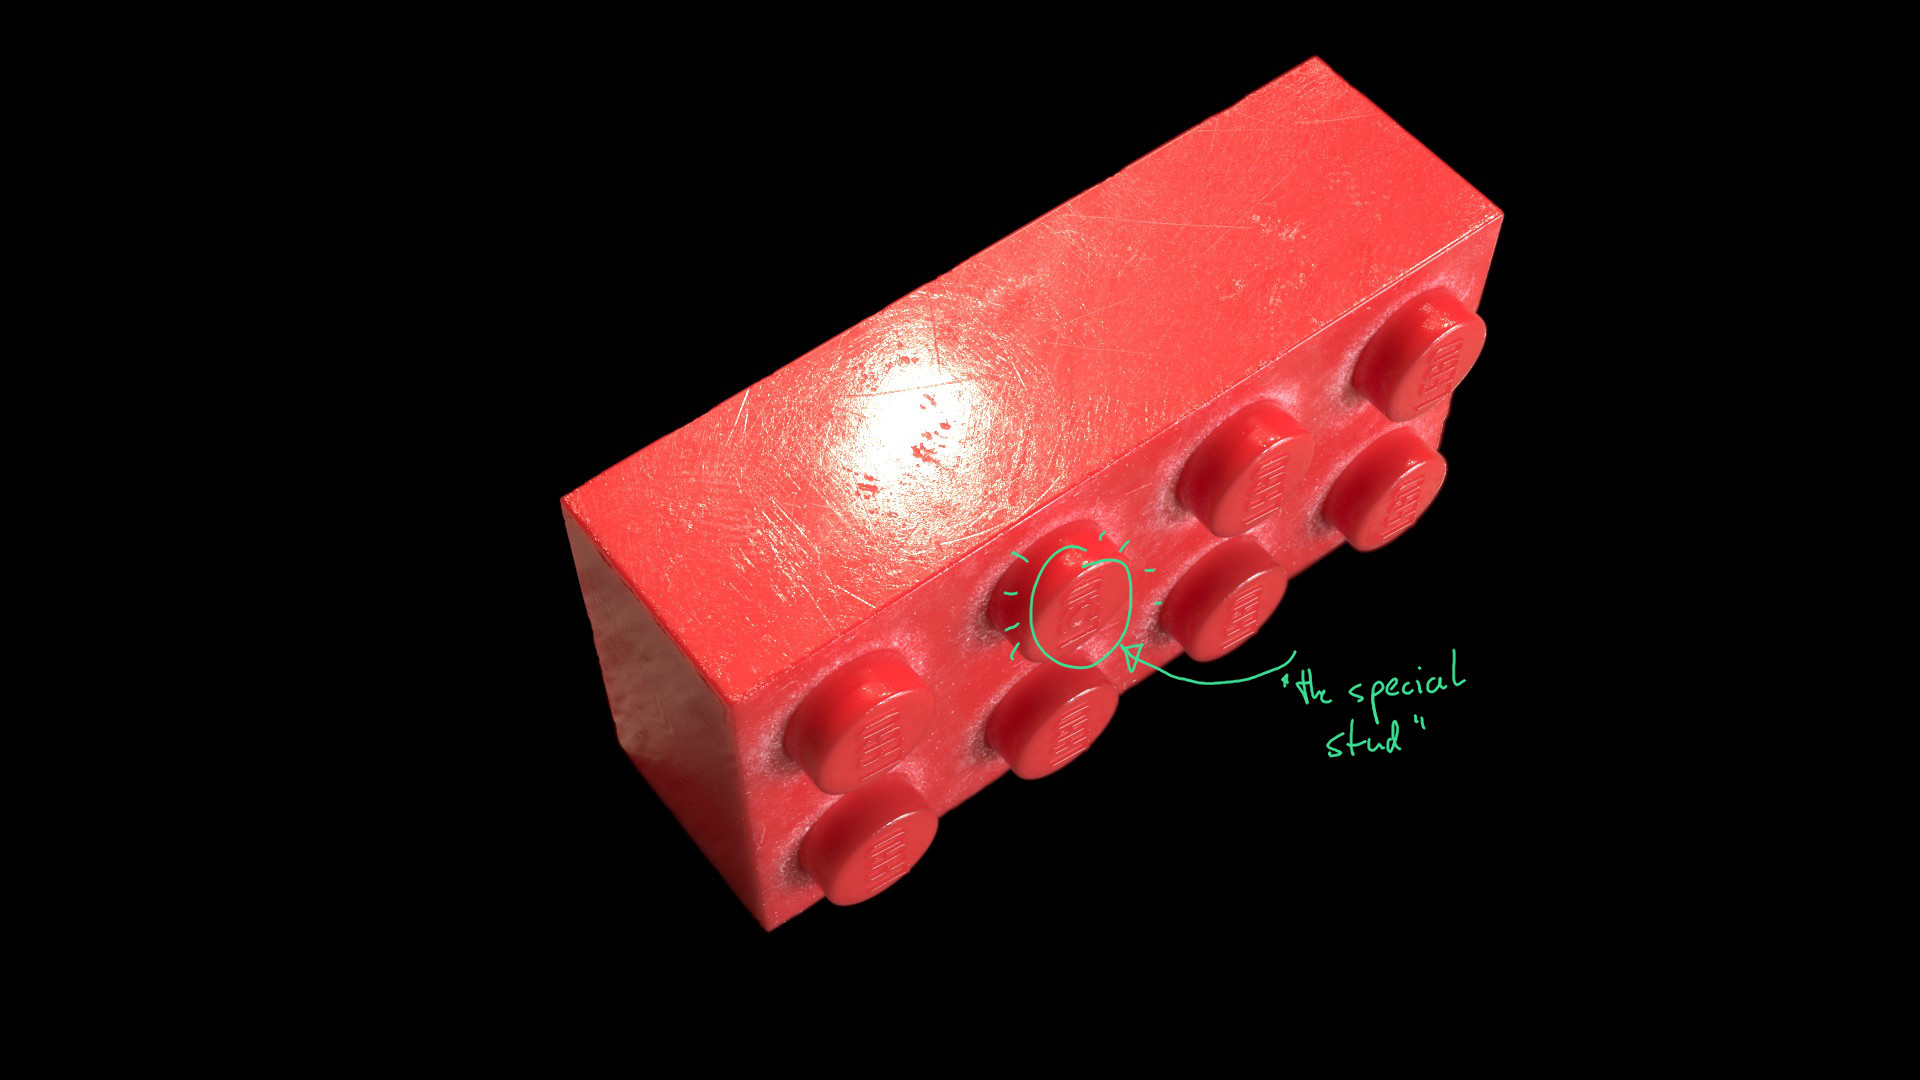
The classic 2×4 brick.
If you have read part 2, you might think, well that
Taking it to the next level
Please pardon me if my blog posts are not completely straightforward. Part 1 is a bit more theoretical and part 2 more practical. In this 3rd part, I want to revisit everything and see if we can improve upon it. This means that there might be some overlap, but since I am learning at the same time as I am typing this, I hope that this is alright.
Angles matter
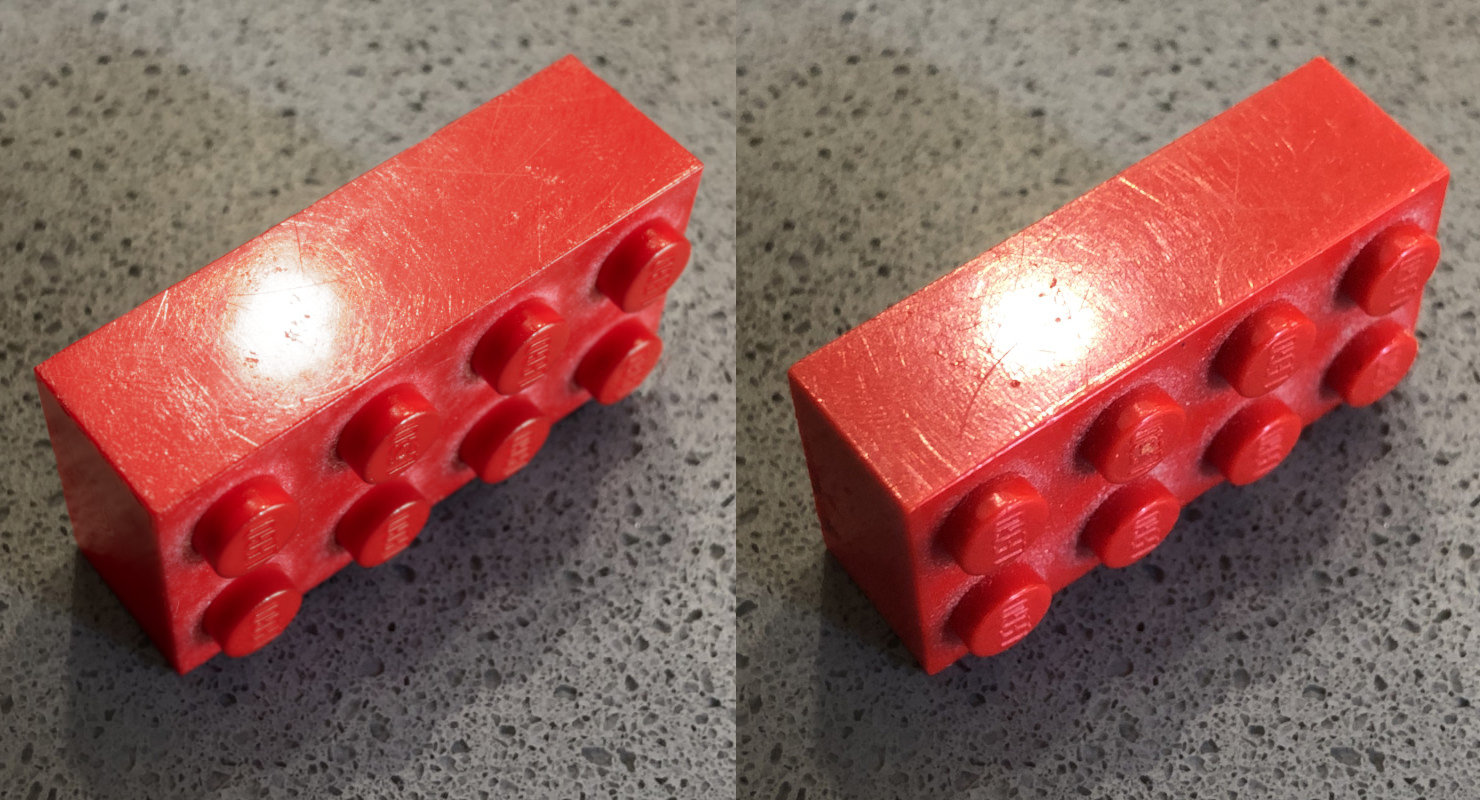
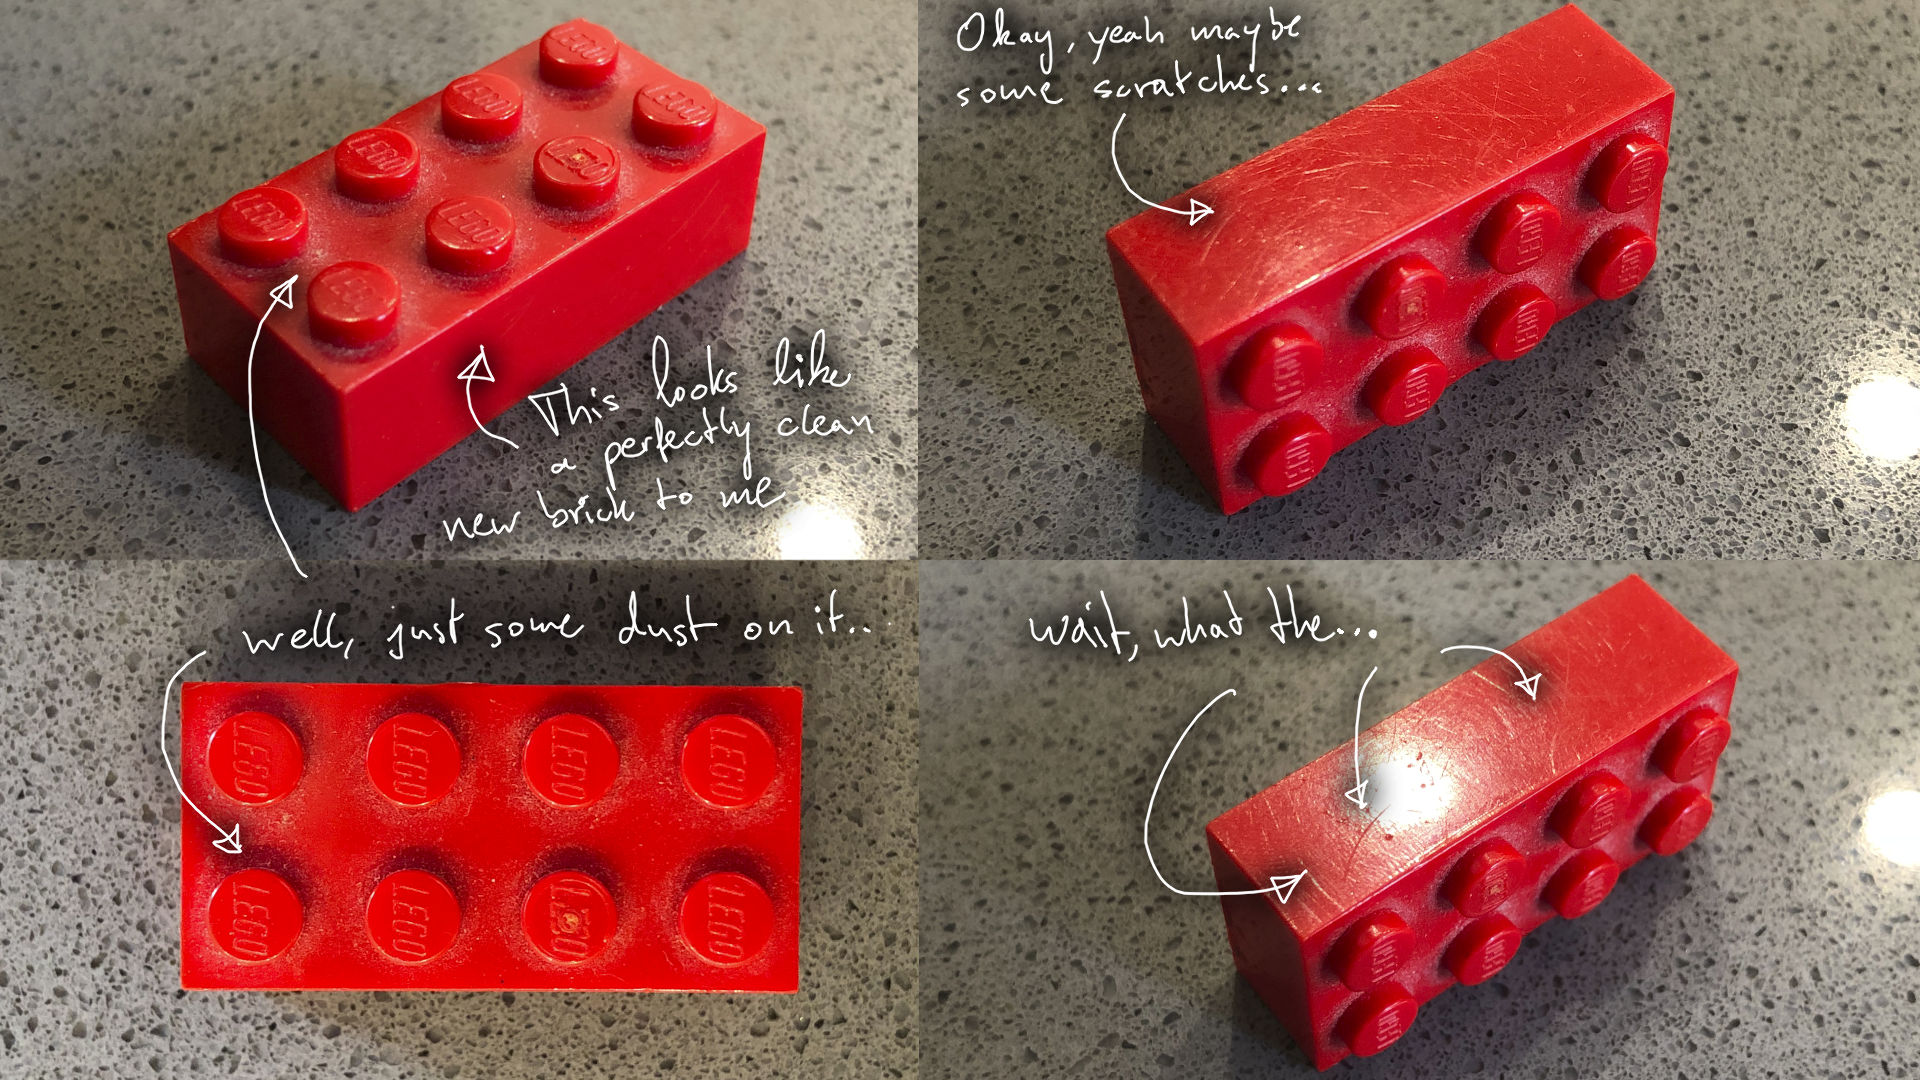
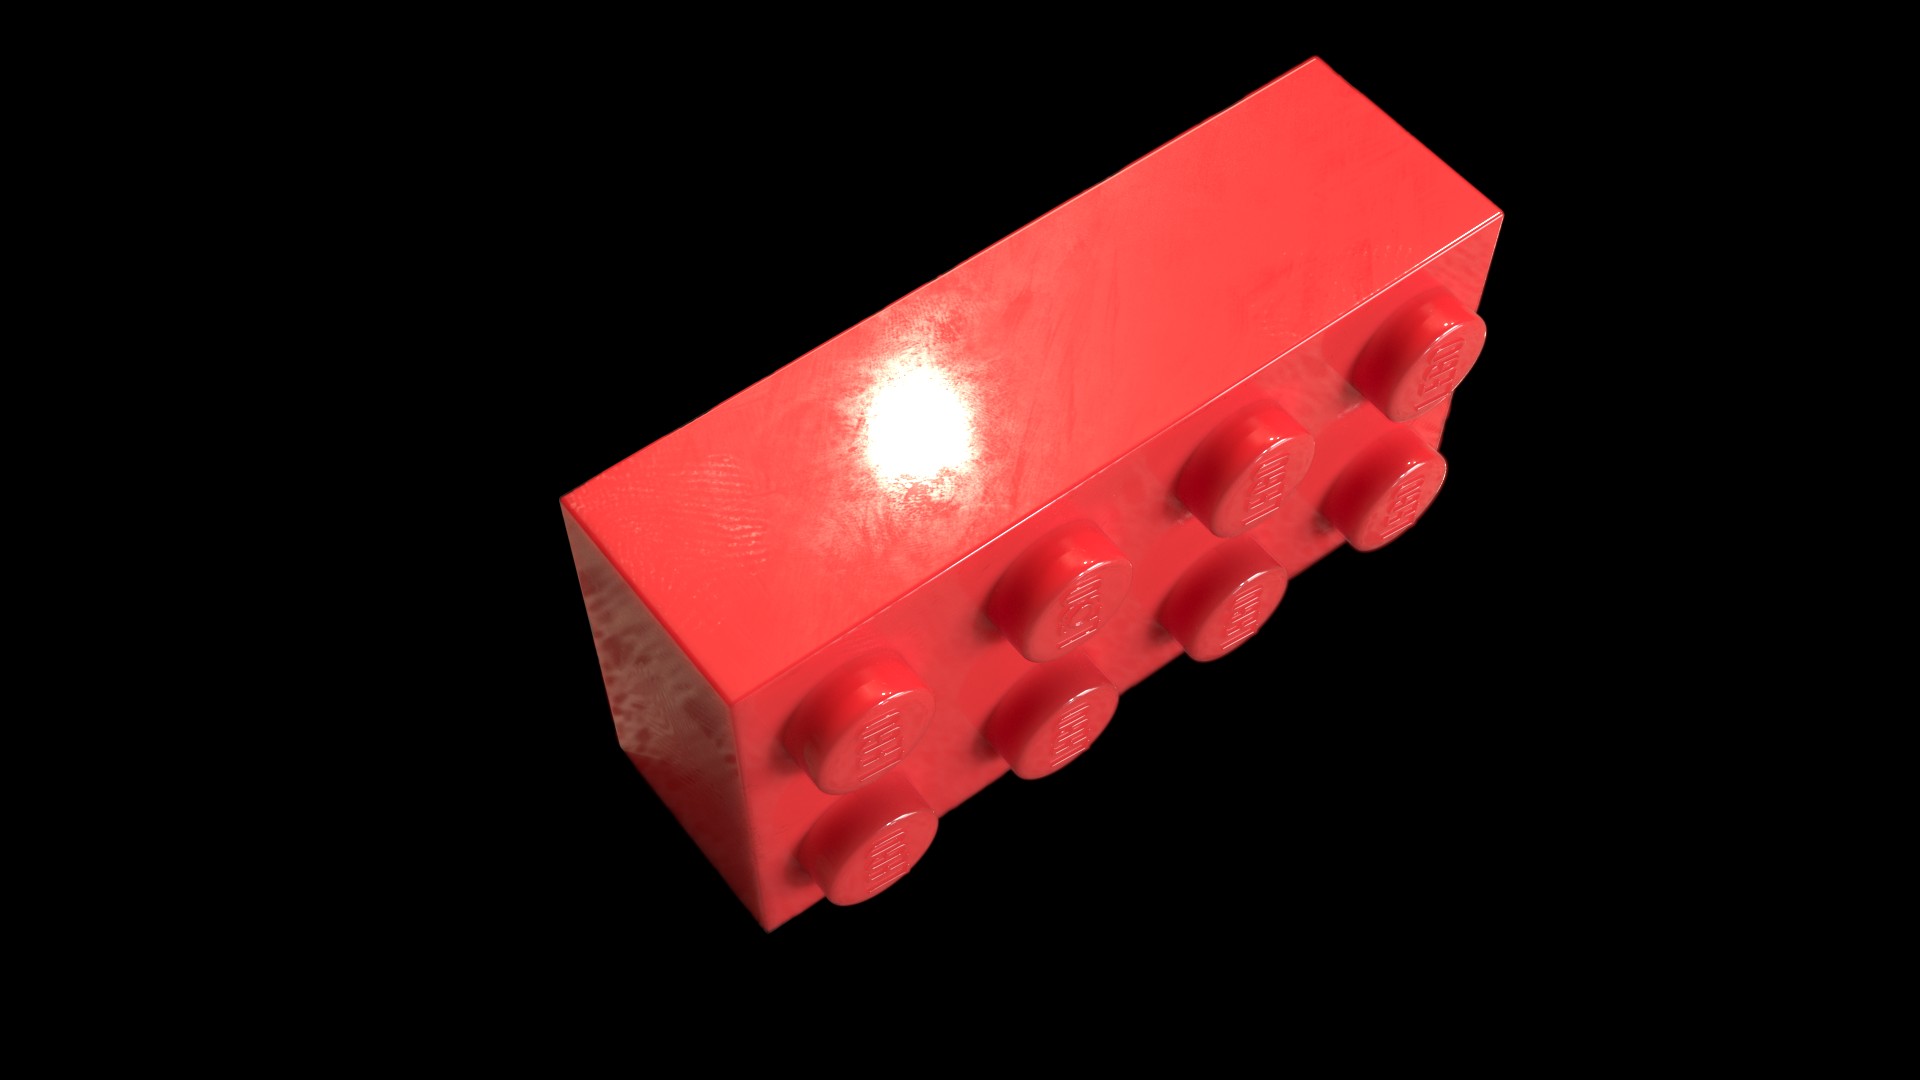
We already know how important the viewing angle and the light position is. While inspecting classic LEGO bricks more closely, I took some pictures which show the fresnel phenomenon and light interaction in general quite impressively.
Did I nail it?

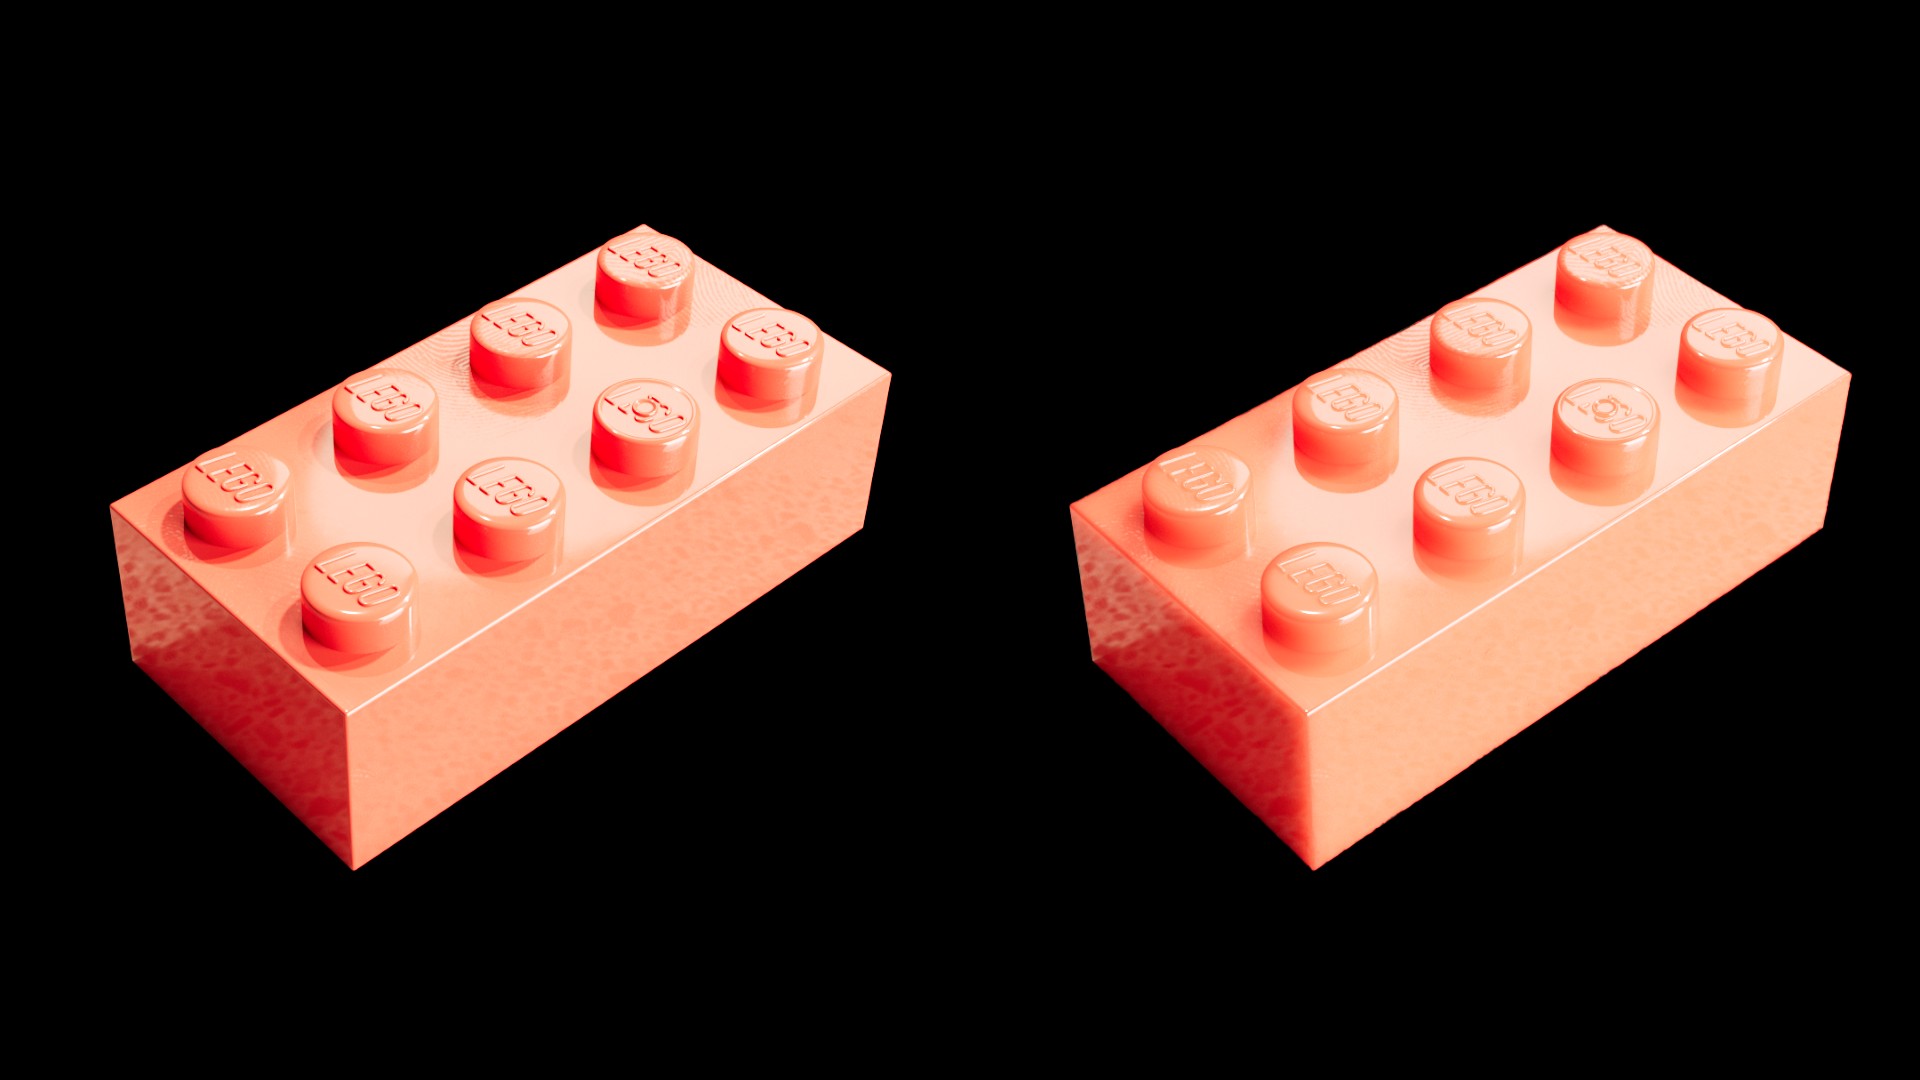
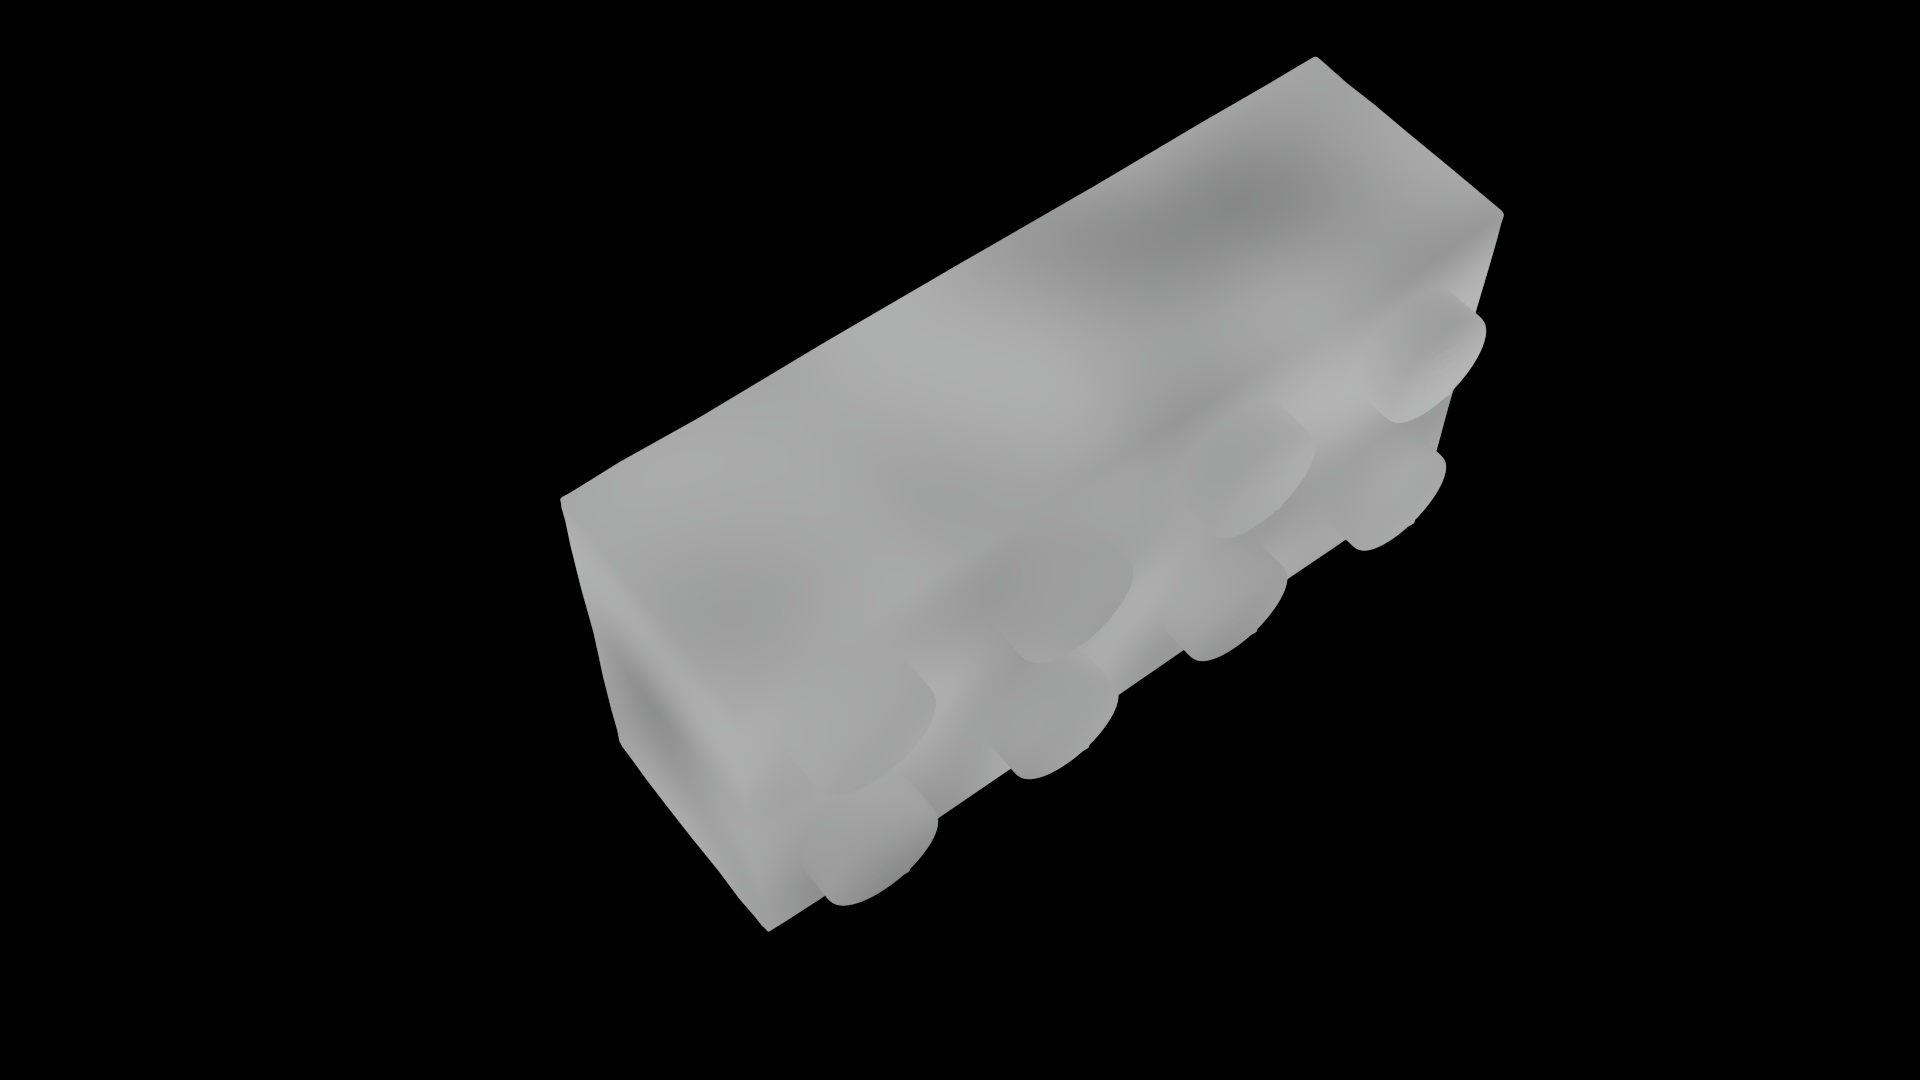
CG vs photography – brick on side
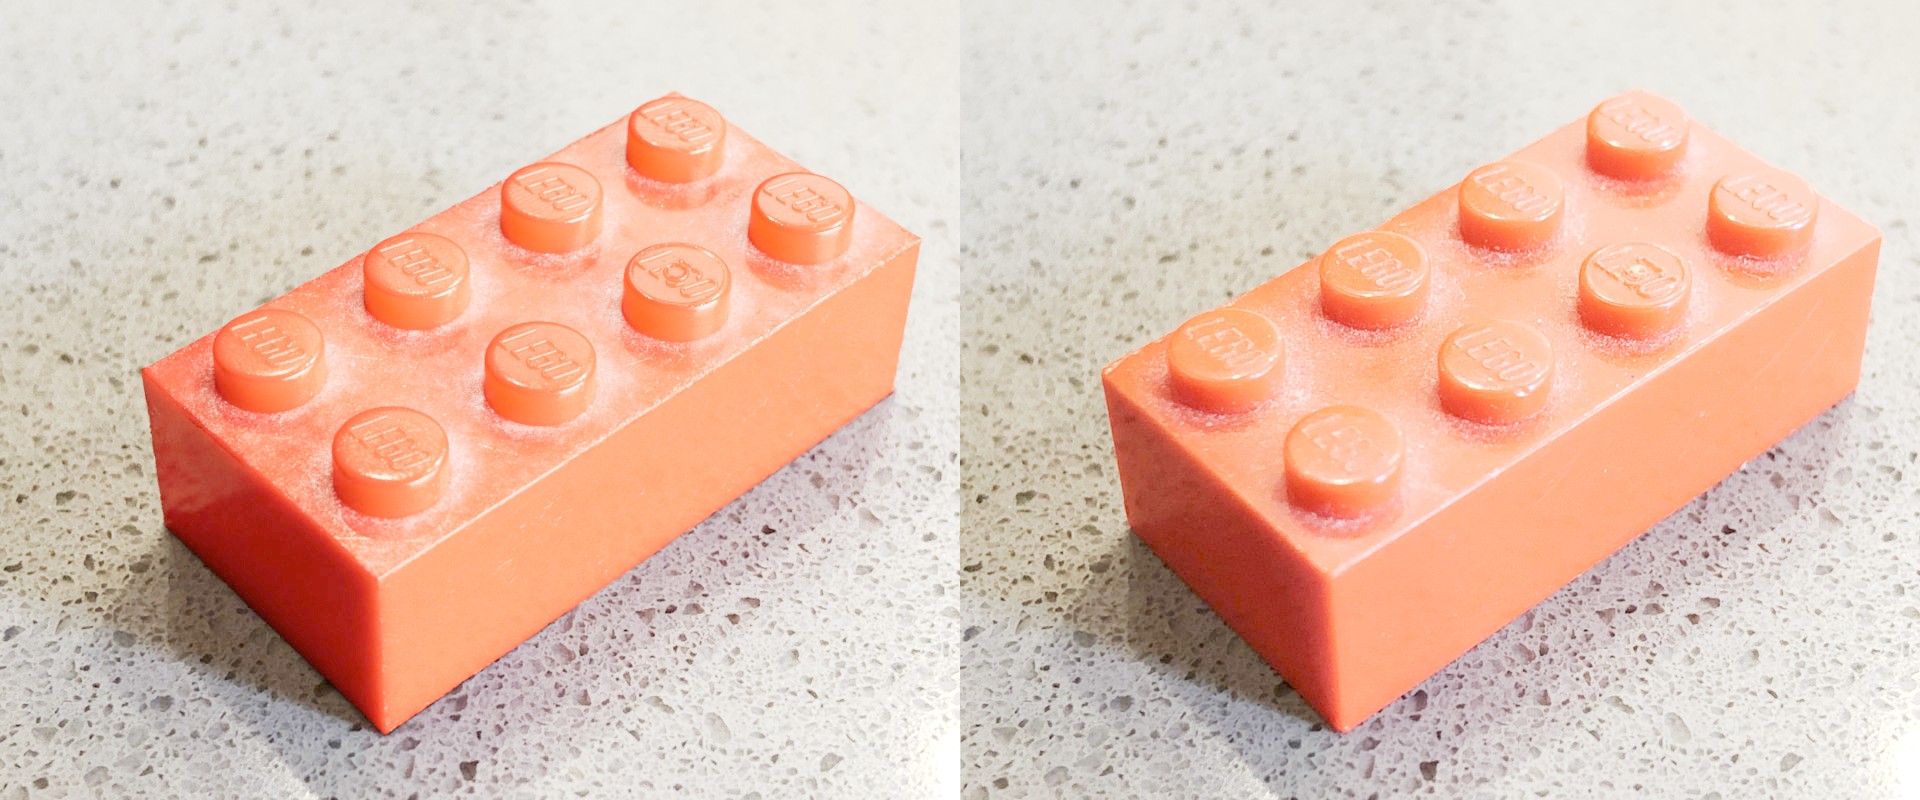
CG vs photography – brick upside
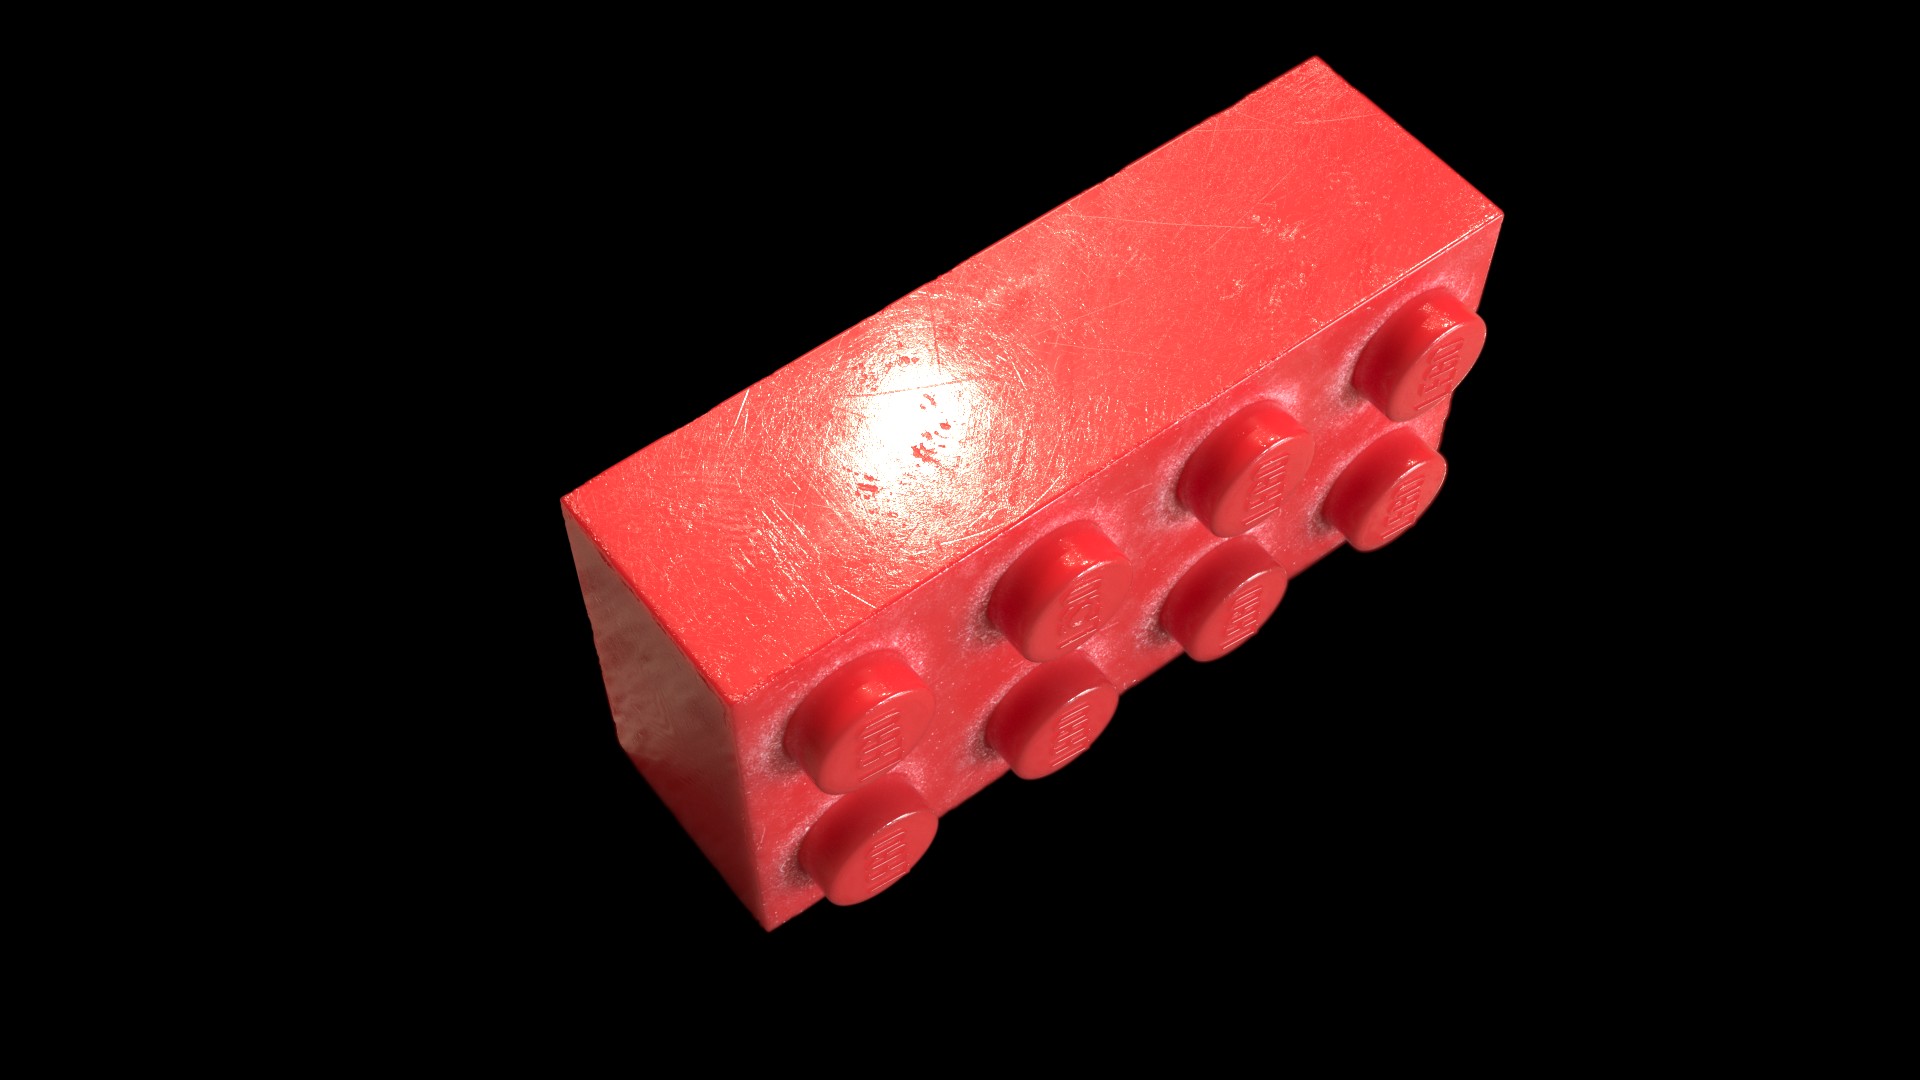
This is the final result. While building the shader, I constantly switched between the two photographs and I tried to match both of them at the same time as closely as possible. This was a good quality check for myself, to see if the shader would hold up with different viewing angles.
LEGO Shader Breakdown
The brick we are looking at is from my parents’ attic which I used to play with in the mid-90s. What we see here is an honest example of many many years of wear and what happens when a kid is not too cautious with their toys. Everything annotated below is what we already discussed in one of the previous blog posts. Let’s stack up all these effects one after another. While doing so there will be some new discoveries/techniques in it that weren’t in the previous posts. We will take a closer look at those findings.
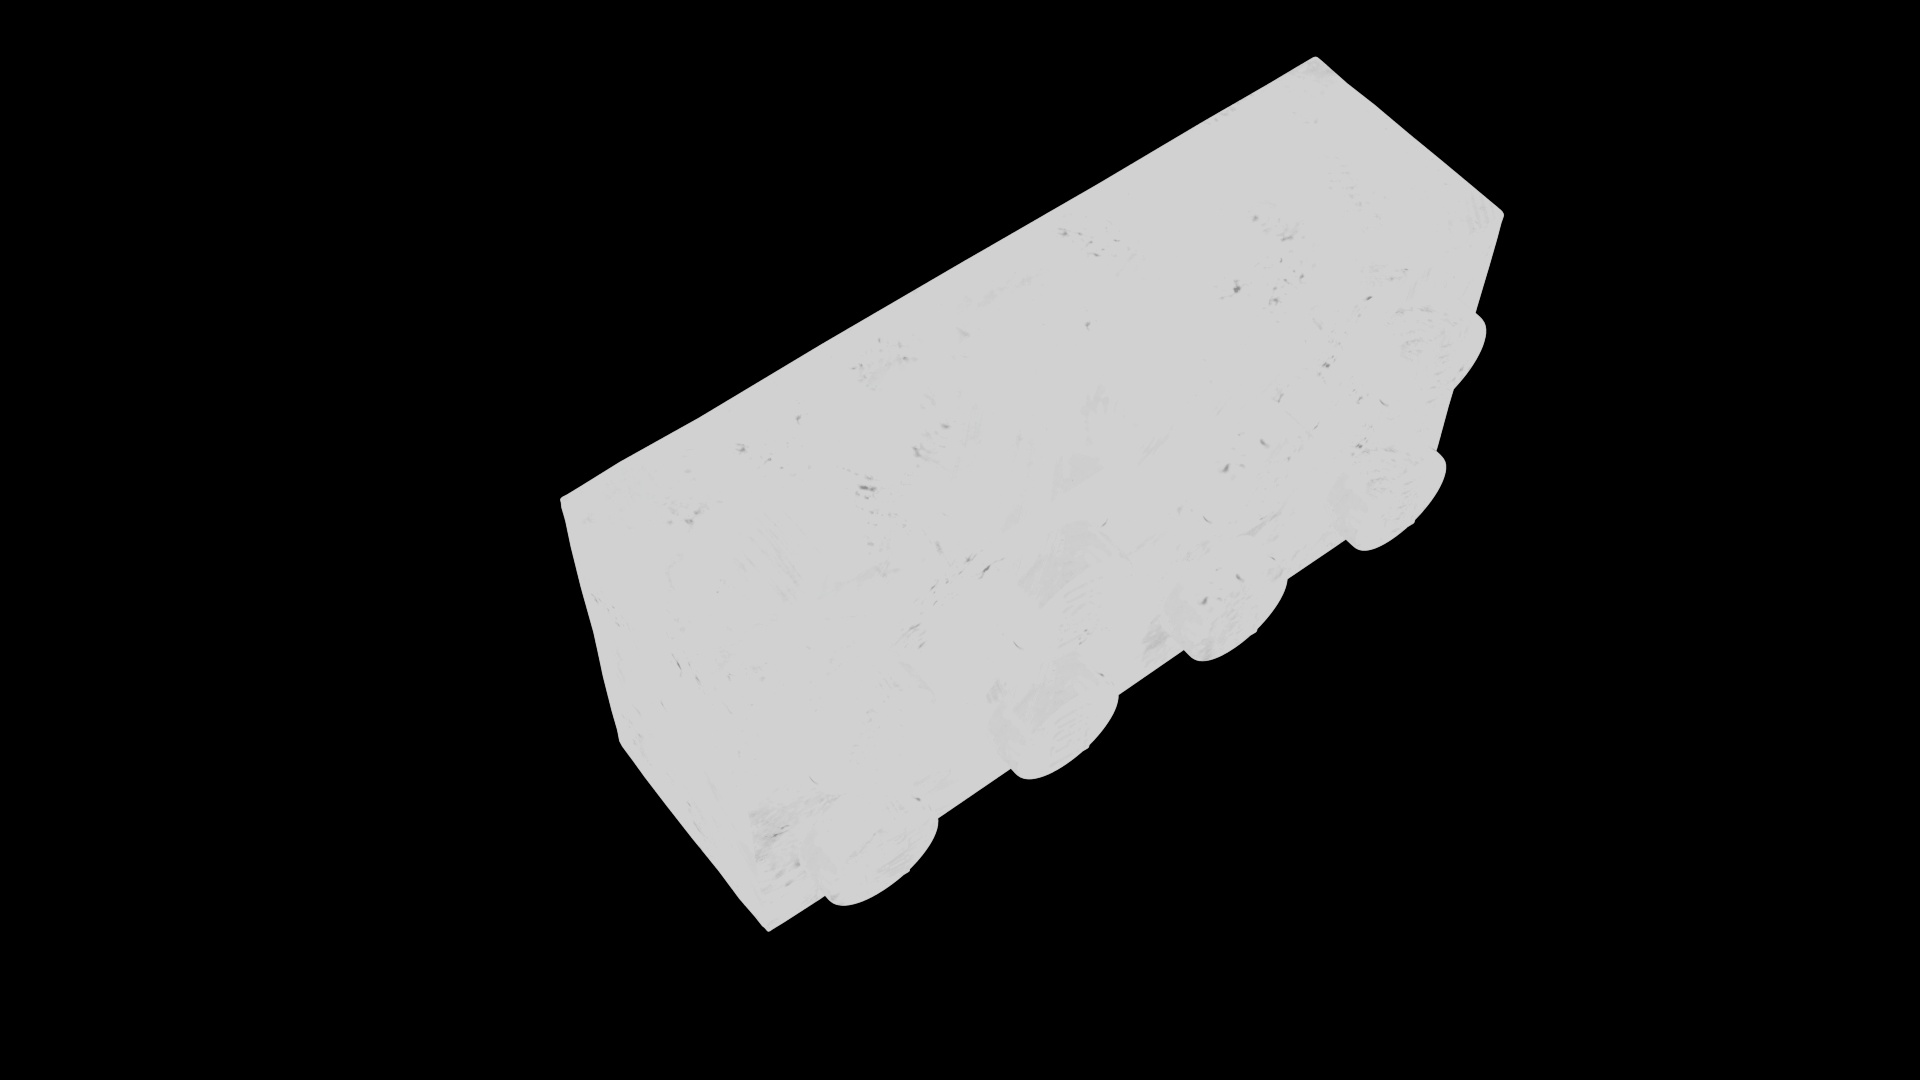
Since I got asked quite a lot what my textures look like, there is now always the texture map right next to it. I also included links where I got the textures from – whenever I didn’t create them myself. This should allow you to to build your own LEGO shader.

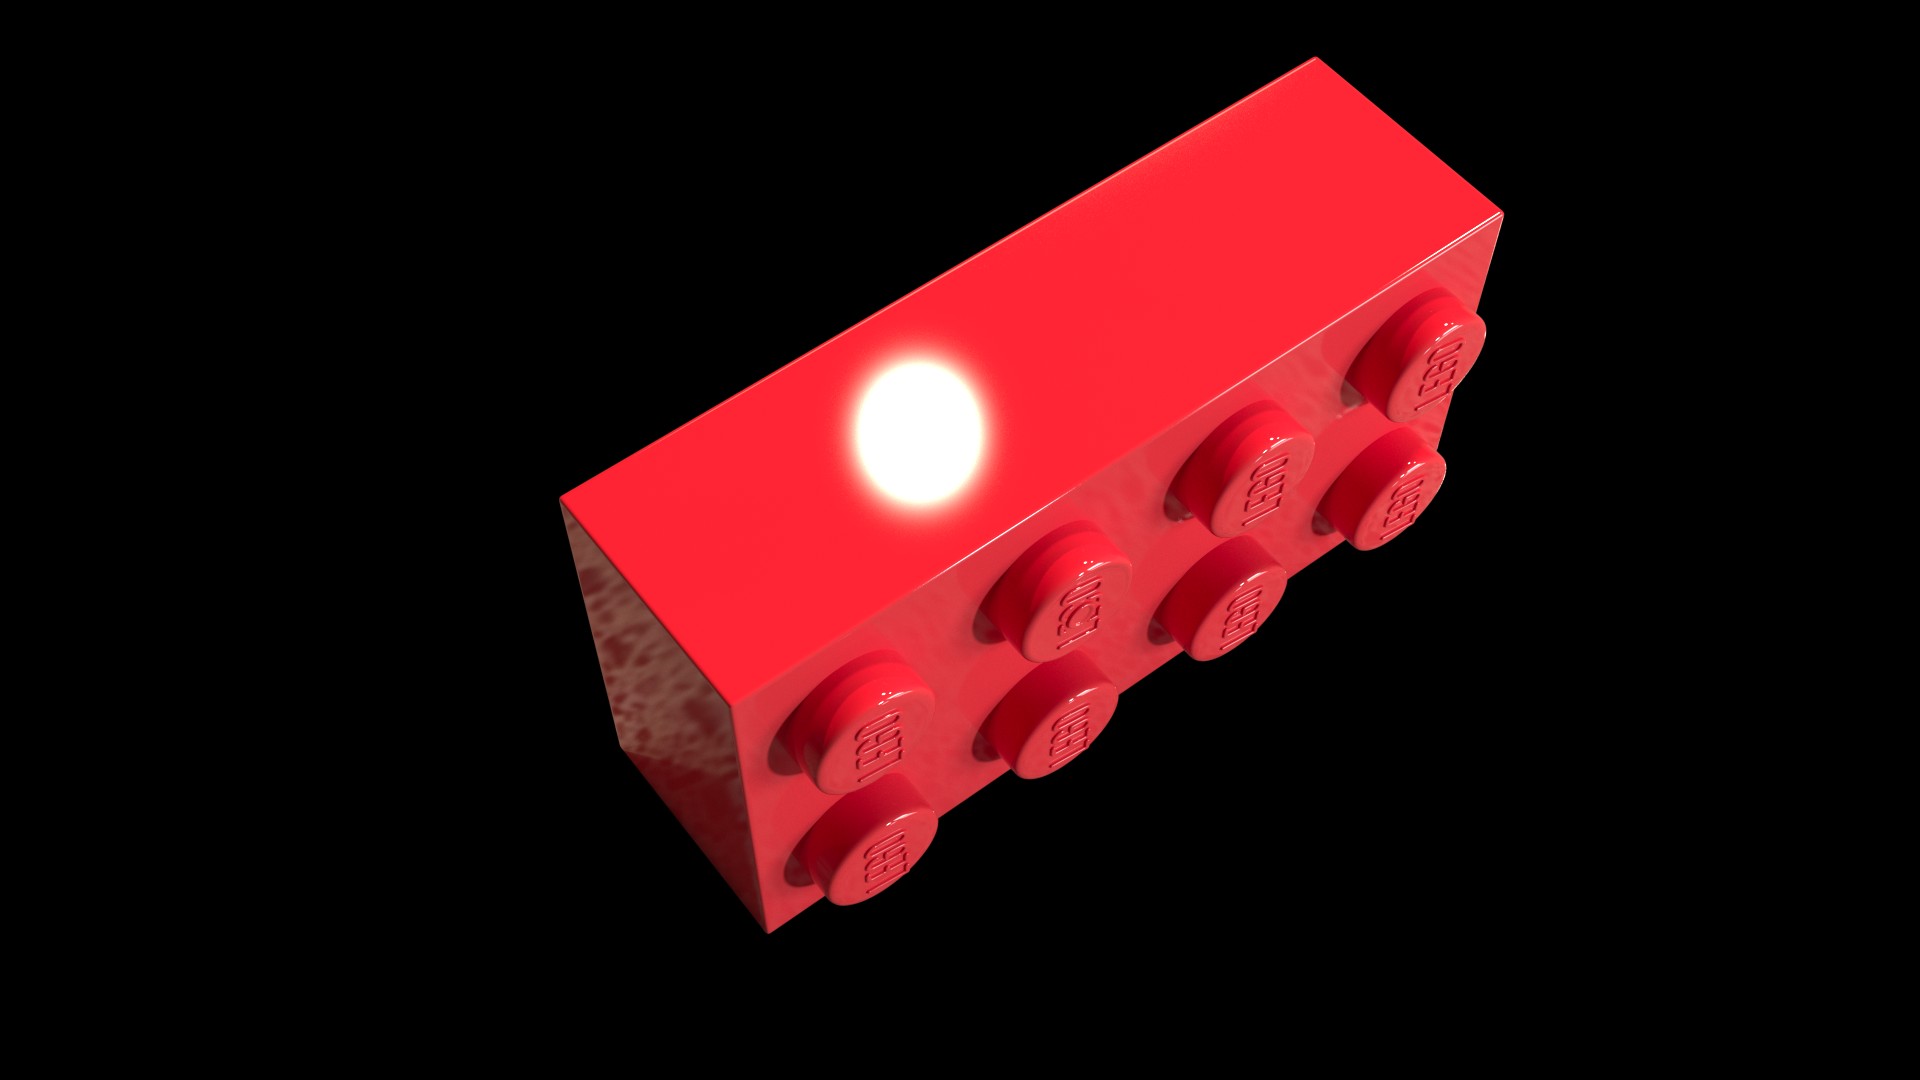
Red Diffuse Brick
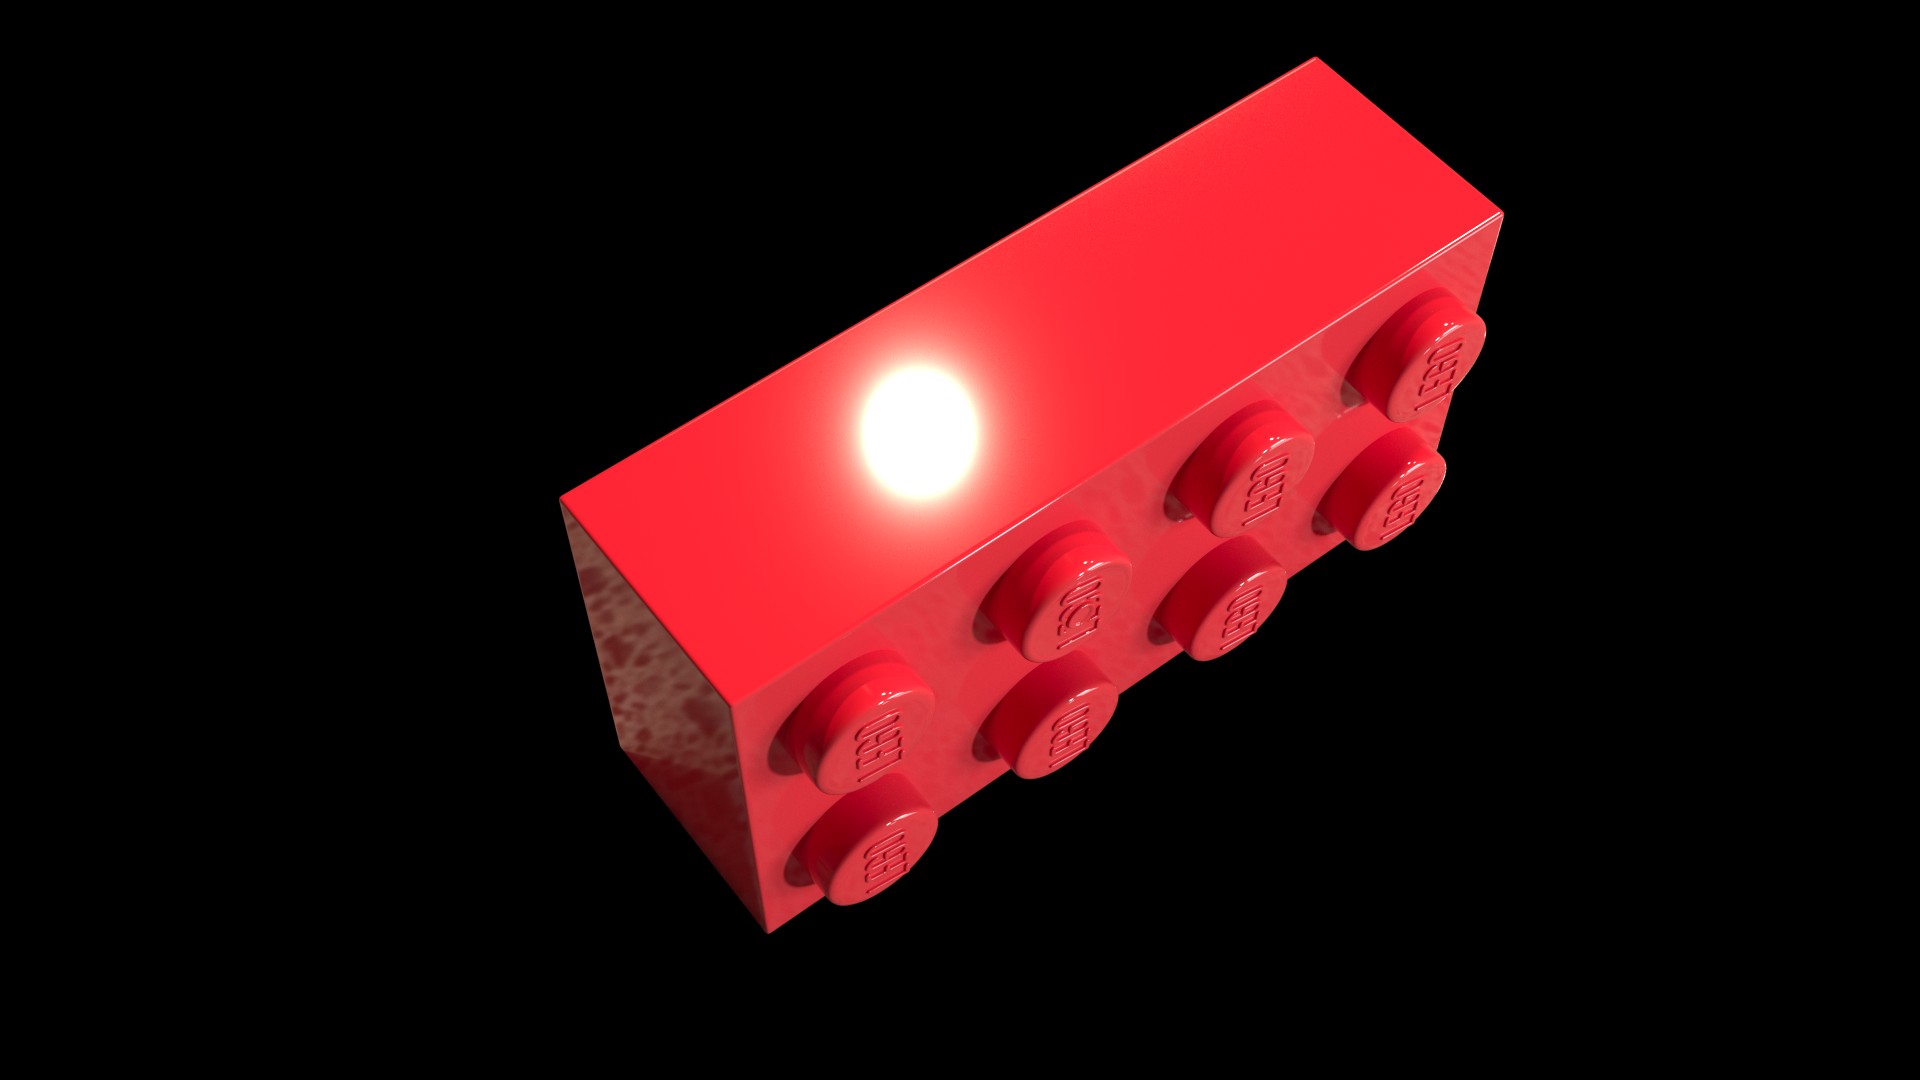
BRDF: GGX vs Beckmann
GGX is known for its hot core with a long tail. It got quite popular in recent years – especially for metals. While being more expensive to calculate, the added fidelity is easily worth it. Looking at our photo reference, the hot specular highlight with its long falloff is quite apparent.
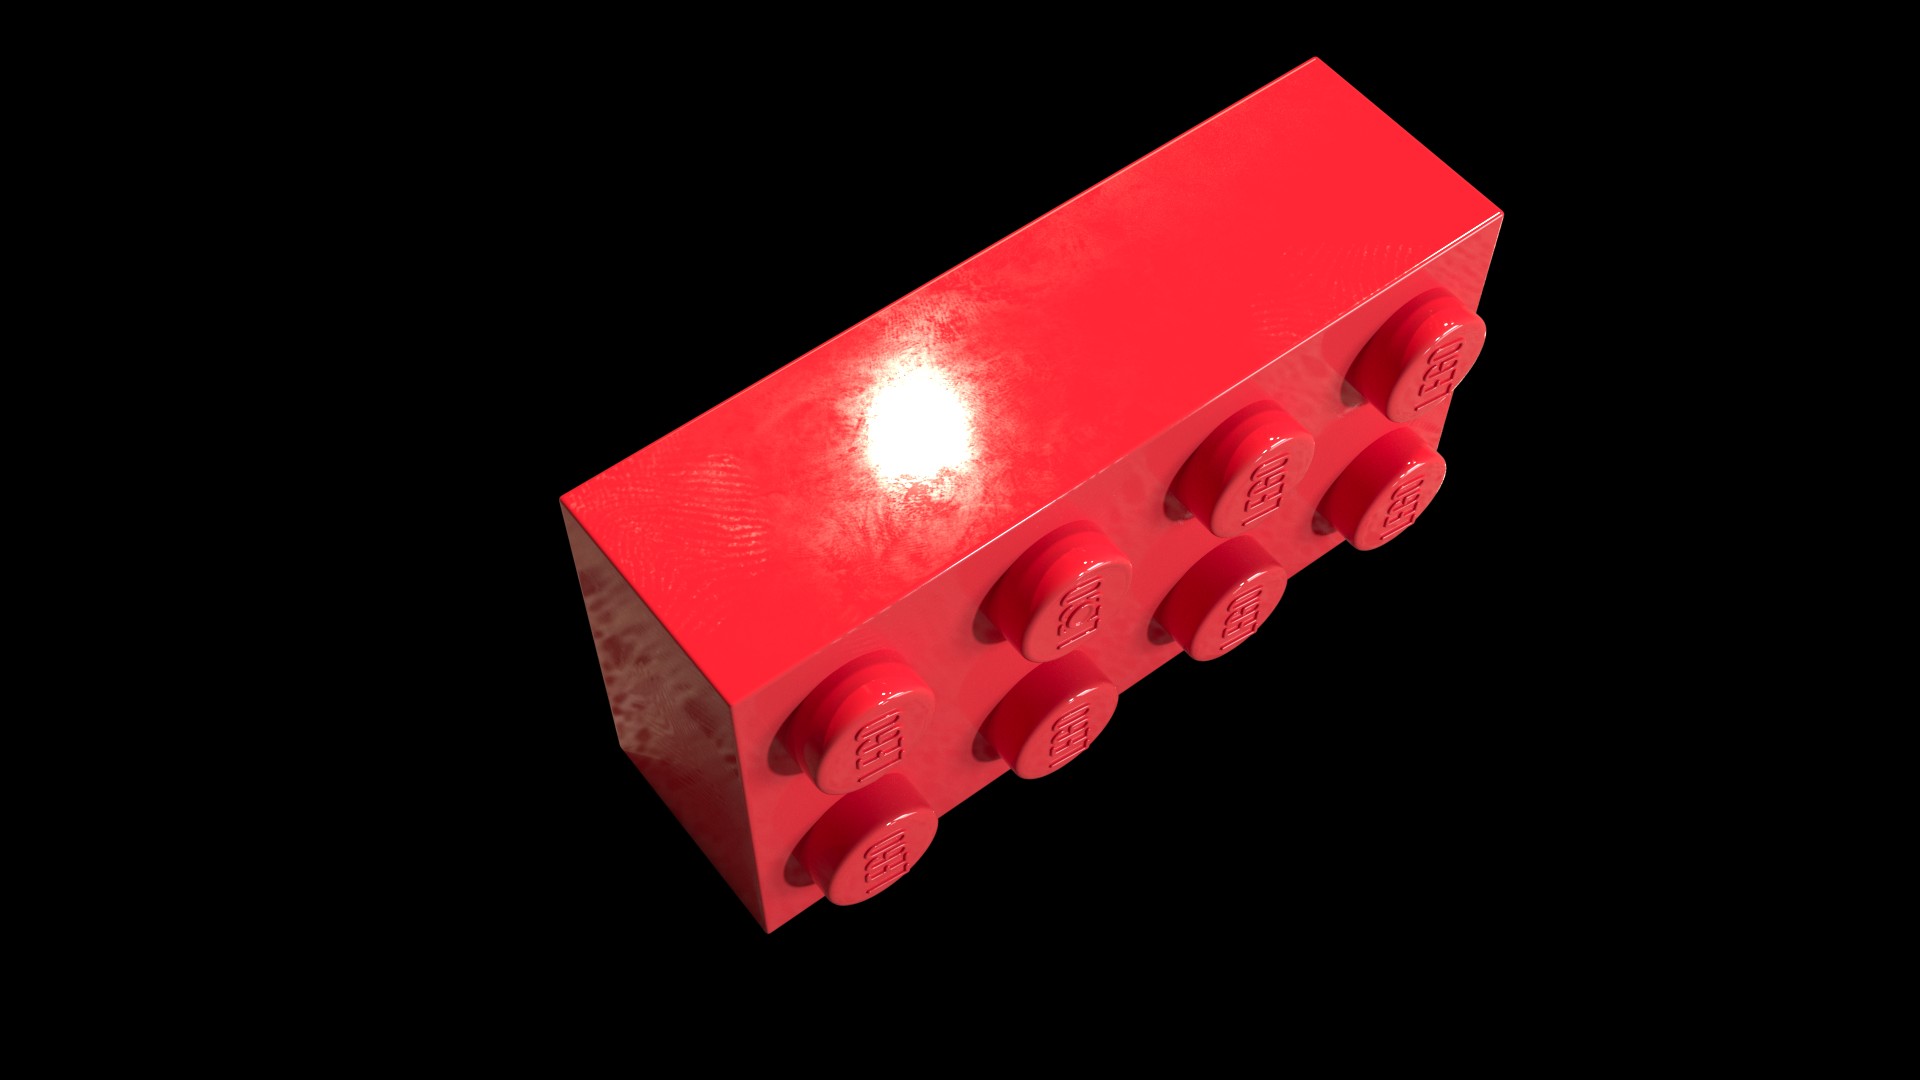
Smudge and Fingerprints as Roughness Map
This has been covered in part 2. The tricky part here is to grade the roughness map, so it has an overall very low value but has still enough contrast to create variety.
🔗 smudge texture – corneliusdammrich
🔗 fingerprint textures – https://texture.ninja/
Grease
Even though we use GGX, it feels like there is an additional veeery broad long falloff. The side facing the light is considerably brighter/paler than the stud side. An additional very subtle coating/reflection layer can help to simulate this kind of grease.


🔗 grease texture – https://cc0textures.com
Subsurface Scattering Revisited
In part 2, I stated sss would be ‘nice to have’. Let me rephrase this to: ‘SSS is absolutely essential’. Looking at the edges of the brick, we can see the red-yellow color shift quite easily. When comparing the two renderings with and without it, it almost looks like a model change because the edges got so soft. A good quality check is to expose up the reference and the rendering to see if the color shift matches. The sss brings us a big step closer to our photograph.


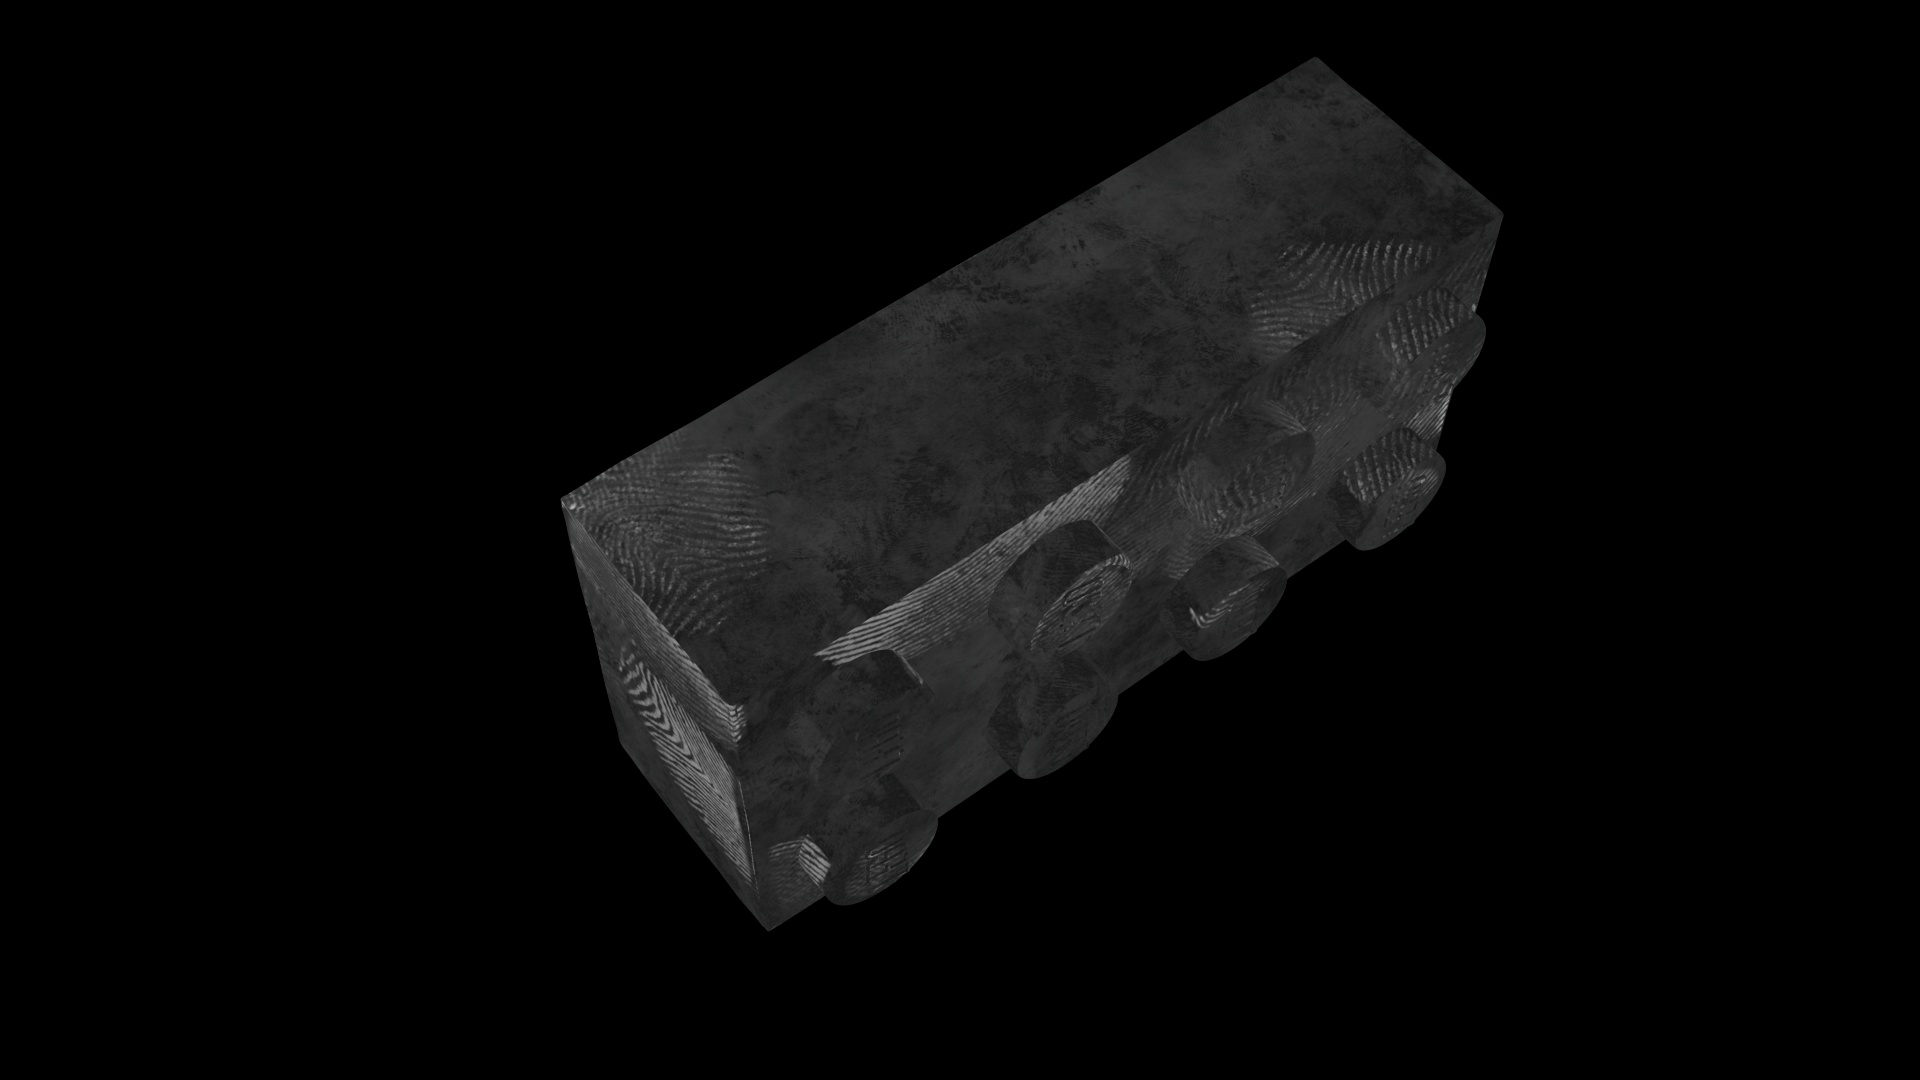
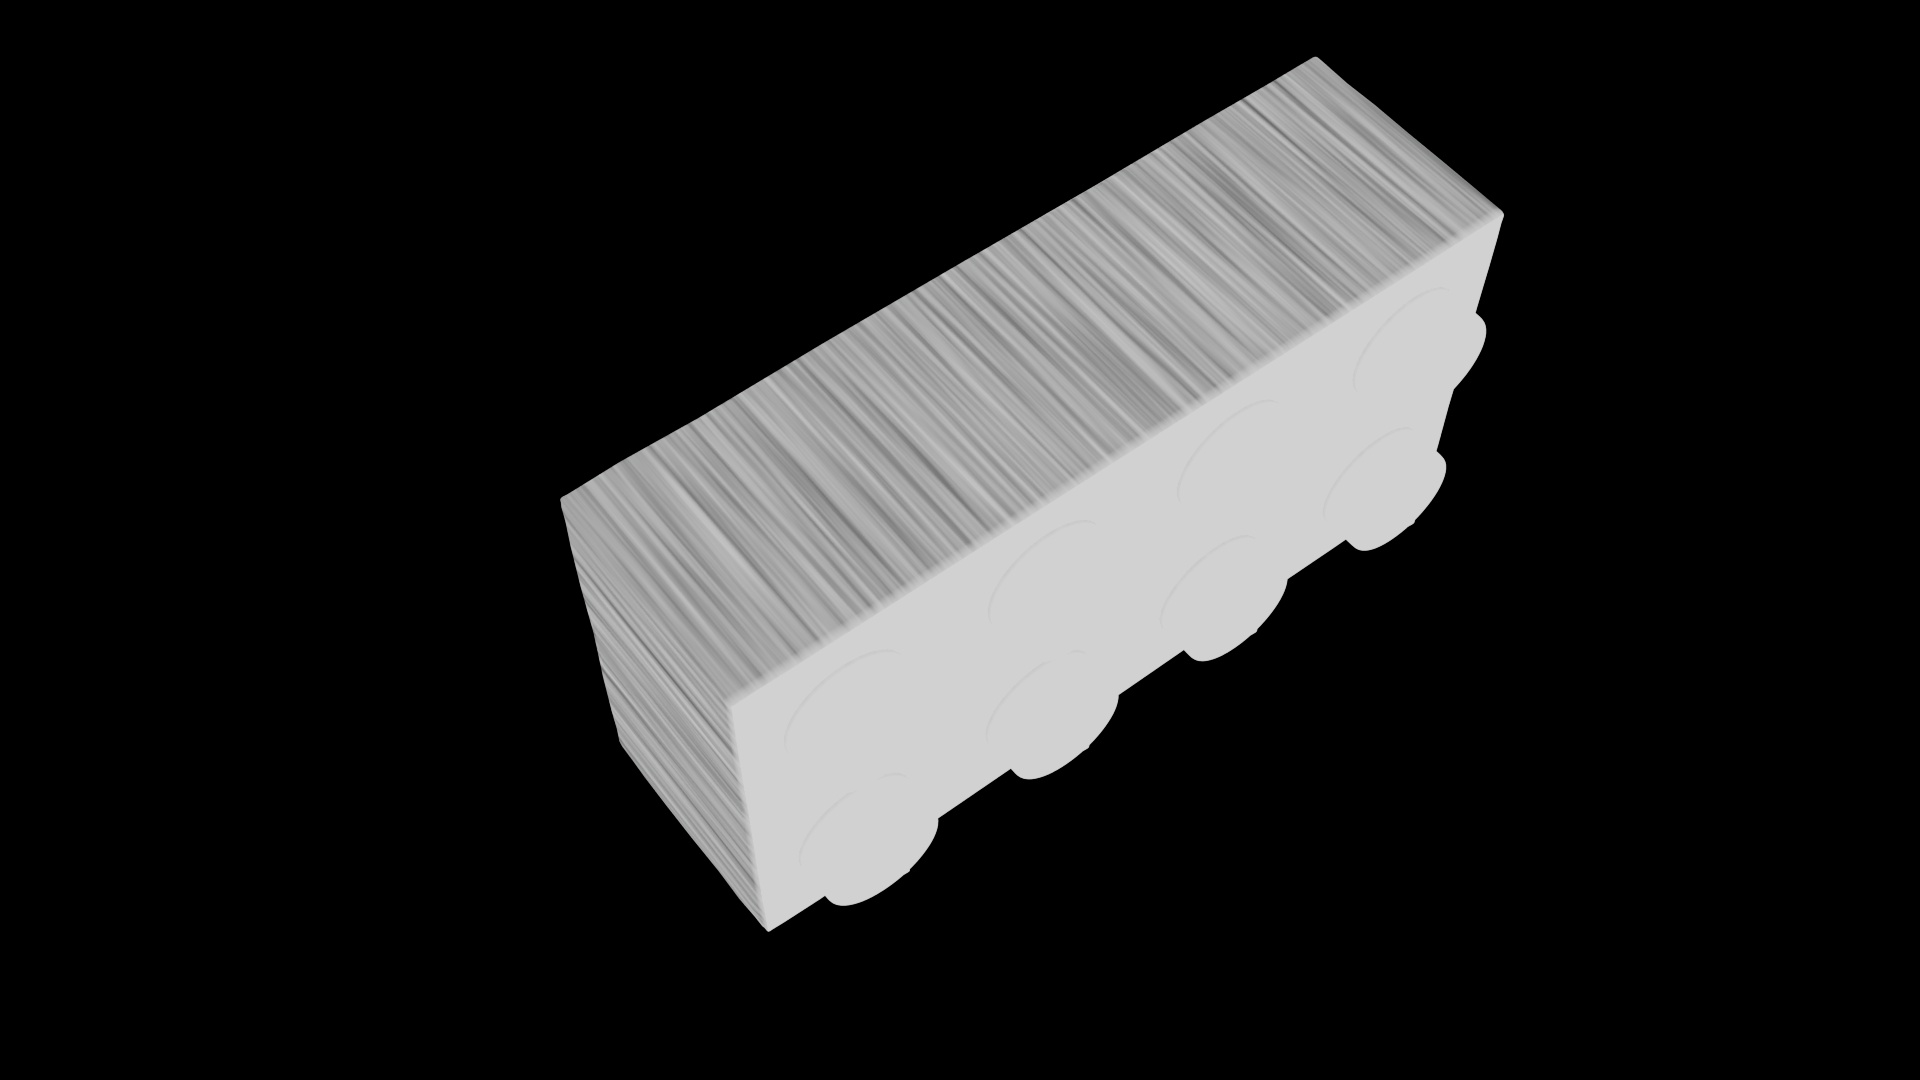
Displacement vs Bump
I think we all agree that displacements are always better than bump/normal maps in terms of realism. I didn’t really bother with displacement maps yet, because I thought LEGO bricks would be too tiny and it wouldn’t make any real difference. While this might be true for a complete set, looking at our pirate from part 2 again, it becomes clear that, no matter how many bump maps we throw at it, the geometry, especially the silhouette will always look perfect. And yes, LEGO is extremely precise and that’s one of the reasons we love it so much, but it’s not mathematically perfect. The edge wear is the most obvious candidate that would benefit from being displaced since it’s modifying the edge and therefore becomes visible in the silhouette.


Unevenness

Micronoise


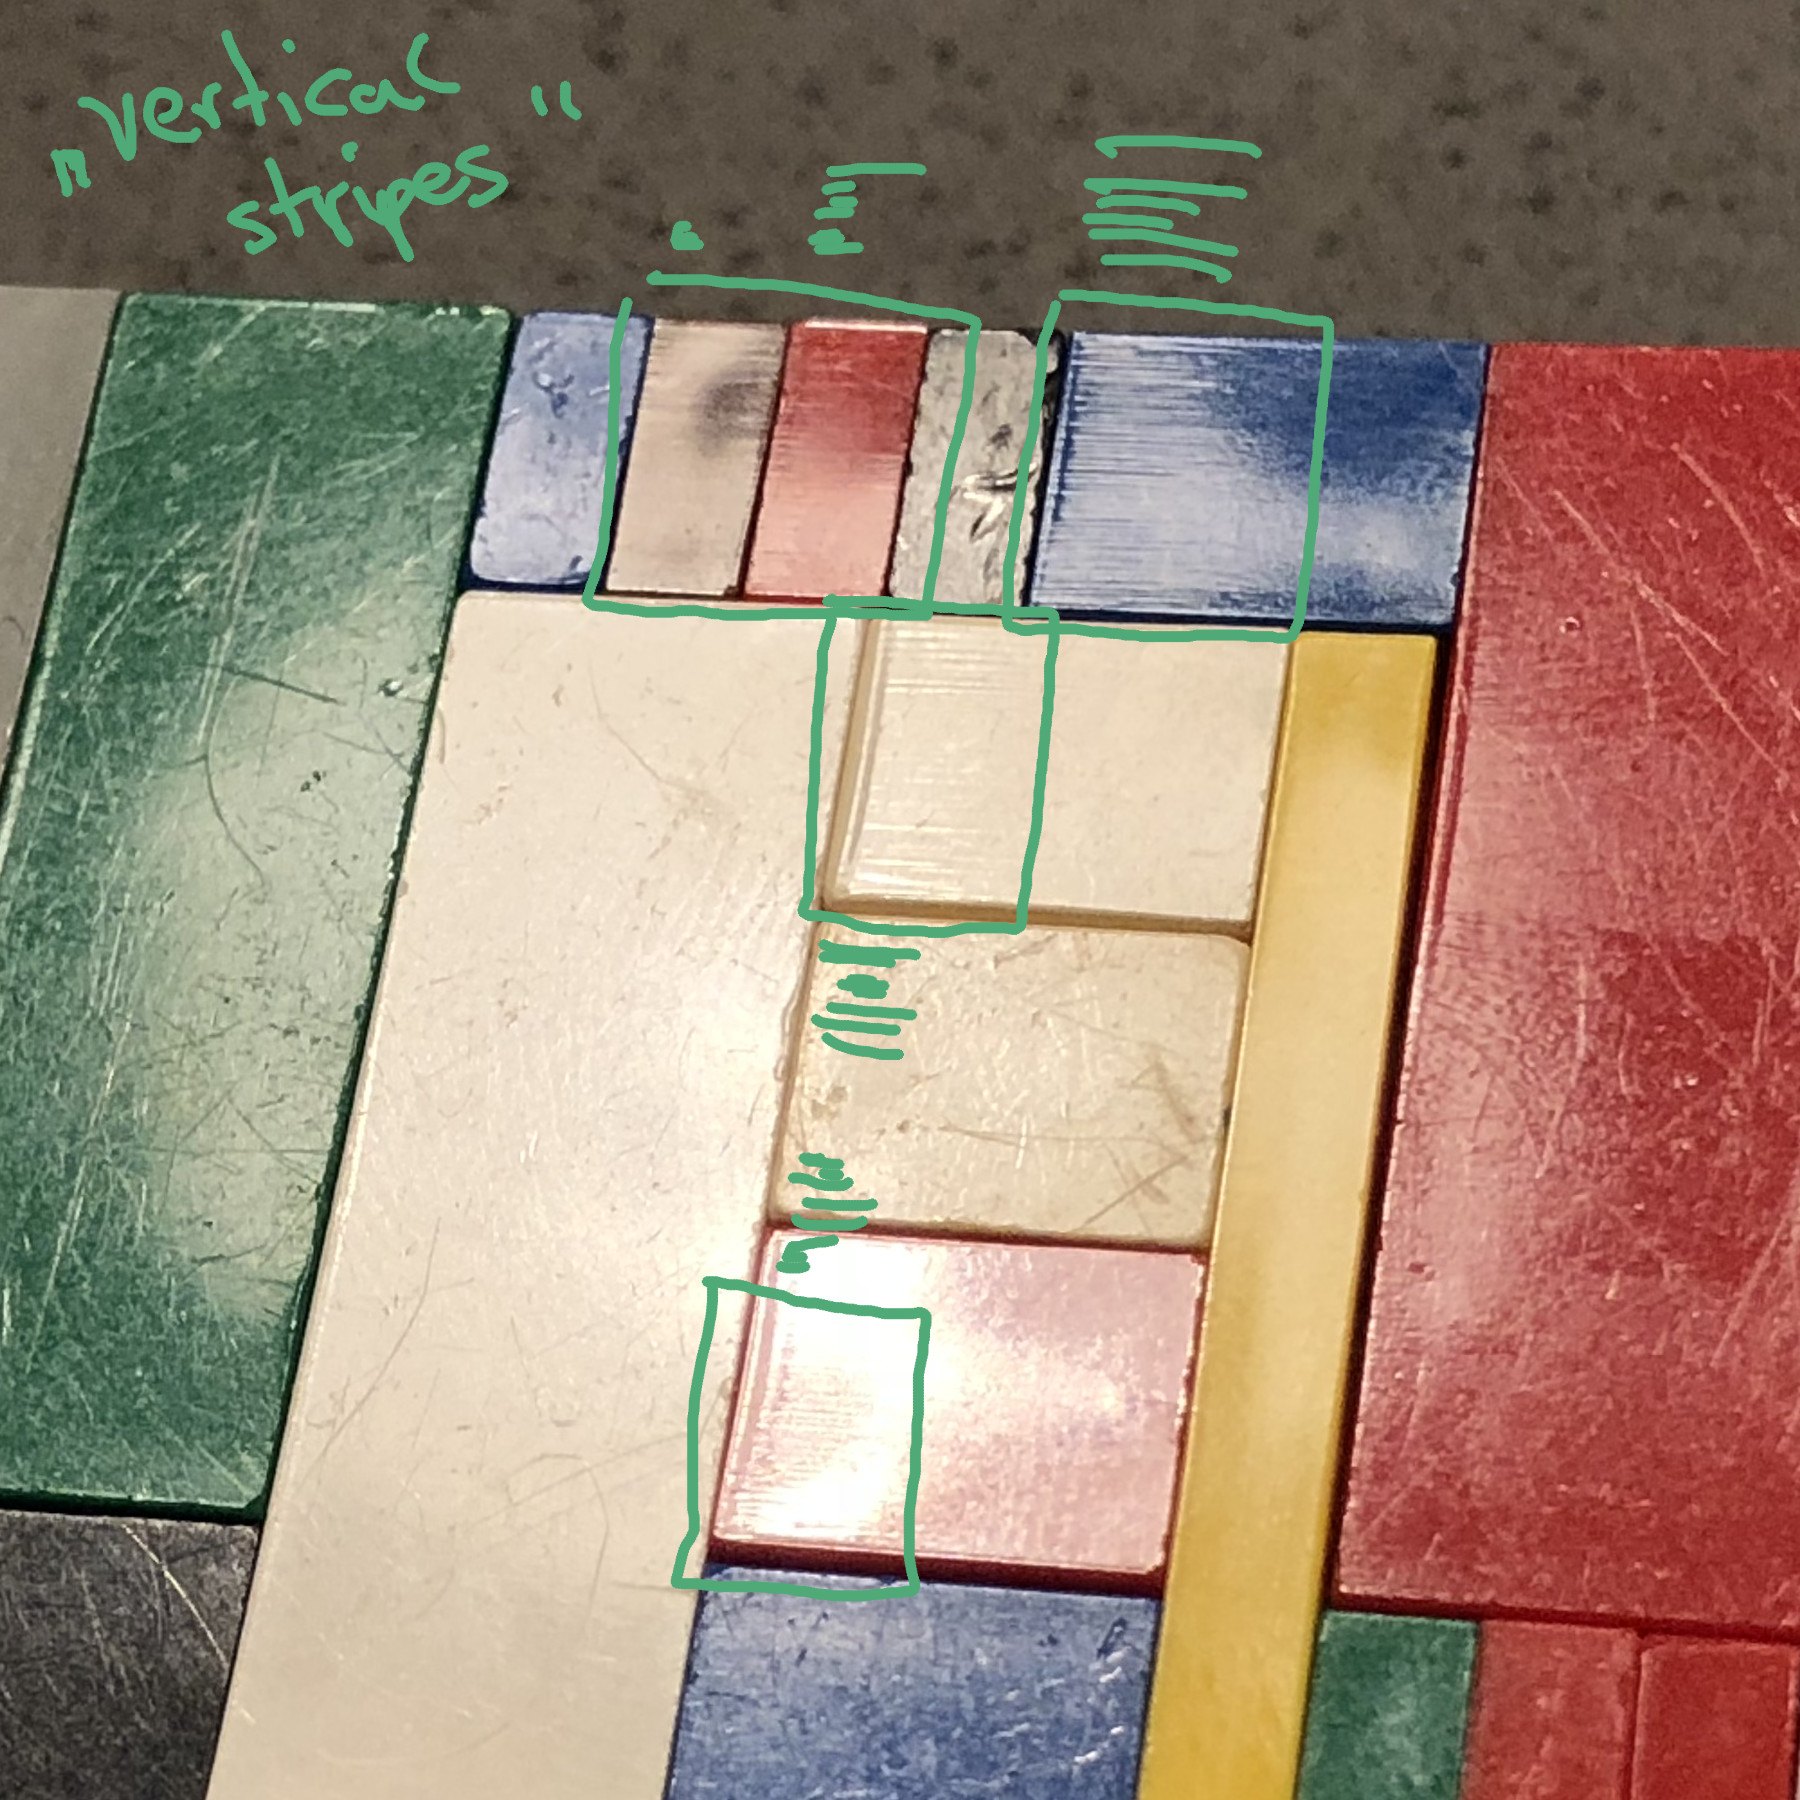
Vertical Stripes
I’m running out of names for all those bump maps, so I decided to call this phenomenon ‘vertical stripes’ Any better suggestions? I was able to take some pictures showing this effect quite drastically. Not exactly sure why certain bricks have it, but with a heavily stretched noise texture this one is easy to mimic.

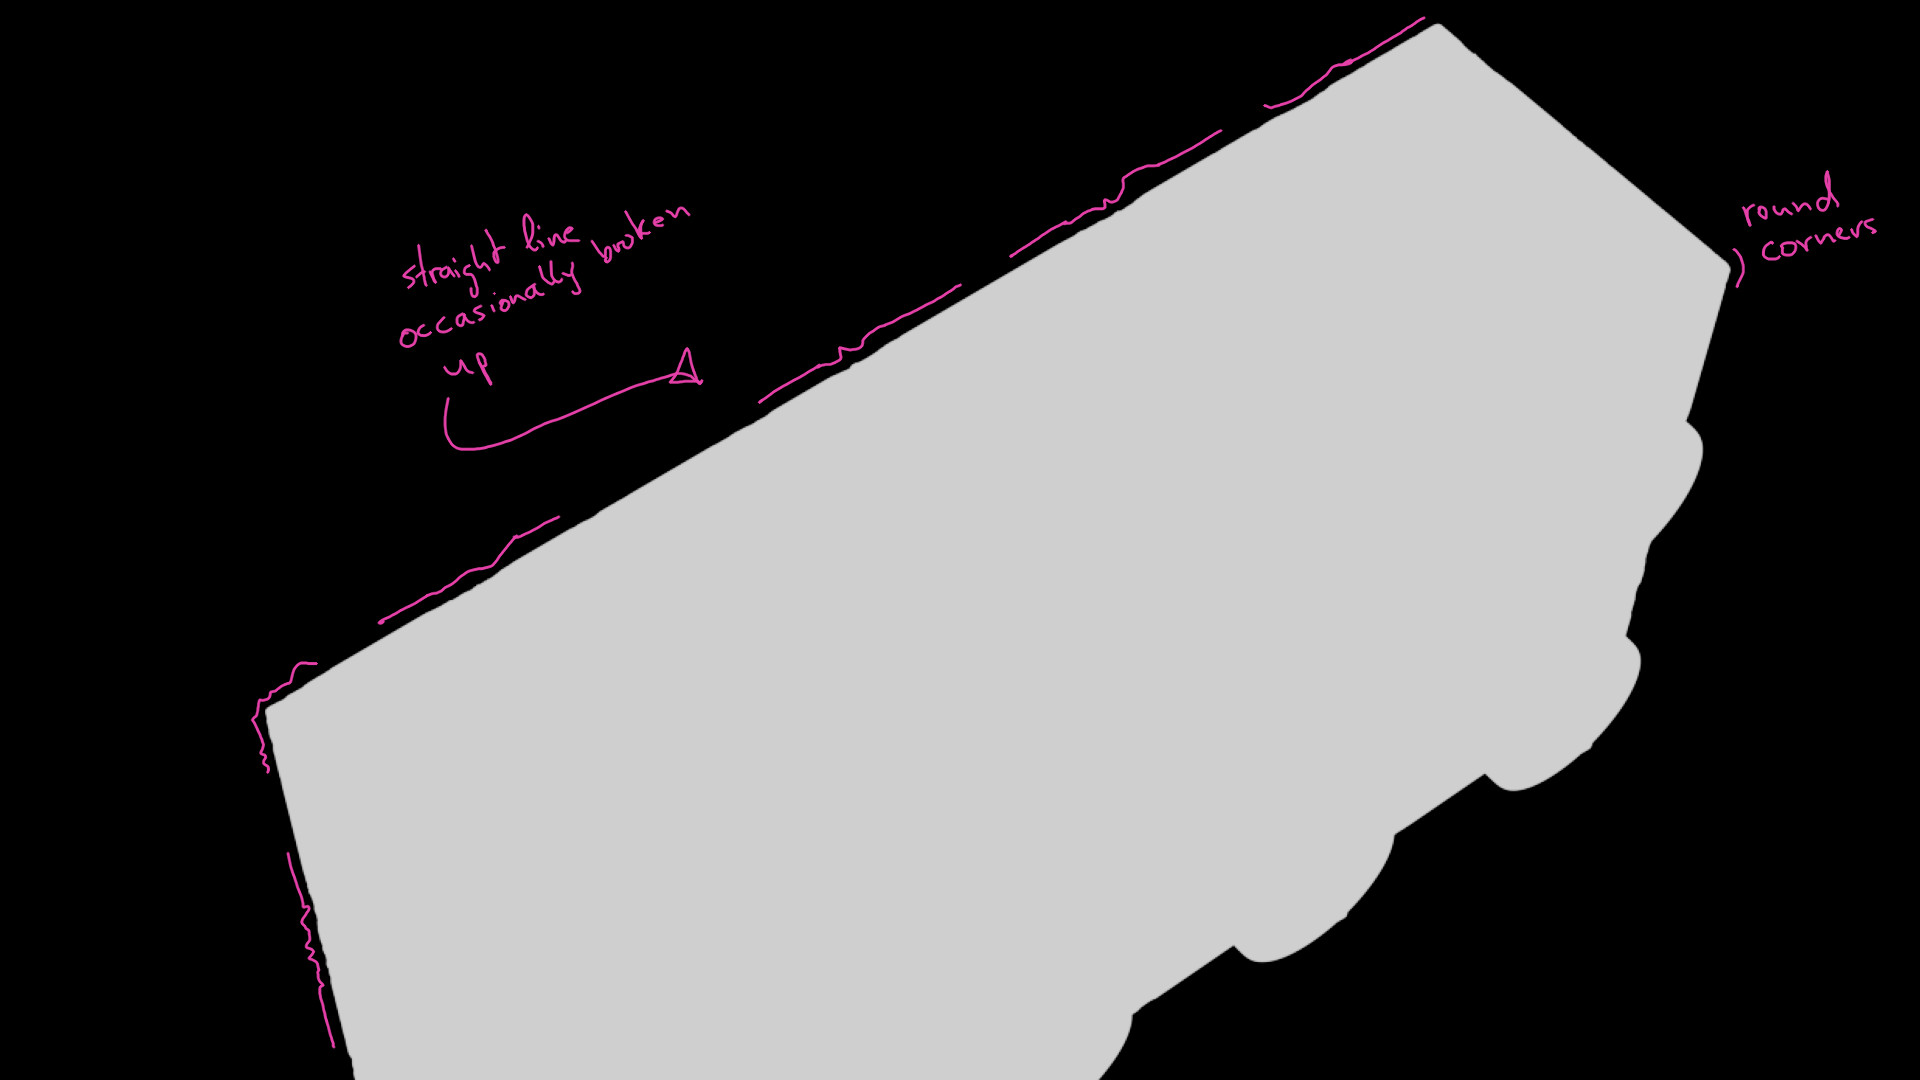
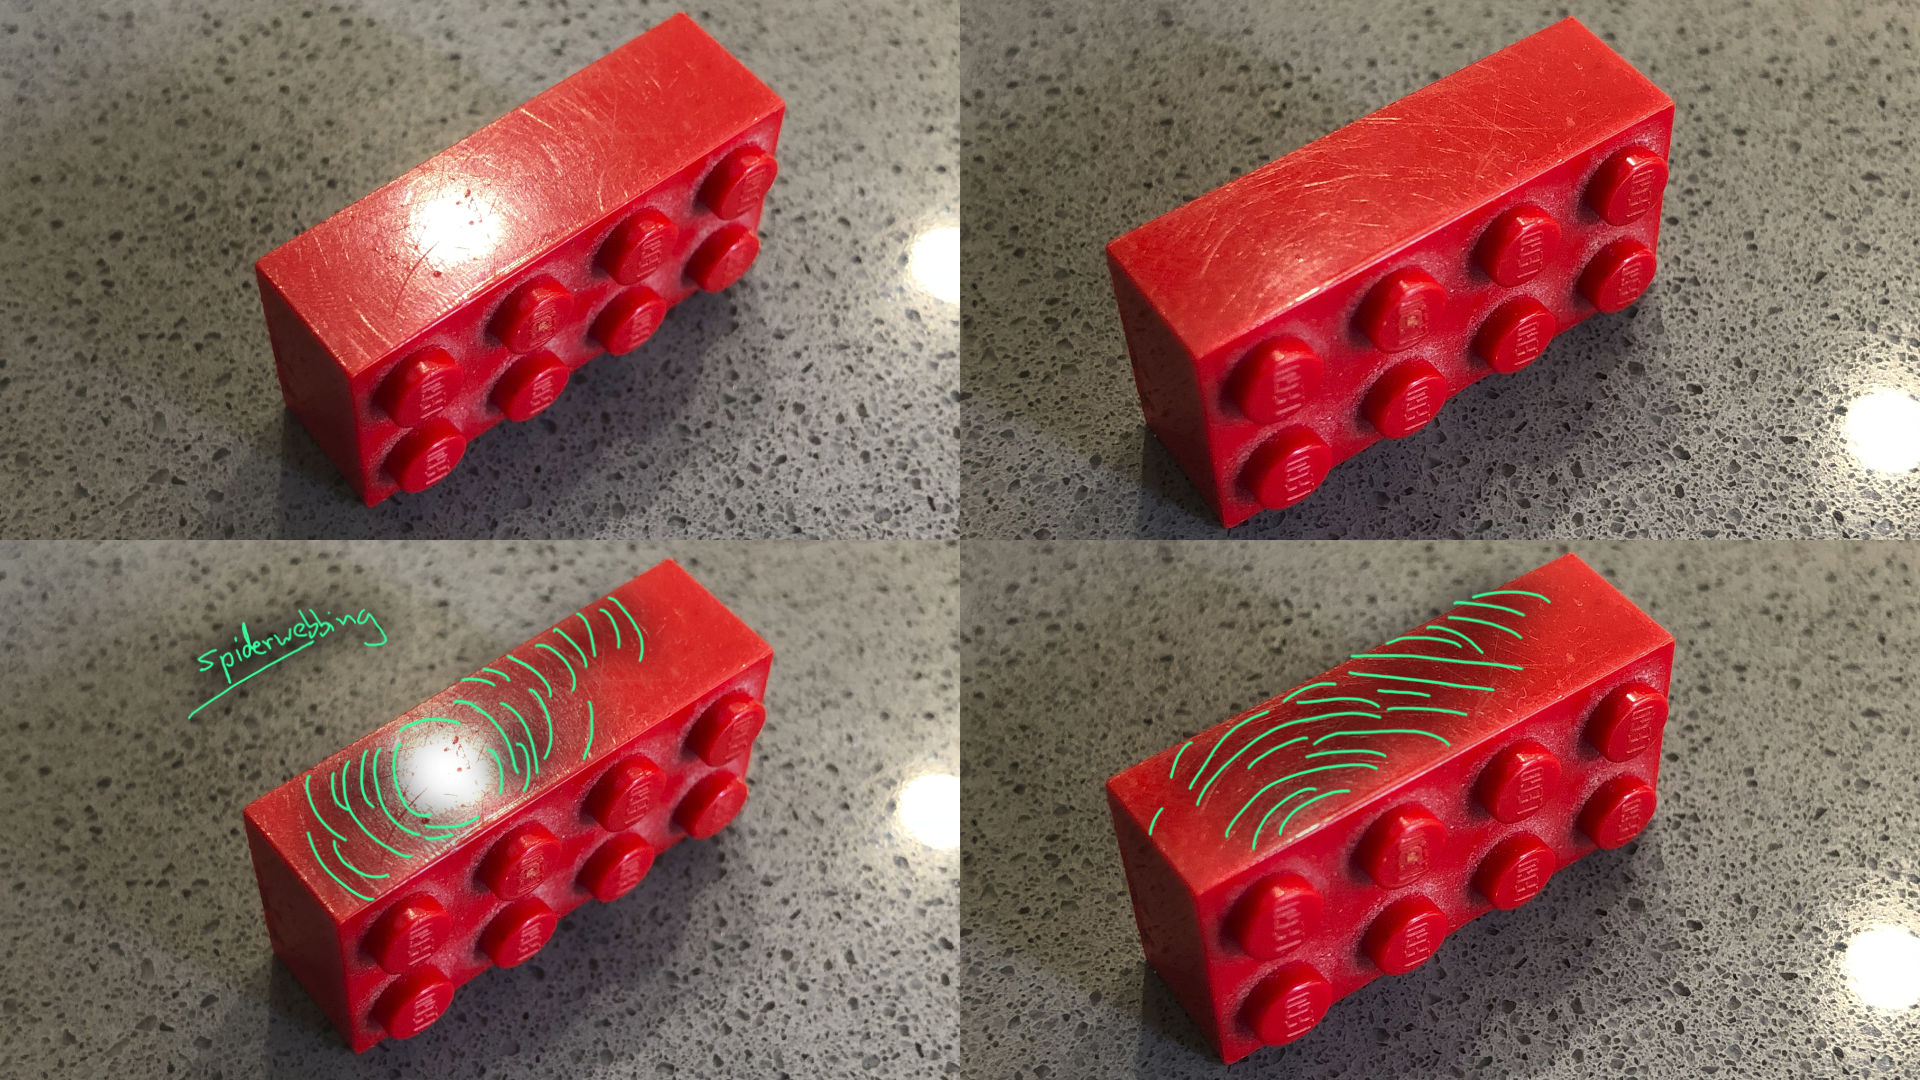
Microscratches/Spiderwebbing
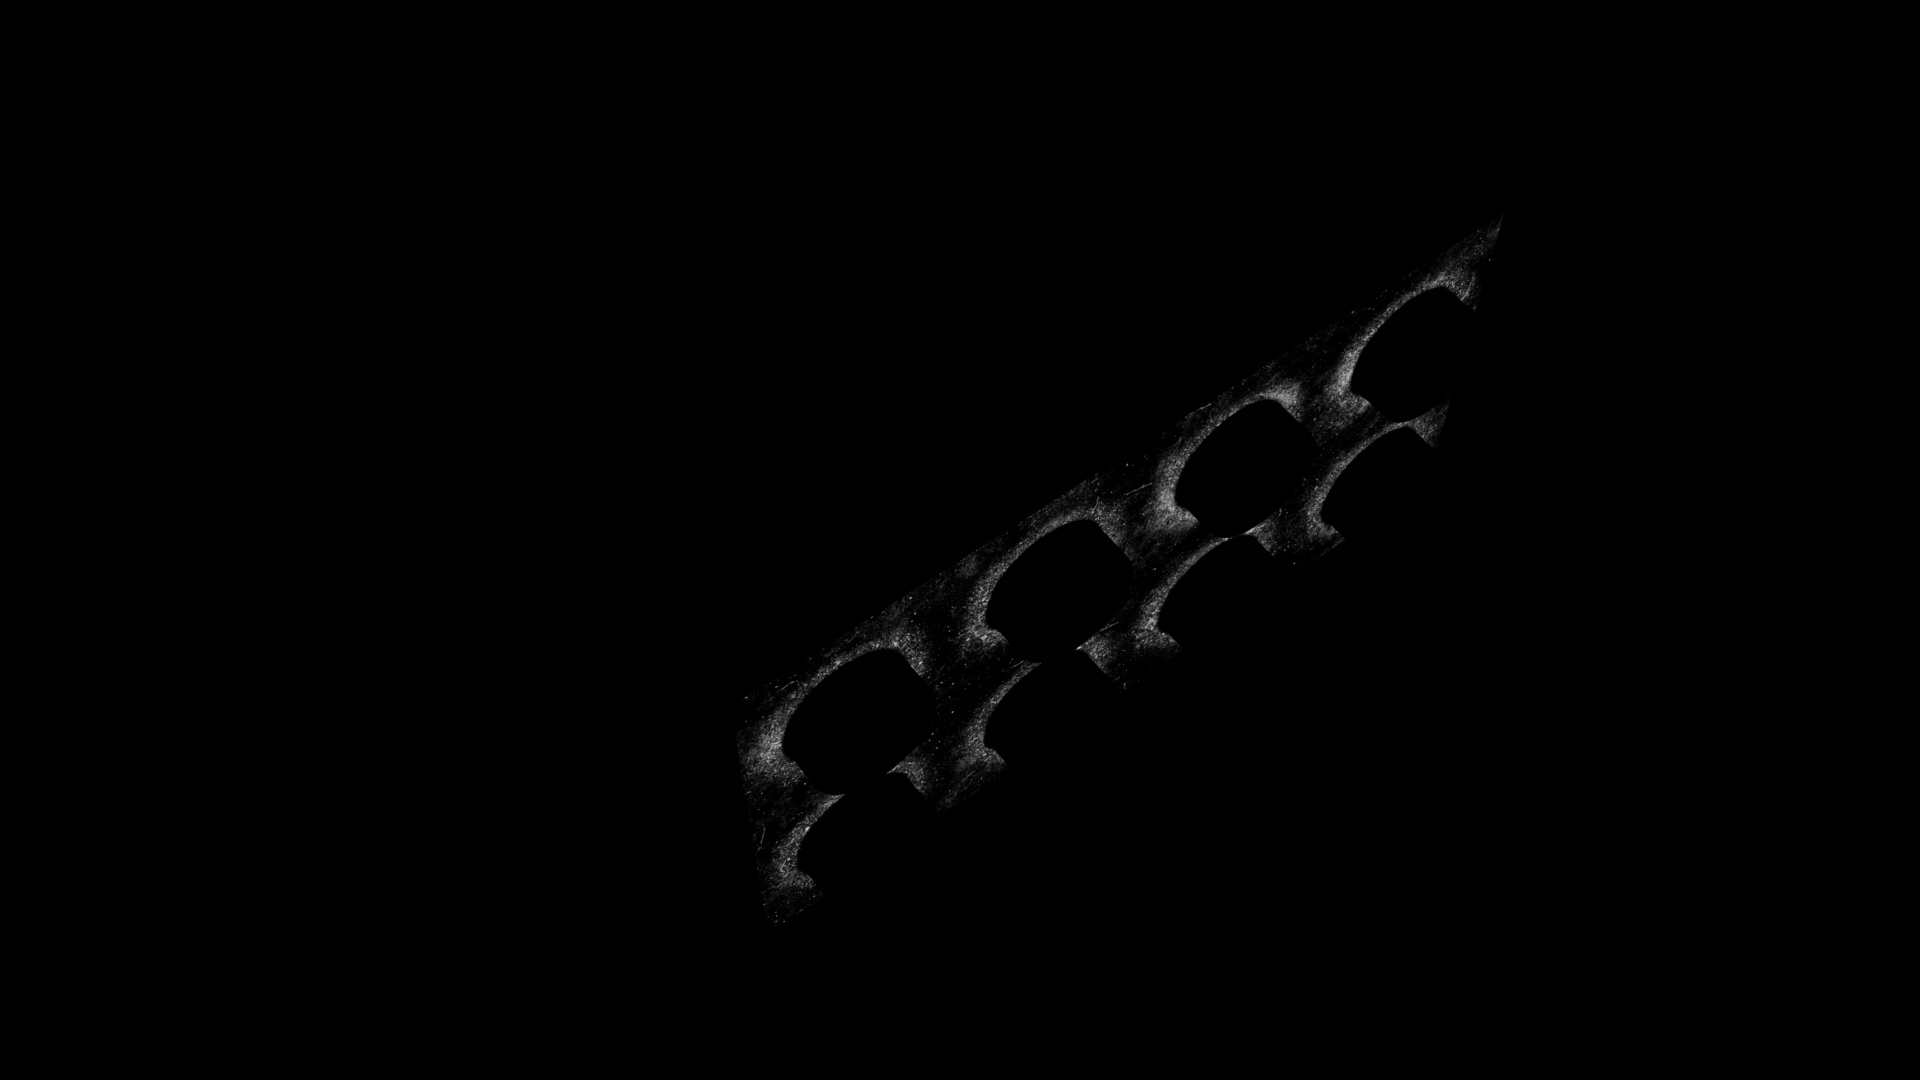
This is something probably everyone has already seen a million times, but for some reason, I never really bothered with it. However, the more I am inspecting it, the more I love this phenomenon. While scratches on a surface are usually completely random, it looks like they would have a radial flow around hot highlights. That’s because those scratches are in fact tiny cuts into the surface and thus the outer walls inside those cuts catch the most light, creating this illusion. This is especially apparent on metals, but also on our favorite plastic toy.
There are 3 main ingredients to make this work.
- A lot of very thin, long random lines packed together on a texture
- No filtering/mipmap whatsoever for the texture (high res)
- super low bump strength

Broader/Thicker Scratches


Dents/Scrapes
🔗 dents/scrapes/random wear texture – corneliusdammrich
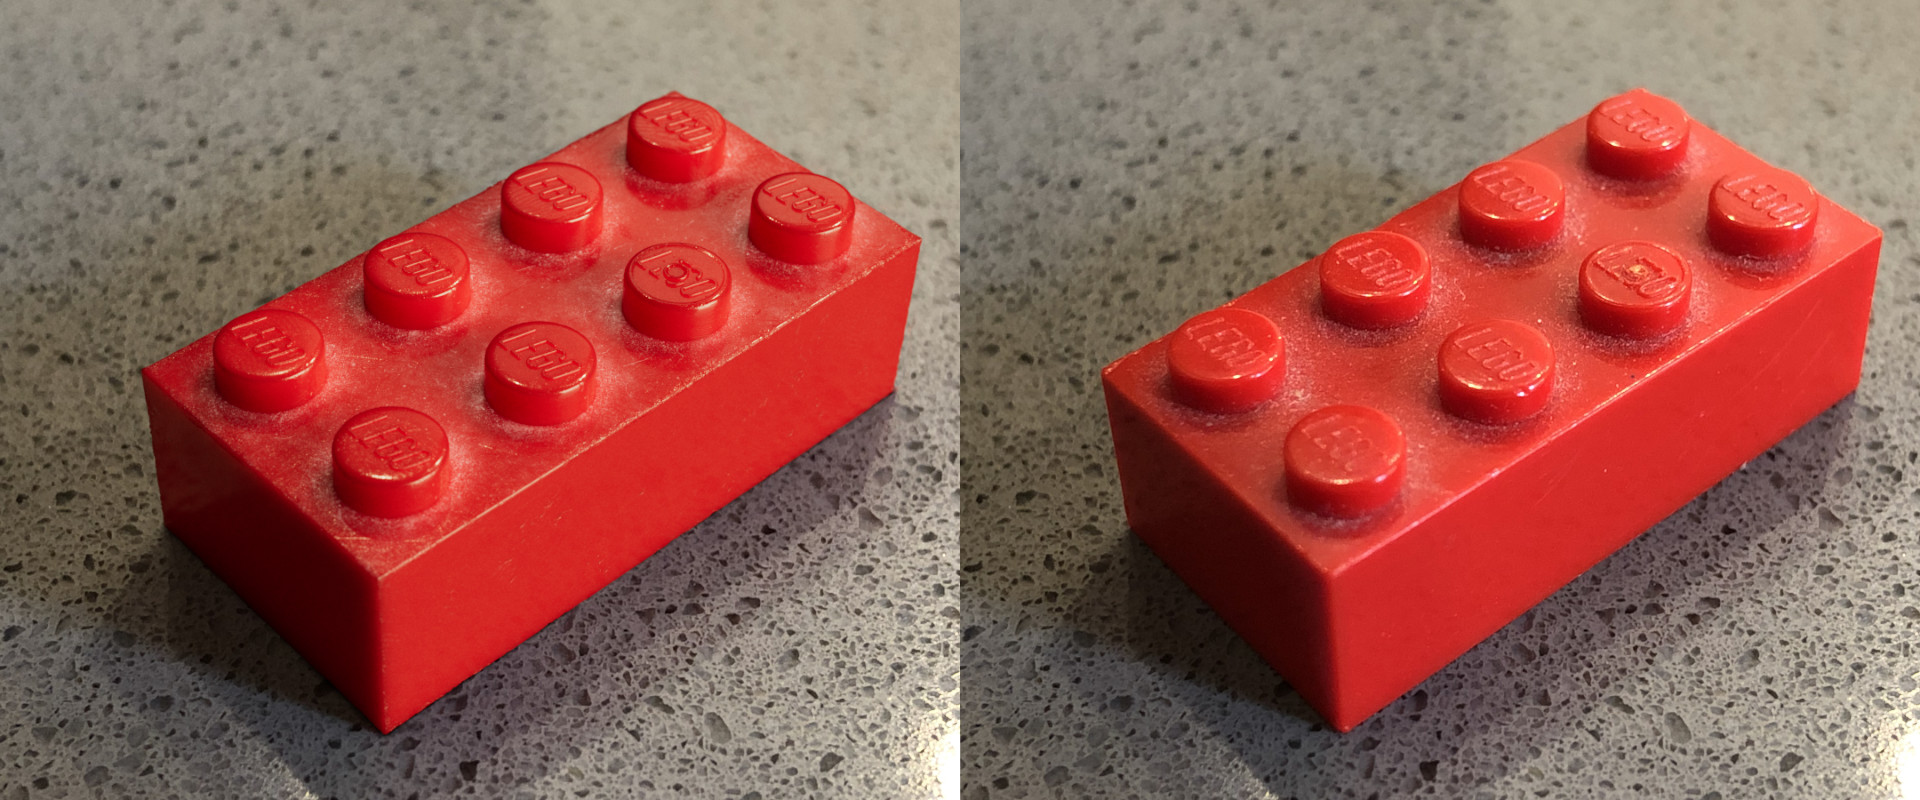
Dust
One thing I ignored until now is dust. It seems this is also something that hasn’t been done for the first LEGO movies either. However, for The LEGO Movie 2, it is an important design element/cue for the story and it greatly supports the scenario. On newer bricks, you can actually see the individual dust particles as they settle onto the bricks over time. The only way to recreate this would be to actually simulate particles/curves on our LEGO geometry and render them. This is something I definitely would love to explore at a later stage.
However, looking at our old brick reference again, the dust looks a bit more “baked in”. This can be achieved with shading/textures, I think. Additional tiny hairs/fuzz can help to break up all those little random dust particles/points.
Dust Layer
There are probably multiple ways of implementing this. I think it would make sense to implement this as a separate layered shader. That way we have full independent control over it. If we mask it with a triplanar projection in the Y-axis, we can make sure that the dust only settles on the normales facing upwards. For larger scale sets, we could also mix in an AO as a supporting mask.
🔗 dust textures – https://blog.spoongraphics.co.uk
That One Special Stud
Another little detail is the little circle on top of one stud. Every brick has one of those. I guess this is where the liquid plastic gets injected into the mold? This is something I modeled in.
Conclusion
That’s it for part 3! This post was – again – far longer in the making than I intended it to be. I think the main takeaway here is, that it’s important to get the fundamentals right. I was trying to render big LEGO sets and I just wasn’t completely satisfied. I realized, that I still didn’t know enough about plastic shading to pull off a believable rendering. So I decided to go back to square one and try to nail a single brick to really understand what is going on.
There are still a lot of things I haven’t looked into too much, like slopes, transparent bricks, rubber for tires and cloth for sails/flags. Well, I guess, lots of opportunities for more blog posts to follow smile
Leave a Reply to Steven W. Howard Cancel reply